‣
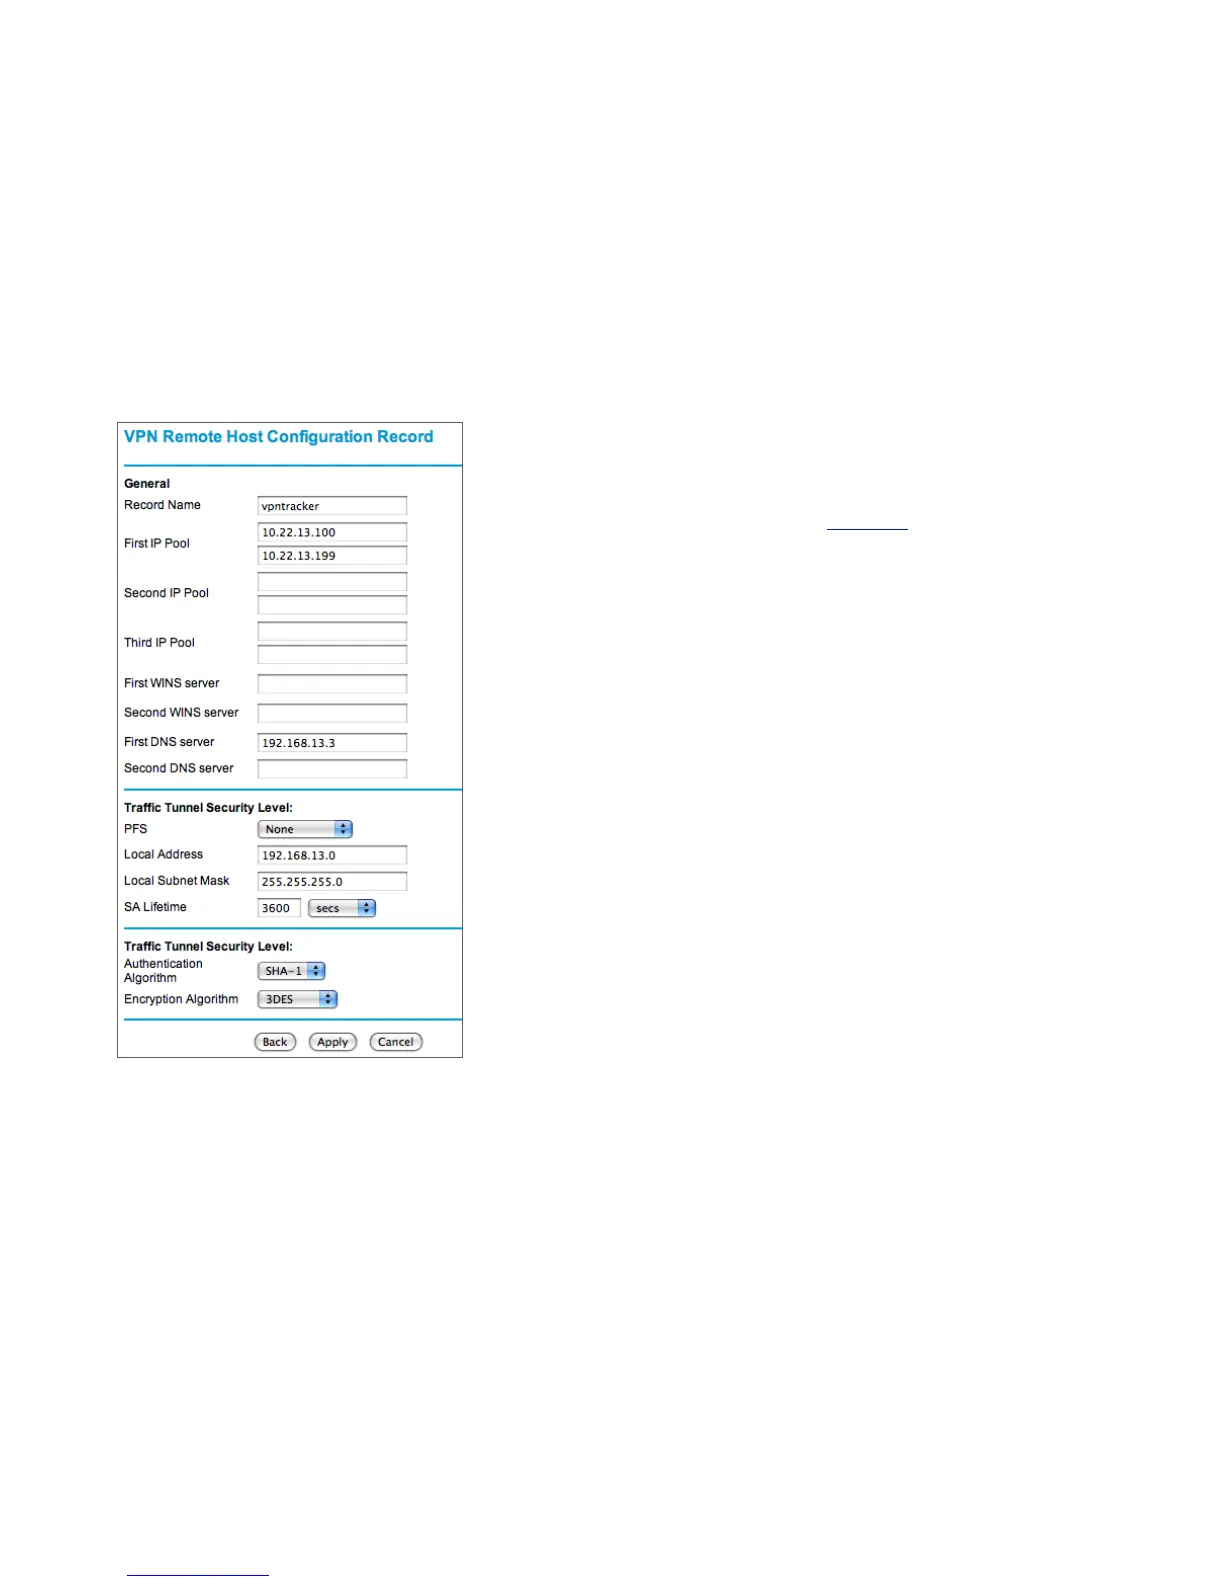
Record Name: Enter a name that will later allow you to recognize this
entry
‣
First IP Pool: Enter an IP range that is not part of your NETGEAR’s LAN.
The range must be from the private (RFC1918) IP address space, and it
should be large enough to accommodate at least the maximum number of
simultaneous VPN connections expected
‣
Second/Third IP Pool (optional): It is possible to add more pools, if
required
‣
First/Second WINS server (optional): The WINS servers are not used by
VPN Tracker and therefore can remain empty
‣
First/Second DNS Server (optional): If you operate your own DNS server,
enter it here. Otherwise, these fields should remain empty
‣
Traffic Tunnel Security Level: These settings correspond to the VPN
Policy settings of the same name. The screenshot shows the default
settings used by a normal (non Mode Config) VPN policy. Since these
match the settings pre-configured in VPN Tracker, it is a good idea to use
them for now. You will need to customize the following settings according
to your specific configuration (refer to “ Step 2 –"Retrieve your
NETGEAR’s LAN and WAN Configuration” for the specific values that you
will have to enter):
‣
Local Address: Enter the LAN Network Address ➐ calculated earlier,
‣
Local Subnet Mask: Enter the LAN subnet mask ➍ of your NETGEAR
‣
Click “Apply” to add the new address pool