Advanced Settings
98
R6250 Smart WiFi Router
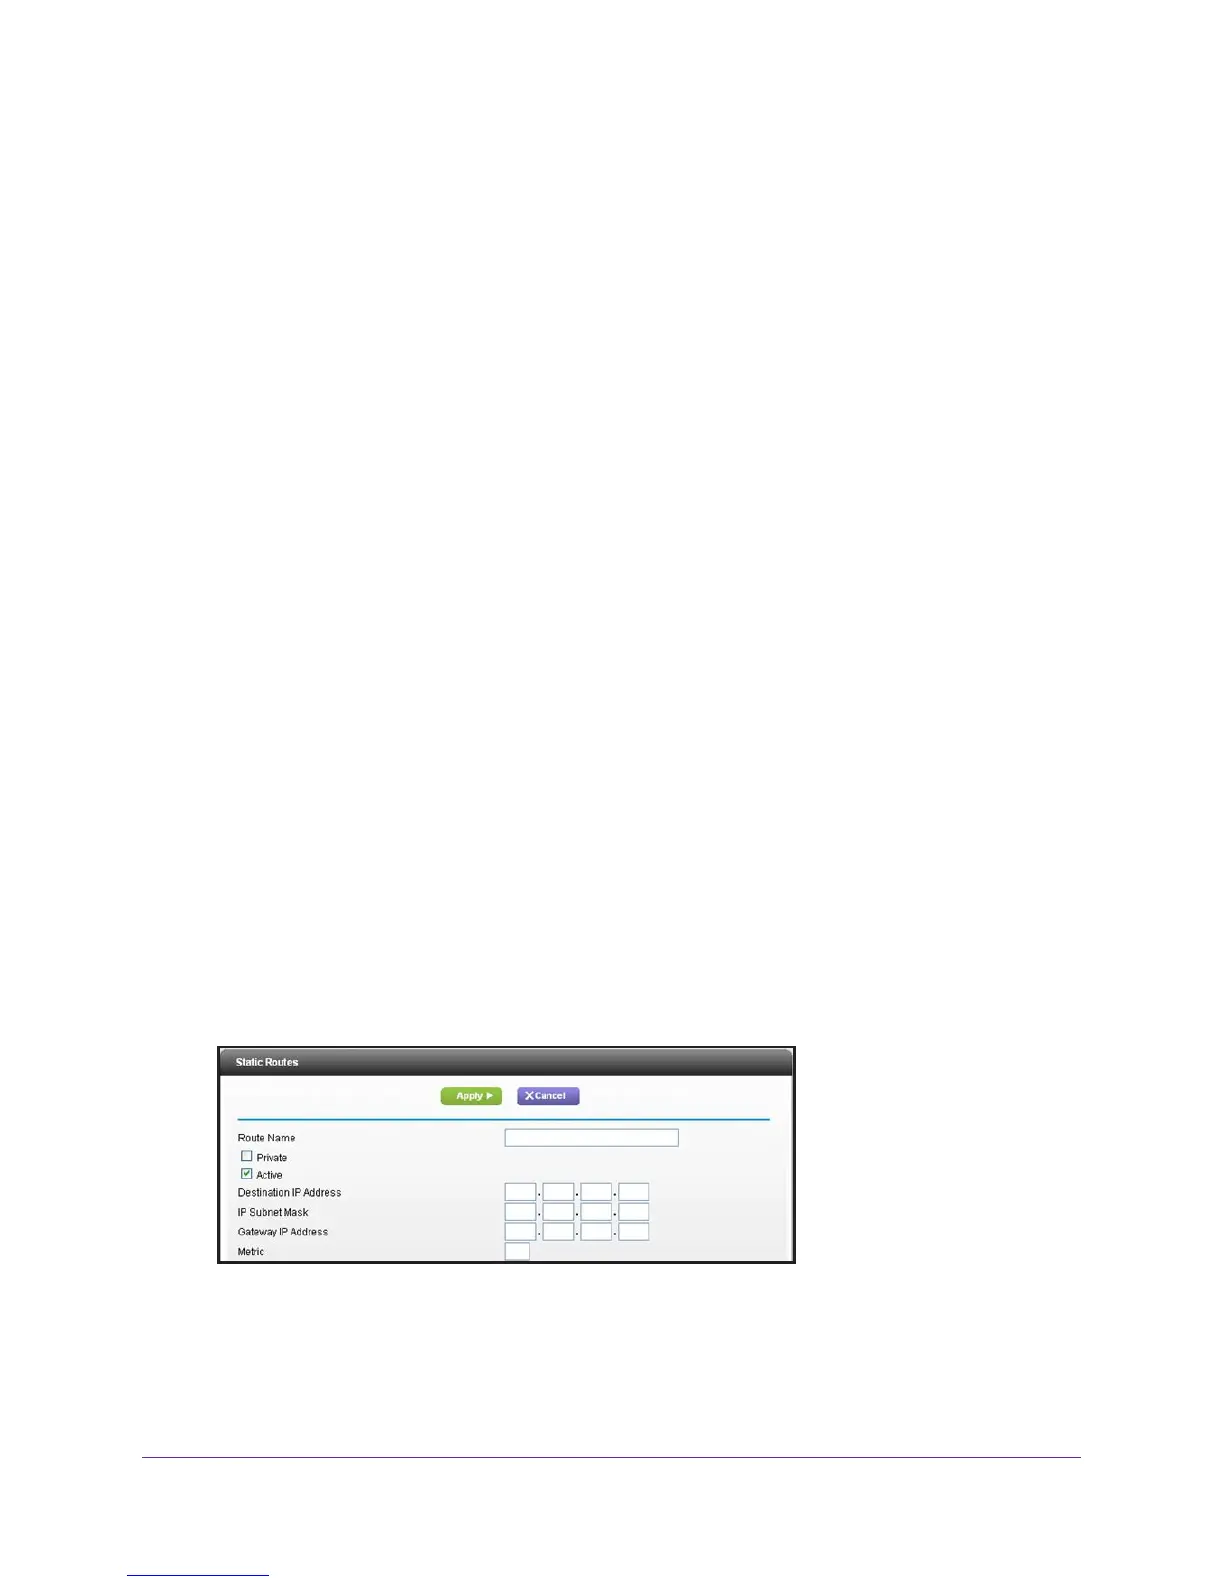
Static Routes
Static routes provide more routing information to your router. Typically, you do not need to
add static routes. You have to configure static routes only for unusual cases such as multiple
routers or multiple IP subnets on your network.
As an example of when a static route is needed, consider the following case:
• Your primary Internet access is through a cable modem to an ISP.
• Y
ou have an ISDN router on your home network for connecting to the company where
you are employed. This router’s address on your LAN is 192.168.1.100.
• Y
our company’s network address is 134.177.0.0.
When you first configured your router, two implicit static routes were created. A default route
was created with your ISP as the gateway
, and a second static route was created to your
local network for all 192.168.1.x addresses. With this configuration, if you attempt to access a
device on the 134.177.0.0 network, your router forwards your request to the ISP. The ISP
forwards your request to the company where you are employed, and the request is likely to
be denied by the company’s firewall.
In this case you have to define a static route, telling your router that 134.177.0.0 should be
accessed through the ISDN router at 192.168.1.100. In this example:
• The Destination IP
Address and IP Subnet Mask fields specify that this static route
applies to all 134.177.x.x addresses.
• The Gateway IP
Address field specifies that all traffic for these addresses should be
forwarded to the ISDN router at 192.168.1.100.
• A metric value of 1 works because the ISDN router is on the LAN.
• Private is selected only as a precautionary security measure in case RIP is activated.
To set up a static route:
1. Select Advanced >
Advanced Setup > Static Routes.
2. Click Add.
3. In the Route Name field, type a name for this static route (for identification purposes only.)
4. Select the Private check box if you want to limit access to the LAN only
.
If Private is selected, the static route is not reported in RIP.
5. Select the Active check box to make this route ef
fective.
 Loading...