Installation and Configuration
13
ProSafe Wireless-N Access Point WNAP210
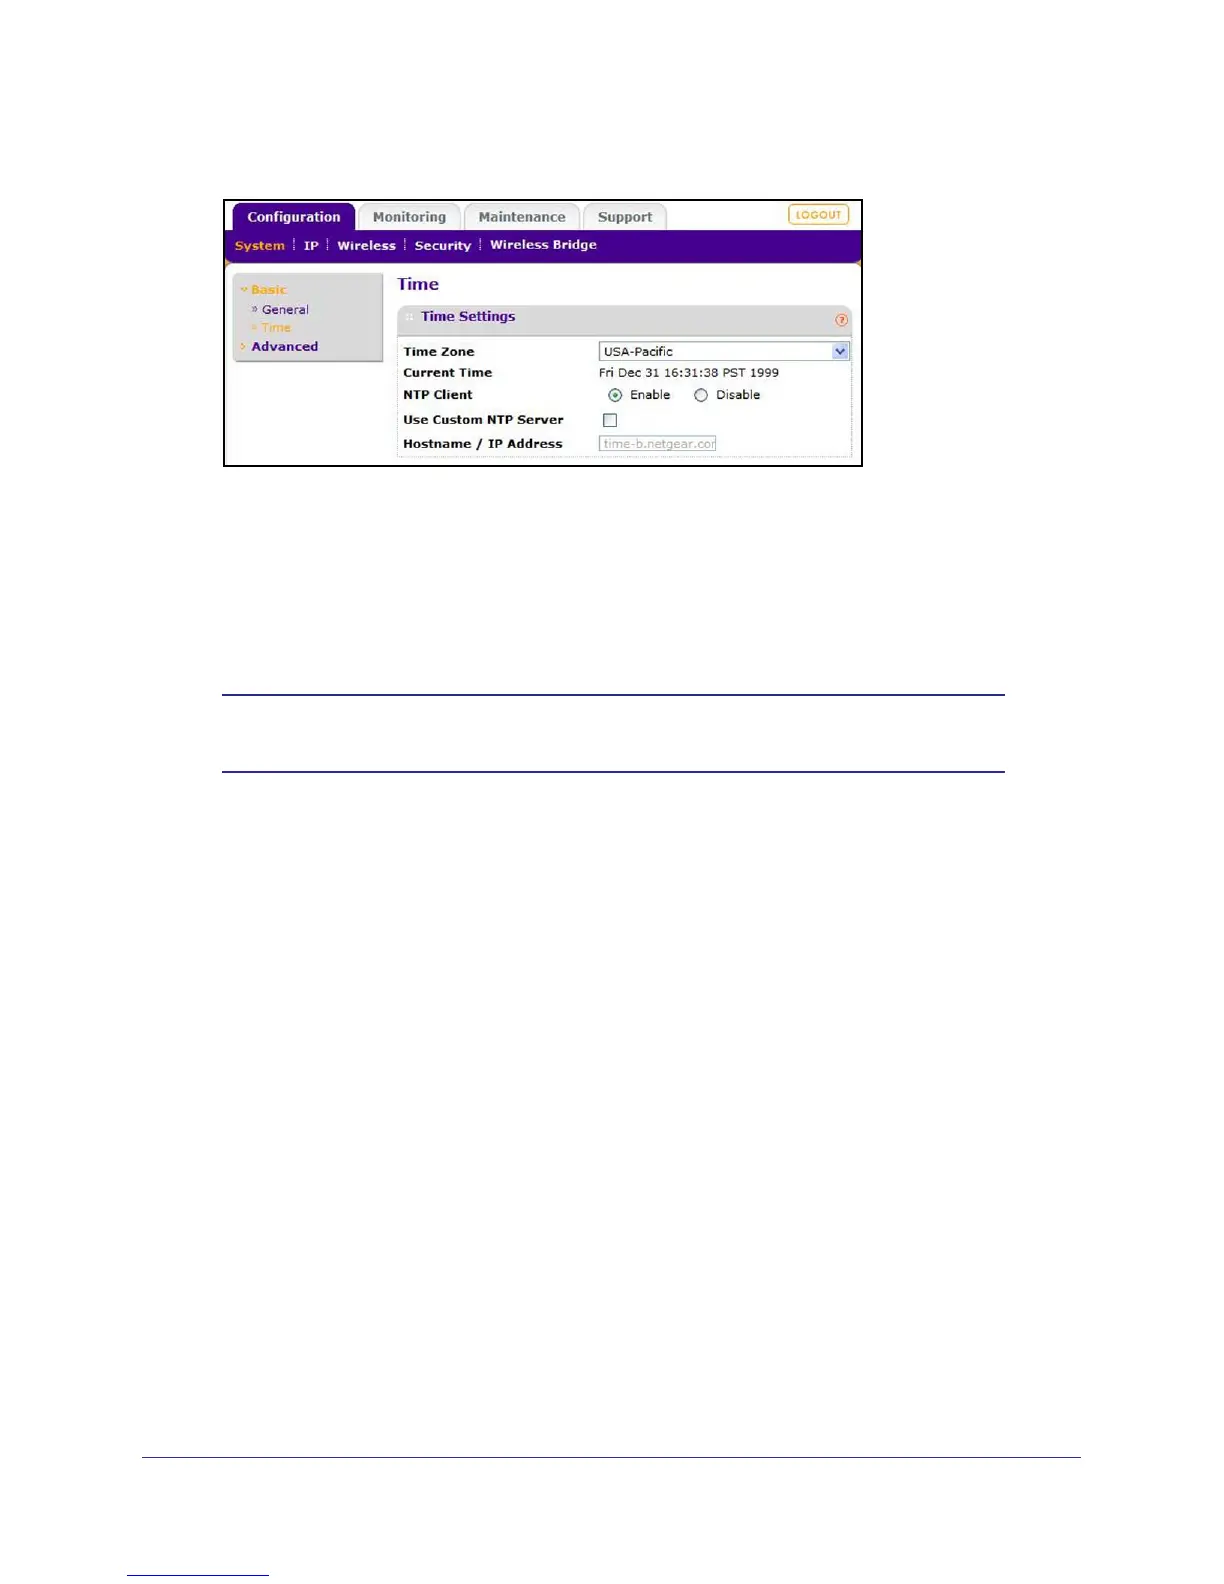
3. Select Configuration > System > Basic > Time.
4. Adjust the following fields:
• Time Zone. From the drop-down list, select the local time zone for your access point
from a list of all available time zones. The default is USA-Pacific. The access point will
get the current time from the connecting computer.
• NTP Client. Enable the NTP client to synchronize the time of the access point with an
NTP server. The default is Enable.
Note: You need an Internet connection to get the current time using an
NTP client.
• Use Custom NTP Server. Select this check box if you have a custom NTP server.
The default is not selected.
• Hostname / IP Address. Enter the host name or the IP address of the custom NTP
server. The default is time-b.netgear.com.
5. Click Apply.
6. Specify the IP settings as described in the following section.
Set Basic IP Options
Enter the basic IP settings for your access point on this screen. The default settings work in
most cases. However, if your access point is part of a more complex LAN network, then
modify these settings to meet the requirements of your network.
 Loading...