Installation and Configuration
15
ProSafe Wireless-N Access Point WNAP210
Set Up and Test Basic Wireless Connectivity
Follow the instructions in this section to set up and test basic wireless connectivity. Once you
have established basic wireless connectivity, you can enable security settings appropriate for
your needs.
Note: If you connect wirelessly to the access point and you change the
SSID, channel, or security profile settings, you will lose your wireless
connection when you click Apply. To avoid this situation, you can use
a LAN connection to set up the access point.
To set up and test basic wireless connectivity:
1. Select Configuration > System. Verify that the correct country/region in which the
wireless interface will operate has been selected.
2. Click Apply to save any changes.
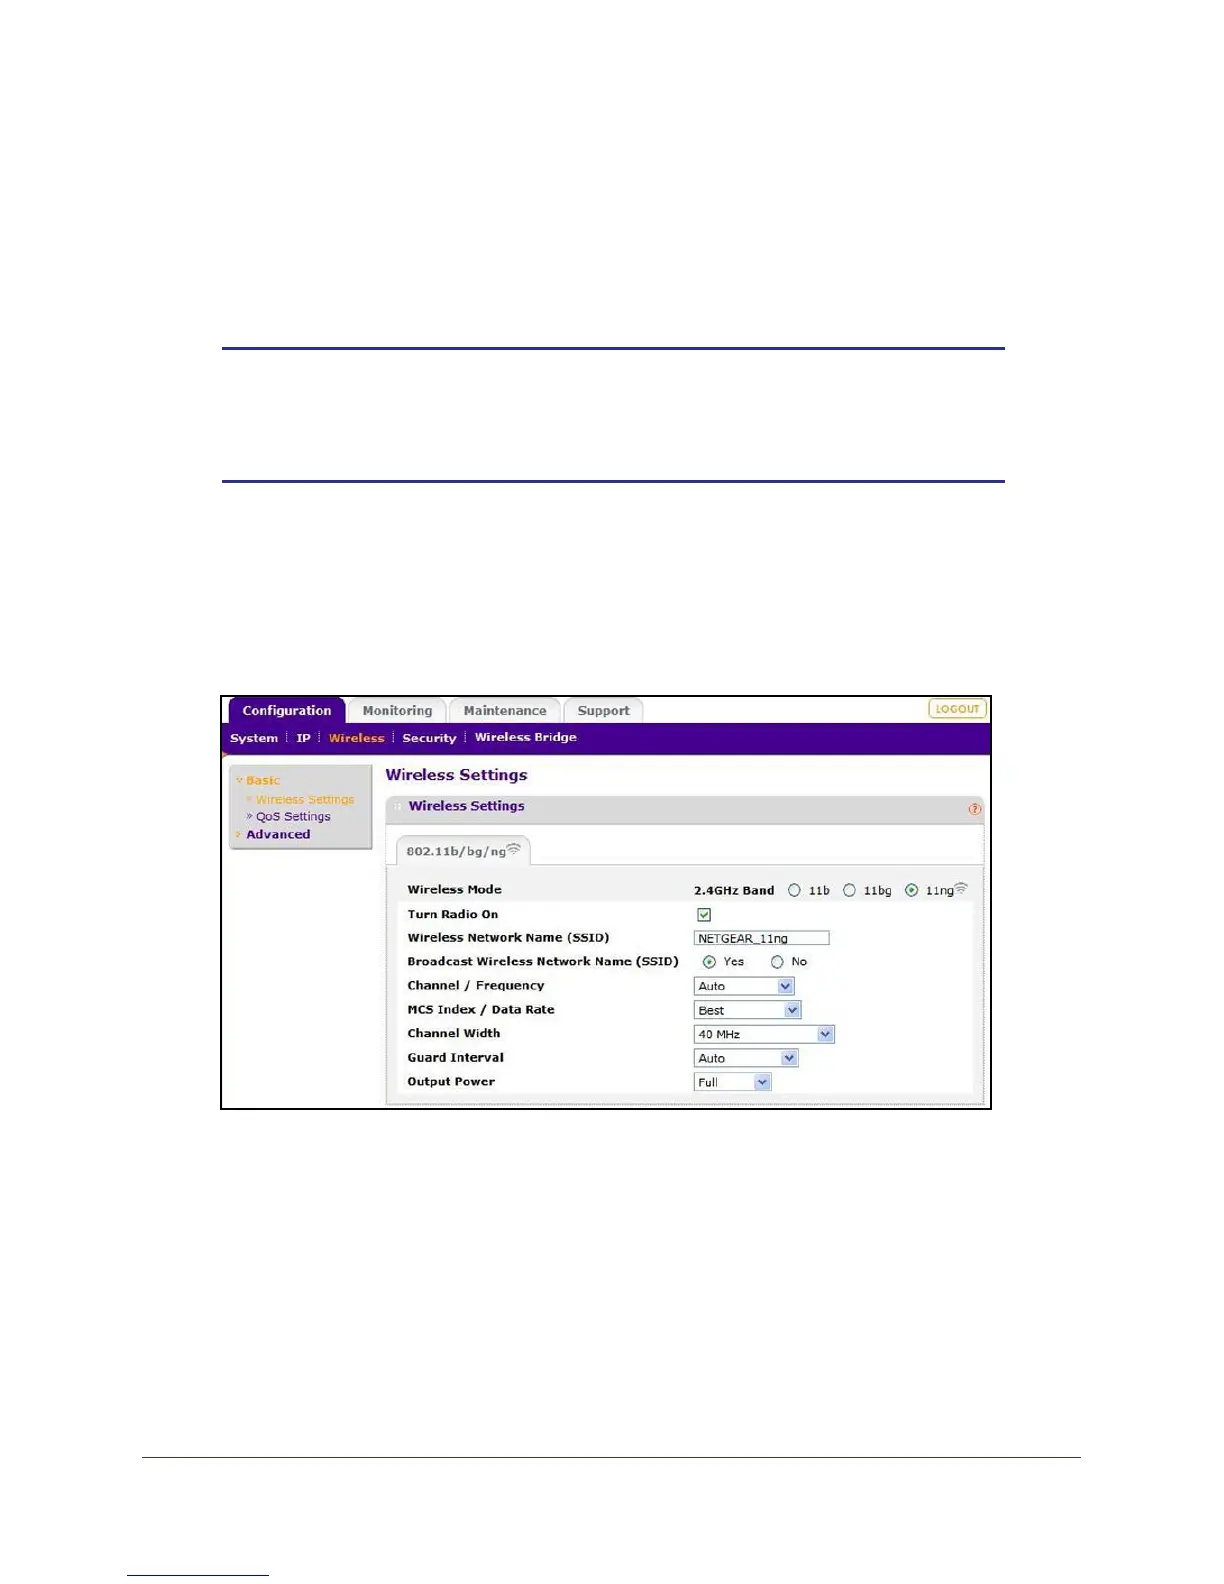
3. Select Configuration > Wireless, and the following screen displays:
4. Ensure that the auto channel (default) feature is selected for your network. This feature
selects a channel that has the least interference.
You don not need to change the wireless channel unless you notice interference or are
near another wireless access point. Select a channel that is not being used by any other
wireless networks within several hundred feet of your access point.
Note: If you select a wireless mode option and other settings on this screen
are disabled, then you have to select the Turn Radio On check box to enable
options on this screen.
 Loading...