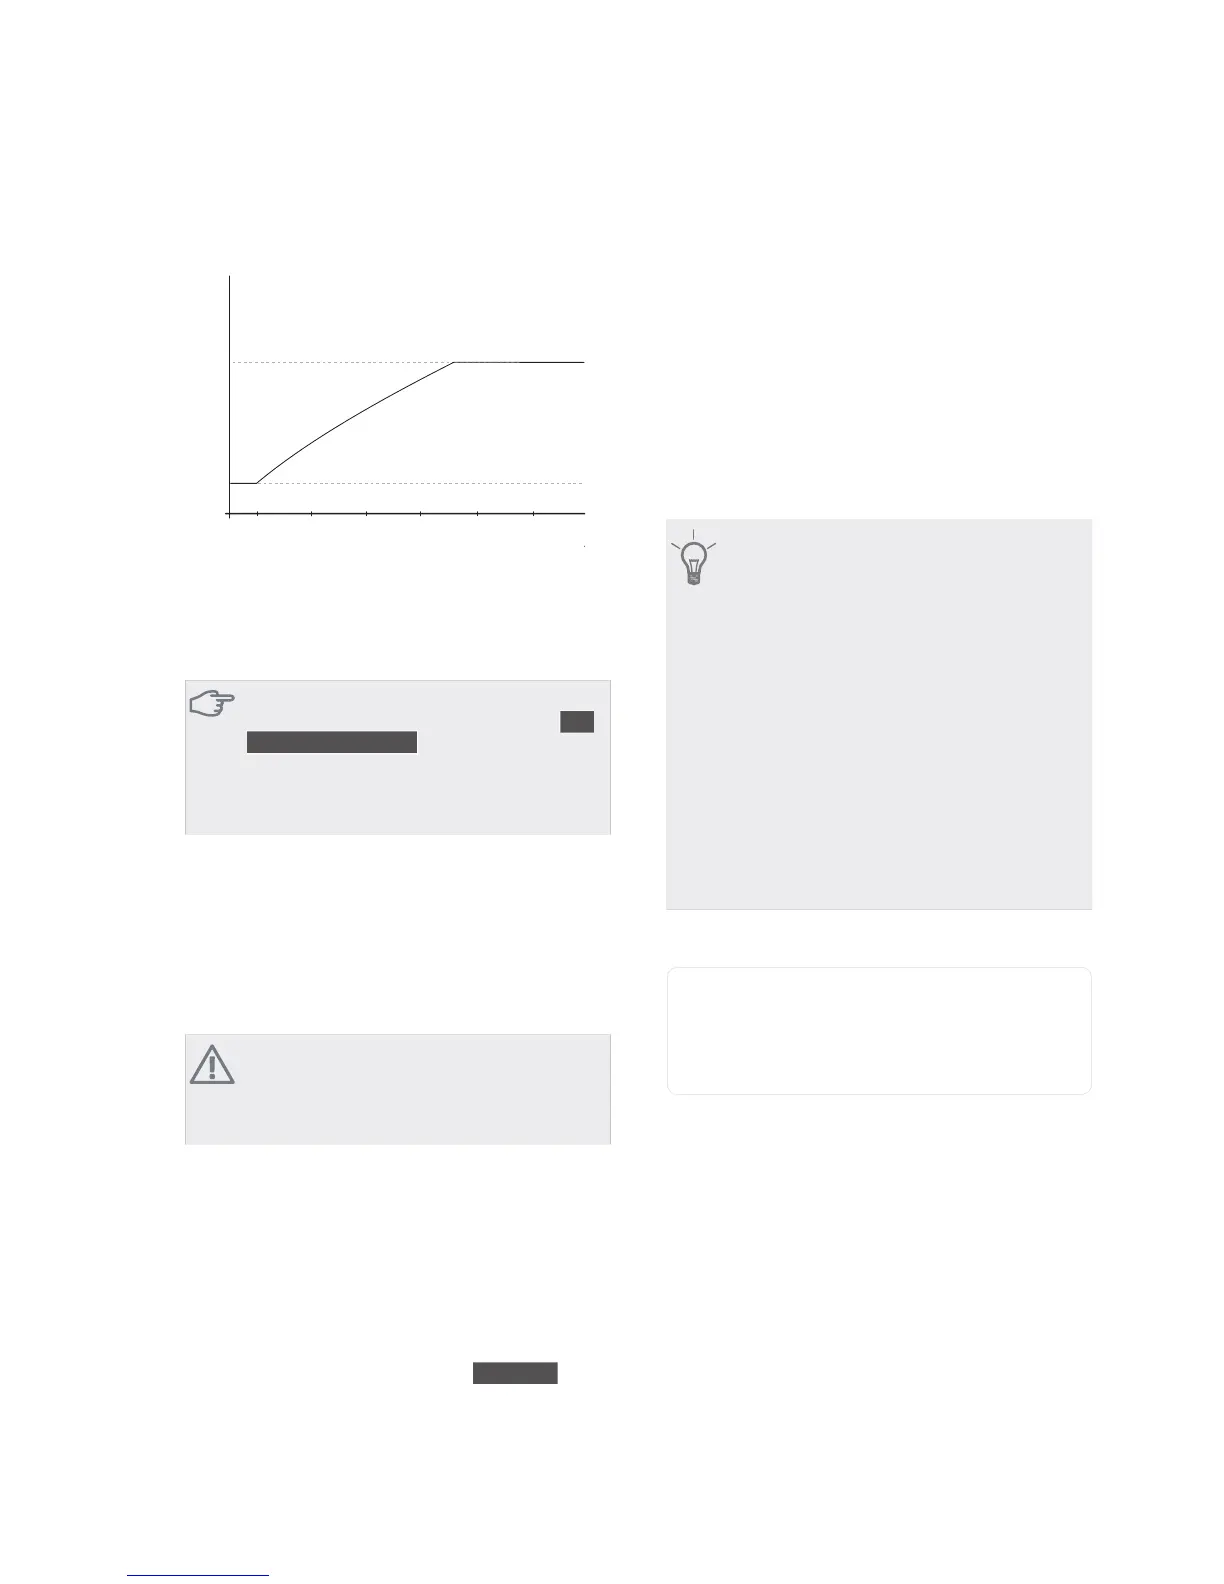
Flow line temperature– maximum and minimum
values
30
40
50
60
70
°C
- 40°C
UTETEMPERATUR
- 10
0
10
- 20 - 30
Maximivärde
Minimivärde
6XSSO\ WHPSHUDWXUH
2XWGRRU WHPSHUDWXUH
0D[LPXP YDOXH
0LQLPXP YDOXH
Because the flow line temperature cannot be calculated
higher than the set maximum value or lower than the set
minimum value the heating curve flattens out at these
temperatures.
Caution
Underfloor heating systems are normally max
flow line temperature set between 35 and 45
°C.
Check the max temperature for your floor with
your installer/floor supplier.
The figure at the end of the curve indicates the curve
slope. The figure beside the thermometer gives the curve
offset. Use the control knob to set a new value. Confirm
the new setting by pressing the OK button.
Curve 0 is an own heating curve created in menu 1.9.7.
To select another heat curve (slope):
NOTE
If you only have one heating system, the number
of the curve is already marked when the menu
window opens.
1.
Select the system (if more than one) for which the
heat curve is to be changed.
2.
When the system selection has been confirmed the
heat curve number is marked.
3.
Press the OK button to access the setting mode
4.
Select a new heating curve. The heat curves are
numbered from 0 to 15, the greater the number, the
steeper the slope and the greater the supply temper-
ature. Heating curve 0 means that own curve (menu
1.9.7) is used.
5.
Press the OK button to exit the setting.
To read off a heating curve:
1.
Turn the control knob so that the ring on the shaft
with the outdoor temperature is marked.
2.
Press the OK button.
3.
Follow the grey line up to the heat curve and out to
the left to read off the value for the supply temperat-
ure at the selected outdoor temperature.
4.
You can now select to take read outs for different
outdoor temperatures by turning the control knob
to the right or left and read off the corresponding
flow temperature.
5.
Press the OK or Back button to exit read off mode.
TIP
Wait 24 hours before making a new setting, so
that the room temperature has time to stabilise.
If it is cold outdoors and the room temperature
is too low, increase the curve slope by one incre-
ment.
If it is cold outdoors and the room temperature
is too high, lower the curve slope by one incre-
ment.
If it is warm outdoors and the room temperature
is too low, increase the curve offset by one incre-
ment.
If it is warm outdoors and the room temperature
is too high, lower the curve offset by one incre-
ment.
Menu 1.9.2 - external adjustment
climate system
Setting range: -10 to +10 or desired room temperature
if the room sensor is installed.
Default value: 0
Connecting an external contact, for example, a room
thermostat or a timer allows you to temporarily or period-
ically raise or lower the room temperature. When the
contact is on, the heat curve offset is changed by the
number of steps selected in the menu. If a room sensor
is installed and activated the desired room temperature
(°C) is set.
If there is more than one climate system the setting can
be made separately for each system.
NIBE™ F1245Chapter 8 | Control - Menus50

 Loading...