R-4108.A
REASSEMLBING PROCEDURE
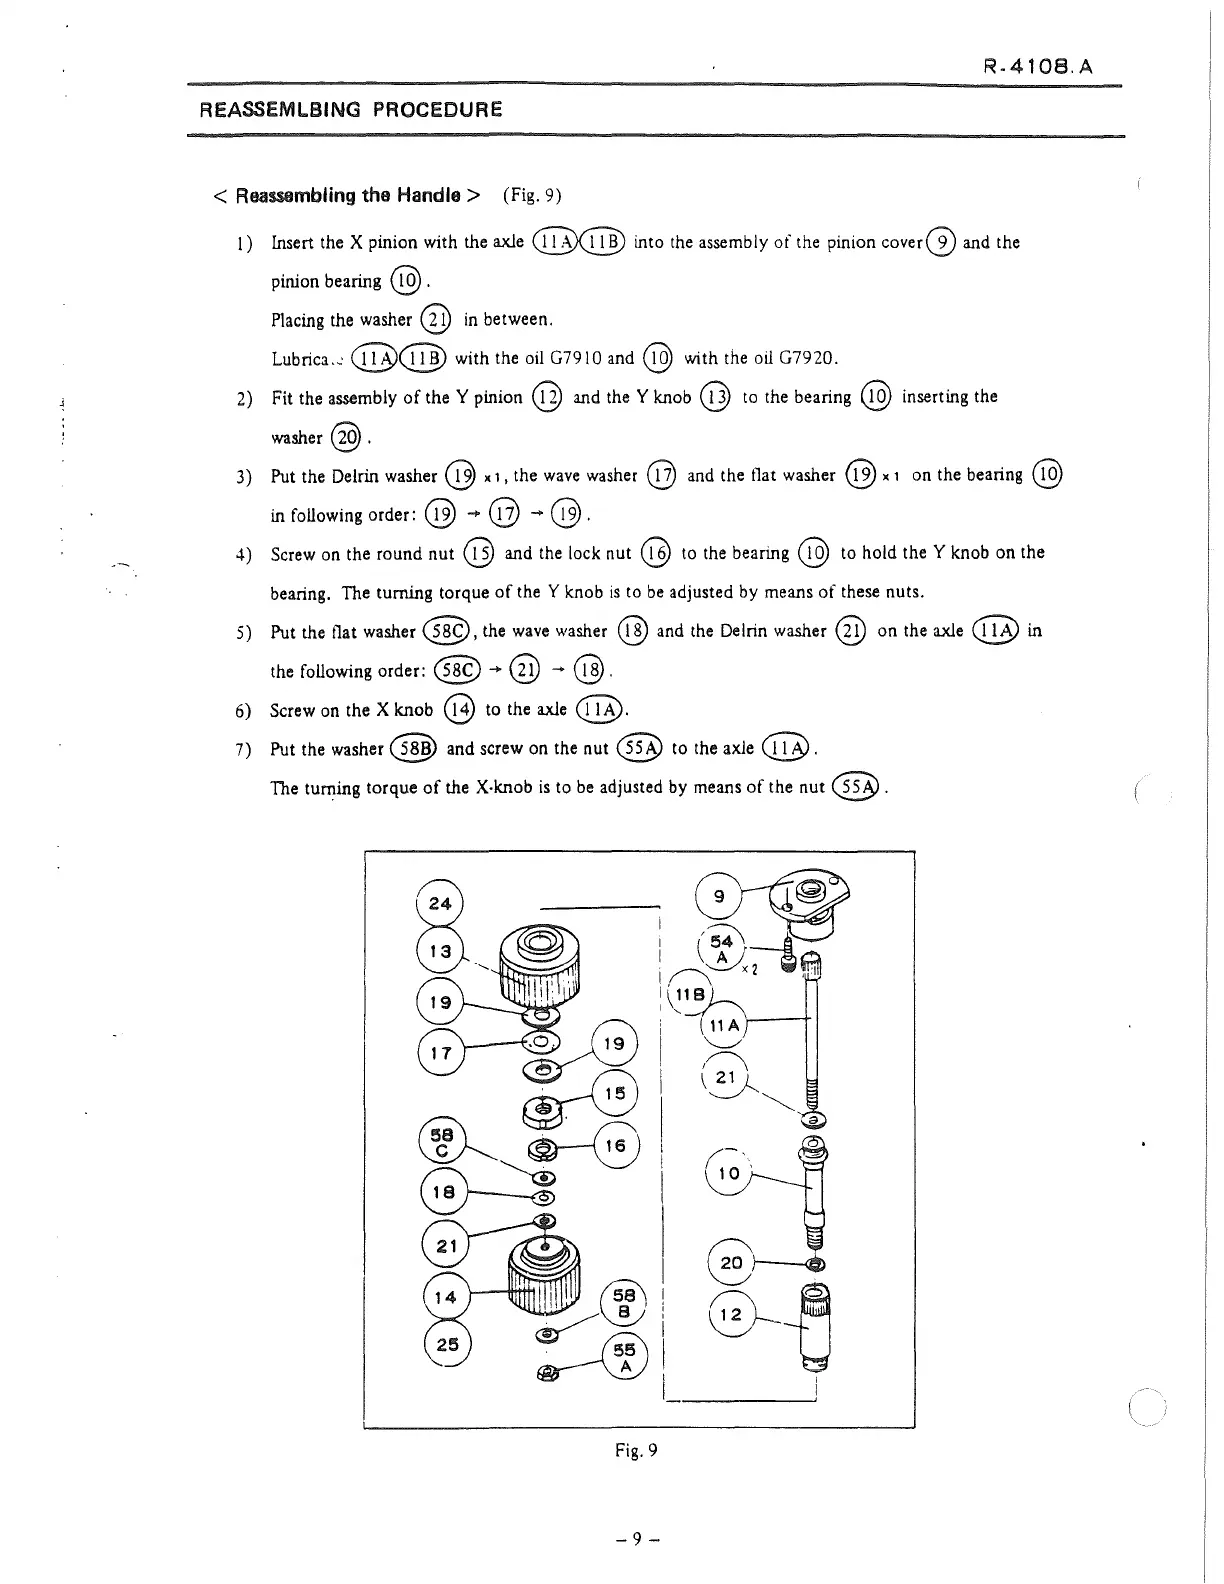
< Reassembling the Handle > (Fig.
9)
J) 1nsert the X pinion with the axle
(§>@
into the assembly
of
the pinion
cover(V
and the
pinion bearing
@ .
Placing the washer @
in
between.
Lubrica.~
@CD]) with the
oi!
G7910 and @ wtth the oil G7920.
2)
Fit the assembly
of
the Y pinion @ and the Y knob @ to the bearing @ inserting the
washer@.
3) Put the Delrin washer @ x
1,
the
wave
washer @ and the tlat washer @ x 1 on the bearing @
in following order: @ -+ @
...,.
@ .
4)
Screw on the
round
nut
@ and the lock nut @ to the bearing @ to hold the Y knob
on
the
bearing. The turning torque
of
the Y knob
is
to
be
adjusted by means
of
these nuts.
5) Put the tlat washer
@,
the wave washer @ and the Delrin washer @
on
the axle
e@
in
the following order: @ -+ @ - @.
6) Screw on the X
knob
@ to the axle (@.
7) Put the
washer@
and screw on the
nut
@ to the axle
@.
The tuming
torque
of
the X·knob
is
to
be
adjusted by means
of
the
nut
@.
r;~·.
Fig. 9
-9-

 Loading...