R-4106.A
REASSEMBLY
PROCEDURE
1.
B·tube
9)
Stick prism @
to
righteye sleeve
~
using No. 200
l.
Apply this adhesive
in
a ring ali
around the
top
edge
of
@.
and inserting @ into
@,
rotate
it
several times.
10) Attach
<1Q§)
to prism base
@with
washer
~
and screws @
x2
transitorily.
Thereafter, screw
in
cover
ring@
into
c:I:QP.
(After posicional adjustment, stick it with
No.
350)
11) Attach lefteye sleeve @ to prism base
CIQD
with washer @ and screws
@x
2
transitorily. Thereafter, screw
in
<@ into
@.
(After adjustment, stick it with No. 350)
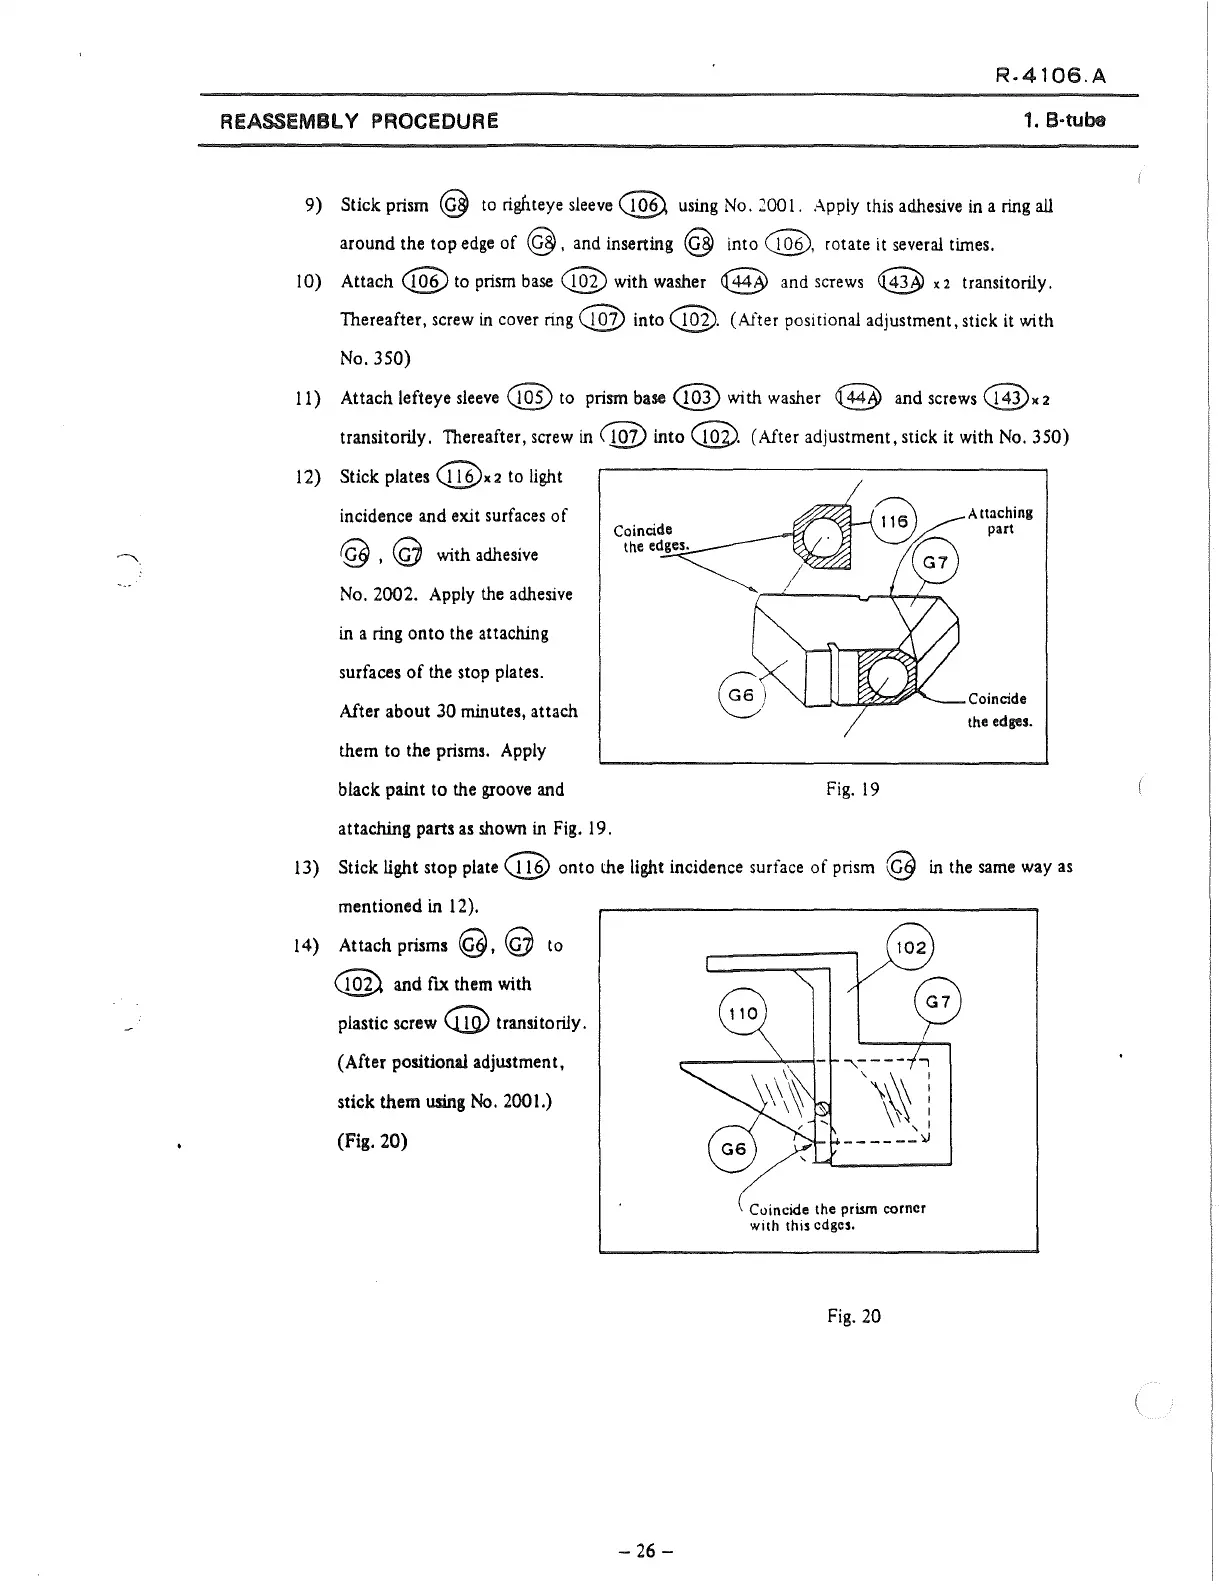
12)
Stick plates
c@x2
to light
incidence and exit surfaces
of
~
, @ with adhesive
No.
2002. Apply the adhesive
in a ring
anta
the attachlng
surfaces
of
the stop plates.
After about
30 minutes, attach
them to the prisms. Apply
black paint to the groove and
attaching parts as shown in Fig. 19.
Fig.
19
Attaching
part
Coincide
the
edges.
13) Stick light stop
plate@
onto the light incidence surface
of
prism @
in
the
sarne
way
as
mentioned in 12).
14) Attach prisms
ª·
@ to
e@
and fix them with
plastic
screw
@ transitorily.
( After
positional adjustmen
t,
stick
them
using
No.
2001.)
(Fig.
20)
-
26-
..-----....,..--{- "-- --
...,
'\~'
j
------~
Fig. 20

 Loading...