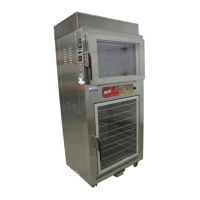
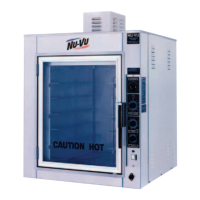
RECEIPT, INSTALLATION AND START-UP SUB-123 OWNER’S MANUAL
Standard Manual Fill Proofer - -
(refer to
Fig. #4
on page 13)
A. Unscrew the glass Light Lenses [19] in the rear of the Proofer. Install the included Appliance
Bulbs (if they are not already installed) and replace the Lenses. Close the Proofer Door [42]
securely.
B. Set the Proofer Power Switch [31] to the
ON
position. The Proofer interior should illuminate and
the Fan Blade [61] should begin to rotate.
C. Set the Proofer Temperature Control [32] to any selected proofing temperature (generally 95º-100º
F). The Temperature Control Indicator Light [33] should illuminate.
D. Place a reliable oven thermometer on a Proofer Shelf [65] in the center of the Proofer.
E. Check the thermometer reading against the Temperature Control setting when the Temperature
Control Indicator Light goes out. If the readings differ by more than 5º the Temperature Control
may need a simple adjustment. Please call the NU-VU
®
Service Department
BEFORE
attempting
calibration or adjustment of the control.
NOTE:
Please allow the Temperature Control to cycle two or three times to allow the Proofer
temperature to stabilize BEFORE comparing the readings.
F. Remove the Water Pan [64]. Set the Proofer Humidity Control [34] to #10. The Humidity Control
Indicator Light [35] should illuminate and the round Humidity Element [13] will begin to heat up.
G. Fill the Water Pan with approximately 1" to 1½" of warm water, place it on the Humidity Element,
and close the Proofer Door. The water should begin to heat up, and in a few minutes a light
fogging should begin to form on the Proofer Door glass.
H. Turn the knob of the Proofer Timer [36] to 20 minutes, then set it back to 5 minutes (if your unit is
equipped with the optional 99-Minute Digital Timers please refer to the appropriate operating
instructions on page 17). Allow the Timer to count down and its Buzzer Alarm to sound. If the
Timer does not run or the Buzzer fails to sound please refer to the
TROUBLE-SHOOTING GUIDE
under
VII - The Oven or Proofer Timer does not run
or
VIII -The Buzzer Alarm does not sound
.
I. Return all Proofer controls and switches to their
OFF
positions.
Your manual fill SUB-123 is now ready to operate!
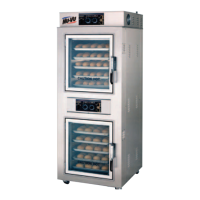
Optional AUTOMIST Proofer - -
(refer to
Fig. #5
on page 14)
A. Unscrew the glass Light Lenses [19] in the rear of the Proofer. Install the included Appliance
Bulbs (if they are not already installed) and replace the Lenses. Close the Proofer Door [42]
securely.
B. Set the Proofer Power Switch [31] to the
ON
position. The Proofer interior should illuminate and
the Blower Wheel [86] should begin to rotate.
C. Set the AUTOMIST Humidity Control [81] to #2 or #3. The Humidity Control Indicator Light
[82] should illuminate as a light water mist is sprayed from the Injection Nozzle [85] into the
Blower Wheel. The spray should stop after less than one second and the Indicator Light should go
out. After a short pause (approximately 40-45 seconds) the Humidity Control and Injection Nozzle
will cycle again. Set the Humidity Control to
OFF
.
NOTE
: The AUTOMIST option controls the humidity in the Proofer by using a solid-state Repeat
Cycle Timer [83]. This Timer has a fixed “
OFF
” time and an adjustable “
ON
” time. Changing
the setting of the Humidity Control varies the “
ON
” time and regulates the duration of the water
spray in the Proofer and the resulting amount of humidity.
D. Set the Proofer Temperature Control [32] to any selected proofing temperature (generally 95º-100º
F). The Temperature Control Indicator Light [33] should illuminate.
NU-VU
®
FOOD SERVICE SYSTEMS MENOMINEE, MICHIGAN 49858-0035
page
8
Sales Fax (906) 863-5889 ♦ Service Fax (906) 863-6322 (800) 338-9886