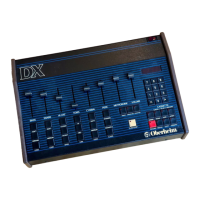
SYNCHRONIZING WITH
THE MIDI CLOCK
Utilizing the MIDI Timing Clock provides an easy method of interconnecting MIDI
devices.
Setup
For best results
, turn off both units before connecting. Using a standard MIDI cable
connect the MIDI OUT jack on the rear panel of the unit to be the master to the MIDI IN
jack on the rear panel of the unit to be the slave.
DX As Master
To use the DX as the master
, set EDIT PARAMETER 02 to "
I" for Internal Clock
, and
turn "
ON" EDIT PARAMETER 10 (MIDI Clock Out).
DX As Slave
To slave the DX to another MIDI timing source
, set EDIT PARAMETER 02 (Timing
Source) to "
d" for MidI. For AUTO START operation
, set E;DIT PARAMETER 02 to
On:'
Auto Start
If a slaved DX has its Auto Start function turned on
, it will automatically enter the PLAY
mode whenever a MIDI Start Command is recognized. The DX wil stop when a MIDI'
Stop Command is received or the STOP buton pressed
, even if MIDI timing pulses.
continue.
If Auto Start is turned off
, PLAY or RECORD must be pressed on the slave unit before
st'arting the master.
Song Select
Turning on SONG CHANGES (EDIT PARAMETER 12) enables remote selection of
Songs (not Sequences) via MIDI. The DX transmits and receives Songs 00-49.
Recording
as
Master
Press RECORD and PLAYas before. The slave units will start as soon as the master
OX starts recording.
Recording
as
Slave
Follow this procedure: Turn AUTO-
START OFF (Edit Parameter 02); Place the DX into
Record by pressing RECORD and PLAY; Then start the master clock source.
METRONOME AS CLOCK
SOURCE
The DX has also been designed to slave sequencers and arpeggiators
, using the met-
ronome output. The CLICK OUT outputs the metronome at all times for this reason.
The Tempo as well as the Click Value of the Metronome wil control the rate of the met-
ronome pulses. The Metronome output is -; 12 Volts DC
, 900 millseconds duration.
The Metronome can be set to click in a programmable rhythm instead of a steady
click. See EDIT PARAMETER 04 (SET PROGRAMMABLE CLICK).
SYNCHRONIZING TO TAPE
You can record a sync tone from the OX onto tape
, and then use the sync tone on
tape to control the DX. Sync to Tape is achieved by recording a sync tone from the TO
TAPE jack on the Rear Panel on to a track of a tape recorder
, and then playing it back
to the FROM TAPE jack.
Recording The Sync Tone Onto Tape
When monitoring your tape recorder
, you should hear a steady tone which is the
Leader Tone. Record the leader tone at a level of between - 5db and 0 db. Some
experimentation wil give the best results for your particular setup. After recording 5 to
10 seconds of leader tone
. press PLAY on the DX at the point you wish the sequence
to start. The leader tone will give way to a chattering sound much like the sound of the
cassette data. This is the timing data. When the DX stops playing the leader tone will
return.