Setting up your receiver
OCEASOFT LoRaWAN Receiver User Guide Page 20
2.3 Ethernet connection to your network
The next step in the setup process is to configure the network connection.
This section describes how to configure your receiver with an Ethernet wired
connection. The receiver does not need to be placed in its final location for this
operation, but it does need to be accessible over your network.
1. Click on
Setup Network Interfaces Options (Edit) for “eth0” (
):
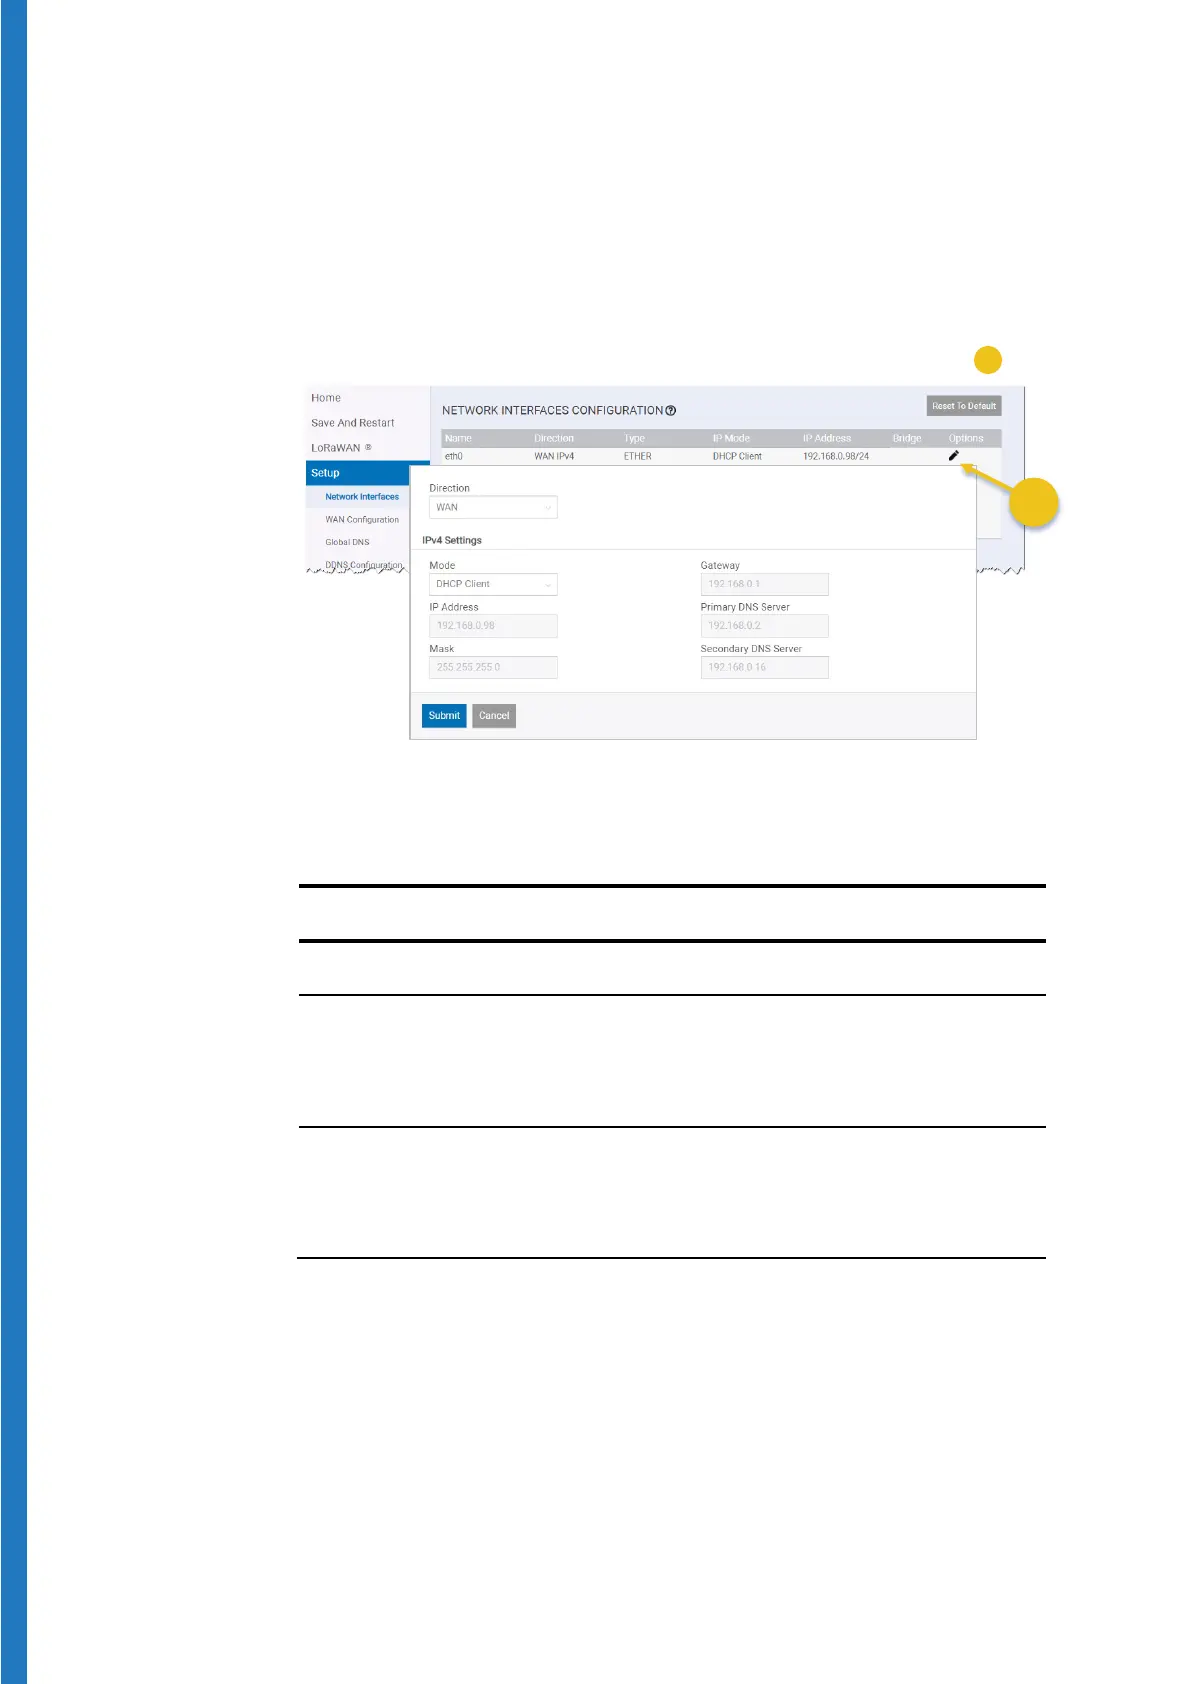
Figure 16 – Adapt Ethernet settings for your network
2. Adjust the various settings in the
Network Interface Configuration window
to match your network:
Direction
Mode
(in which case you must set the IP
Address in the field below), or
(the receiver gets its IP address from your
network’s DHCP server).
IP Address, Mask,
Gateway, Primary DNS
Server, Secondary DNS
Server
Enter the IP addresses according to your
network configuration.