EasyManuals Logo

OCULUS Pentacam User Manual

OCULUS Pentacam
33 pages
To Next Page IconTo Next Page
To Previous Page IconTo Previous Page
Page #22 background imageLoading...
Page #22 background image
10 Measuring Procedure
18 / 29 Instruction Manual Pentacam® / Pentacam HR® (G/70700/0109/en)
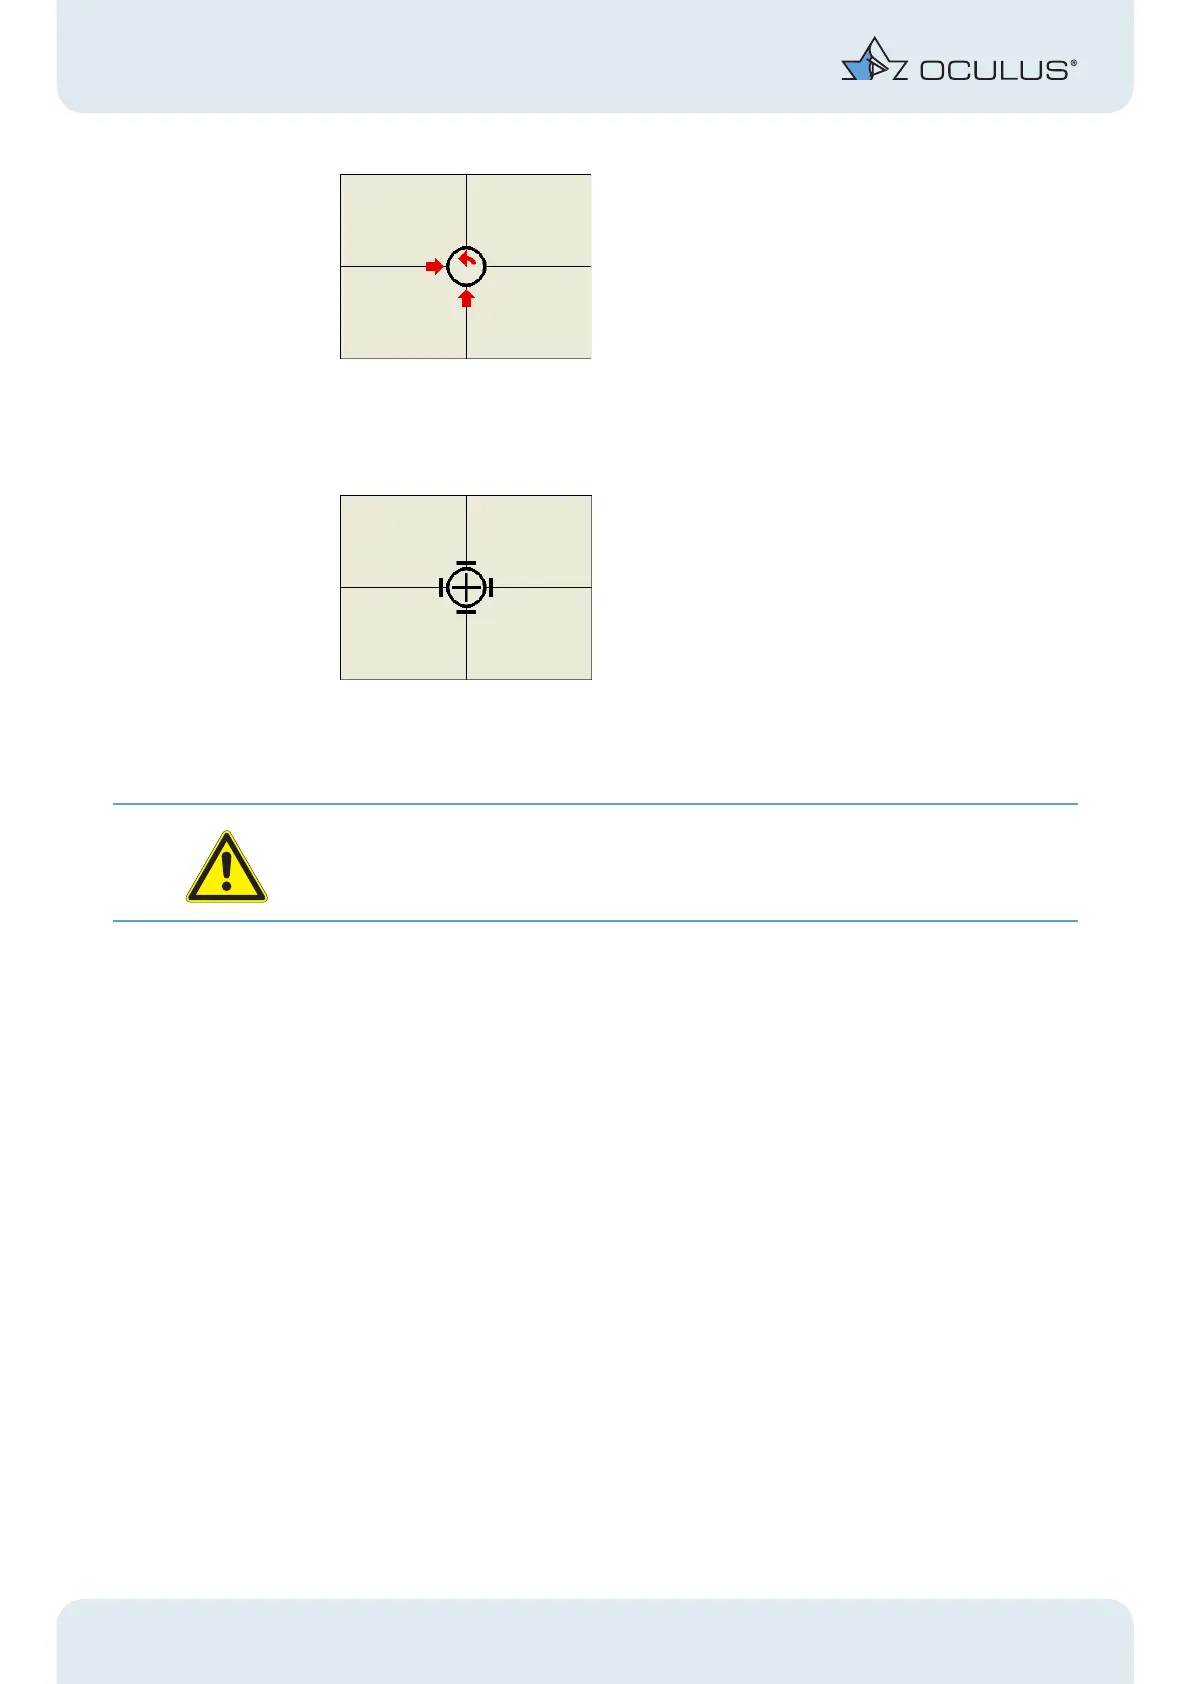
Fig. 10-5: Adjustment window
When you have achieved a sufficiently accurate position, a black cross will appear in
the centre of the ring, surrounded by four black lines. The Pentacam will automati-
cally begin measuring, alternately you can start the measuring procedure manually.
Fig. 10-6: Adjustment window once the final position has been reached
Î For measuring manually: Start measuring by clicking [Start Scan] or by pressing the
return key.
Attention
It may not be possible to carry out a measurement with manual release.
Î Ask the patient to remove his or her head from the rest.
Î Check the measurement results by referring to the quality specifications (sect. 11,
page 19).

Other manuals for OCULUS Pentacam

Questions and Answers:

Question and Answer IconNeed help?

Do you have a question about the OCULUS Pentacam and is the answer not in the manual?

OCULUS Pentacam Specifications

General IconGeneral
Measurement TimeLess than 2 seconds
Corneal CoverageUp to 12 mm
SoftwarePentacam Software
Data TransferUSB
Corneal TopographyYes
DisplayExternal monitor required
Measurement PrincipleScheimpflug imaging
CameraRotating Scheimpflug camera
Light SourceBlue LED
PachymetryYes
Anterior Chamber AnalysisYes
Imaging PrincipleScheimpflug imaging
FixationInternal
Power Supply100-240 V, 50/60 Hz
ResolutionHigh resolution
Lens Density MeasurementYes
DimensionsVaries depending on model and configuration
WeightVaries by model, check manufacturer specifications
Number of Images25 or 50

Related product manuals