Getting started > 10
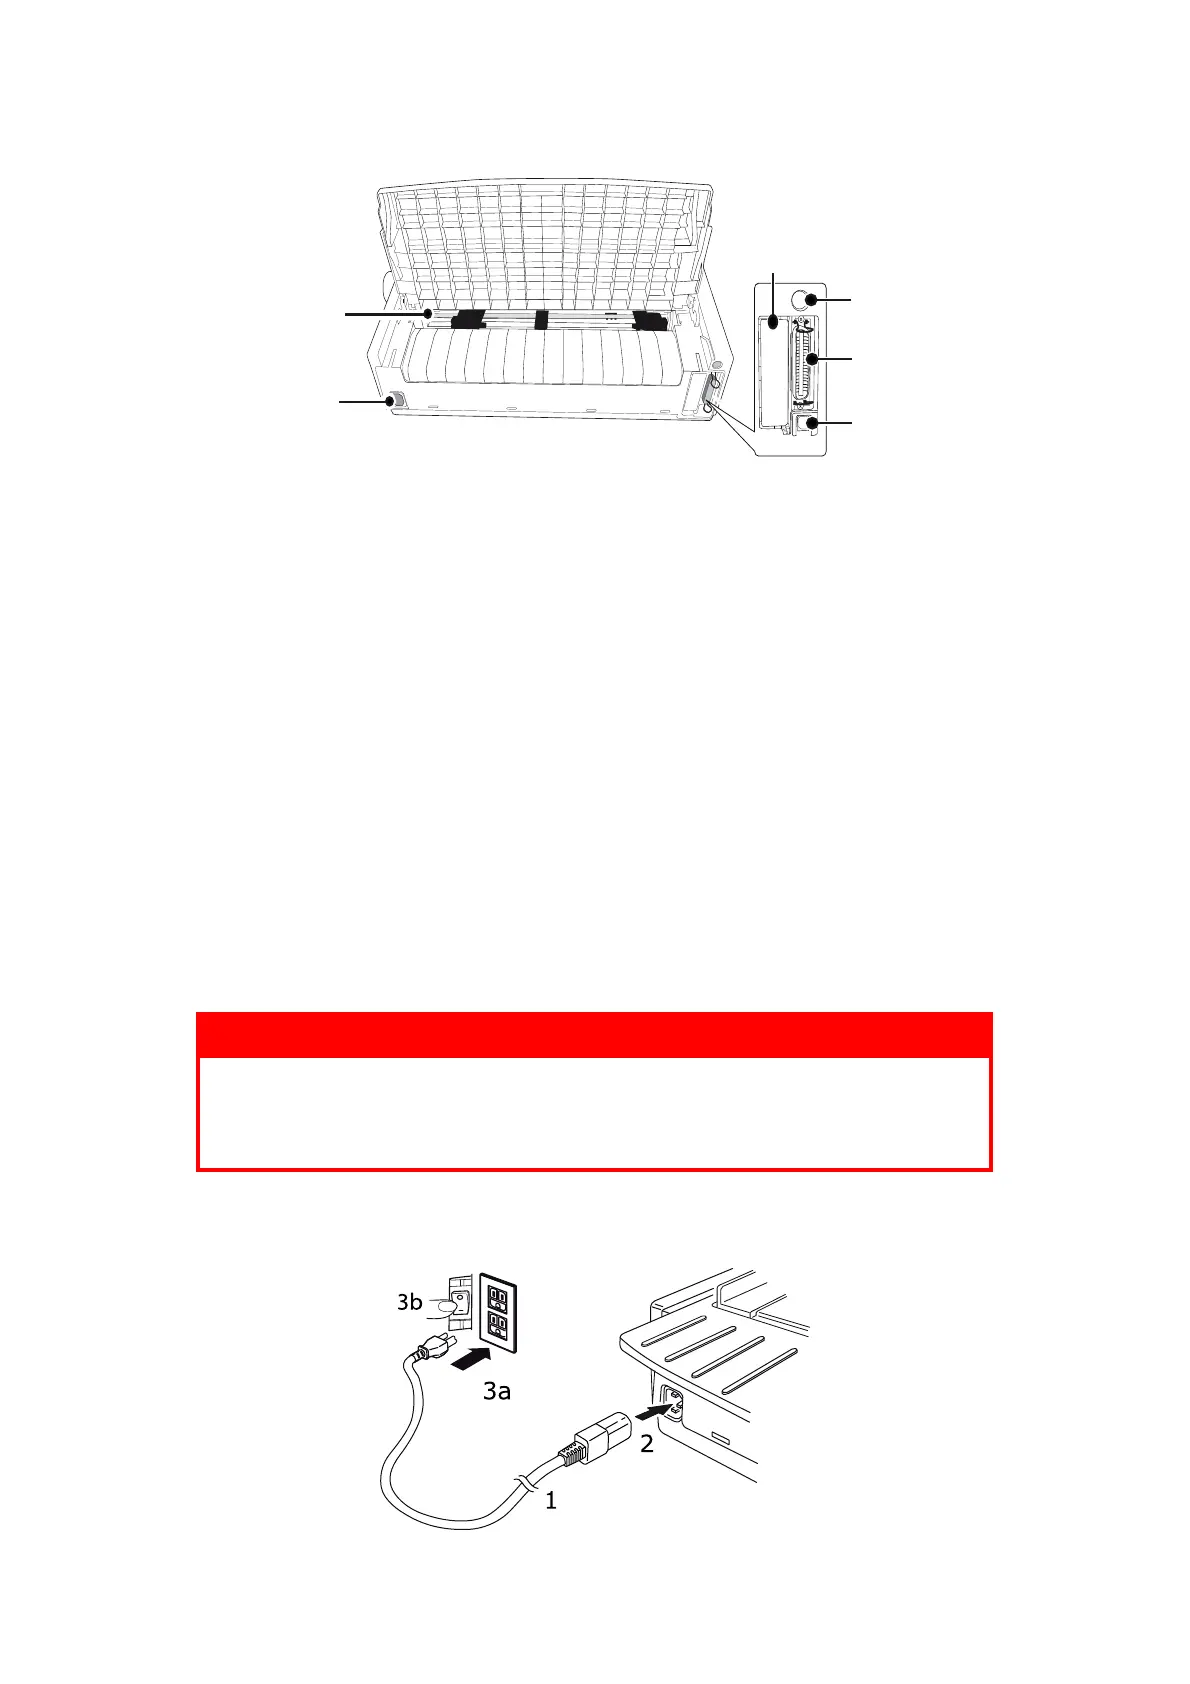
R
EAR
VIEW
1. Optional connector position: connect to optional accessory serial interface card or
100Base-TX/10Base-T network card.
2. Cut-sheet feeder/ Roll Paper stand connector: connect the optional cut-sheet feeder
or the roll paper stand.
3. Parallel connector: connect to parallel interface connector.
4. USB connector: connect to USB interface cable.
5. Pin Tractor: to load and feed continuous forms.
6. Power connector: connect to printer power cable.
L
OCATING
YOUR
PRINTER
> Select a firm solid surface on which to site your printer.
> Allow enough space around your printer (e.g. at least 60cm from any wall) for easy
access to the platen knob and the various paper feed paths.
> Make sure a grounded power outlet is available nearby.
P
OWERING
ON
YOUR
PRINTER
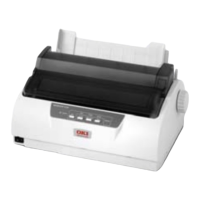
1. Ensure that your printer power switch is set to OFF.
2. Connect the power cable connector (1) to the A/C Input (2) on the printer.
WARNING!
Operations of this equipment are not warranted when the
equipment is connected to UPS (Uninterruptible Power Supply)
and/or inverter. Doing so may result in damage of this equipment.
Do not use an UPS and/or inverter.
1
2
3
4
5
6