5
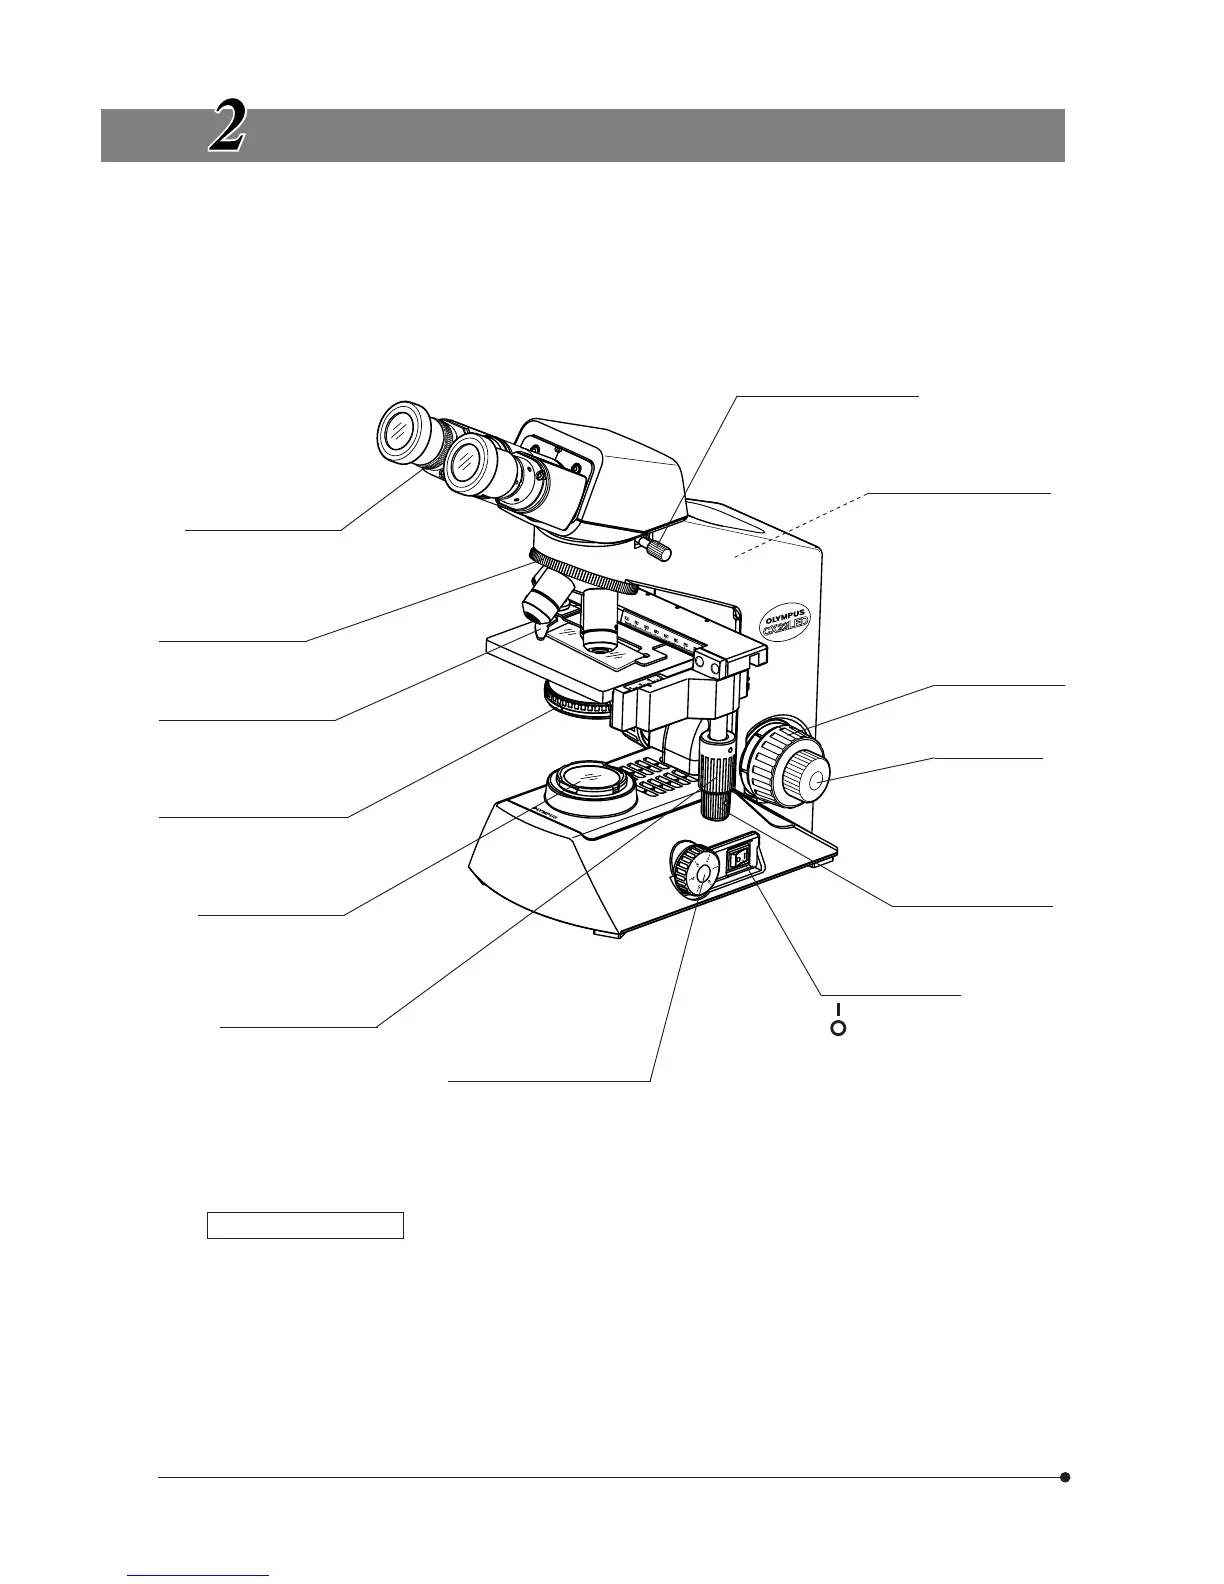
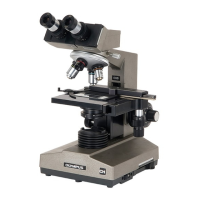
NOMENCLATURE
}The following items have been attached at the factory to prevent deterioration during transport. Remove these items and
retain them for future use. Then loosen the observation tube clamping knob and correct the orientation of the eyepieces
as shown in the illustration below.
1 Revolving nosepiece/observation tube transport band
2 Stage and specimen holder protection sheet
3 Protective pad below the stage
}Attach the AC adapter and power cord as described in chapter 9, “ASSEMBLY” on page 17.
}For detailed description of each item, refer to the page indicated inside parentheses.
NOTE FOR UNPACKING
“ ”: Power ON
“ ”: Power OFF
Diopter adjustment ring
(Page 9)
Specimen holder (Page 7)
Aperture iris diaphragm ring
(Page 10)
Filter holder
Light intensity adjustment
knob (Page 7)
Revolving nosepiece
(Page 10)
Observation tube clamping
knob
Pre-focusing knob (Page 9)
Specimen holder Y-axis
feed knob (Page 7)
Specimen holder X-axis
feed knob (Page 7)
Fine adjustment
knob (Page 8)
Coarse adjustment
knob (Page 8)
Main switch (Page 7)
Accommodates a
45-mm diameter filter.