87
EN
5
Playback functions
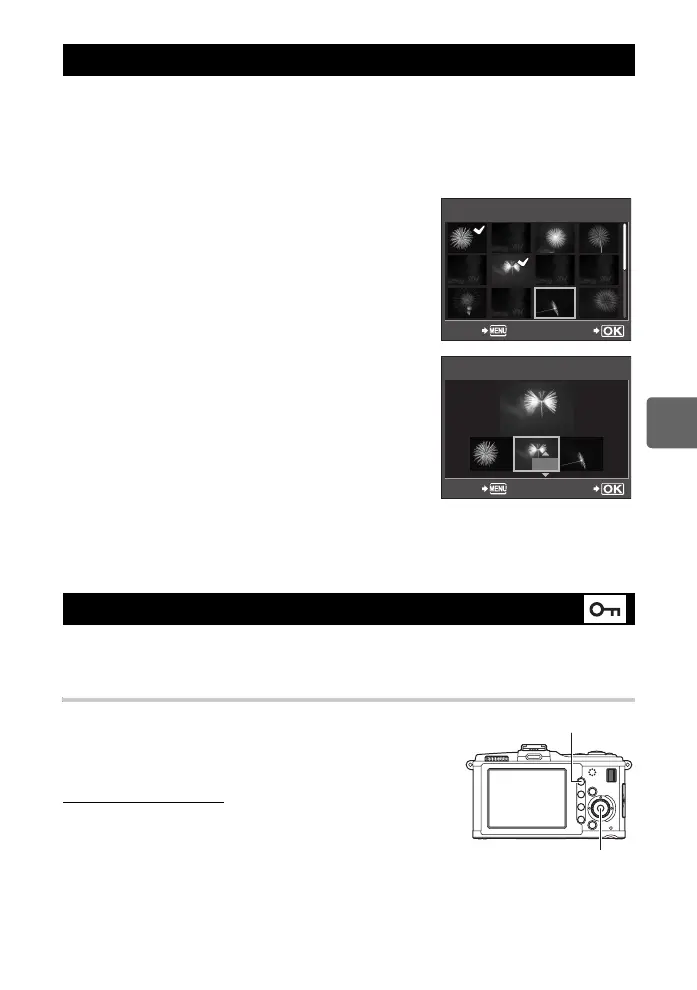
Up to 3 frames of RAW images taken with the camera can be overlaid and saved as a
separate image. The image is saved with the record mode set at the time the image is saved.
1 MENU[q][EDIT][IMAGE OVERLAY]
• Selection is also possible during playback by pressing the i button.
2 Select the number of frames to overlay and press the i button.
3 Use k to select a frame and press the i button.
• Repeatedly select images only for the number of frames
selected in Step 2.
• To cancel your selection, press the i button again.
4 Use hi to select an image, then use fg to
select the brightness for each image. Press the i
button.
• Select from 0.1 to 2.0.
• The displayed image changes as the brightness is
adjusted.
5 Use fg to select [YES], then press the i
button.
x Notes
• When the record mode is set to [RAW], the overlay image is saved as [YN+RAW].
• When selecting a frame to overlay, the JPEG images for images recorded in JPEG+RAW are
displayed.
Protect images you do not want to erase. Protected images cannot be erased by the single-
frame or all-frame erase function.
Single-frame protect
Play back the image you want to protect and press the 0
button.
• 9 (protect mark) is displayed on the top right corner of the
screen.
To cancel the protection
Display the images that are protected and press the 0
button.
Image overlay
Protecting images
IMAGE OVERLAY
RAW
RAW
RAW
RAW
RAW
RAW
RAW
BACK SET
x
0.3
x
0.1
x
0.3
IMAGE OVERLAY
BACK SET
i button
0 button
s0026_e_00_0_unified.book Page 87 Tuesday, September 29, 2009 10:30 AM