PV6088-F4E017
4. ASSEMBLING AND CABLING
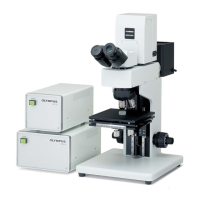
Assemble the unit and layout the wiring as shown in (Fig. 4):
1) Install the ocular body tube into the main unit. Fix it with a lateral screw.
Size of the fixture screw: M5
Hexagon wrench: 2.5 mm
2) Insert the eyepiece (MICRO SWH10×) into the tube at the right of the ocular
body tube.
3) Insert objective lenses (MPLFLN10× and MPLFLN20×) into the revolving
nosepiece of the main unit. In a measurement, you can rotate the revolving
nosepiece to place the lens you want to use into the near side.
Figure 4. Assembling and Cabling Diagram
Input voltage is configured to 100–120 V or 220–240 V, depending
on the shipment destination. There is a label indicating the voltage
setting on the back surface. Use this product within the voltage
range. Otherwise, there is a risk of damage or fire. Make sure to
contact our service department when you move it into a place
having a different voltage range.
 Loading...