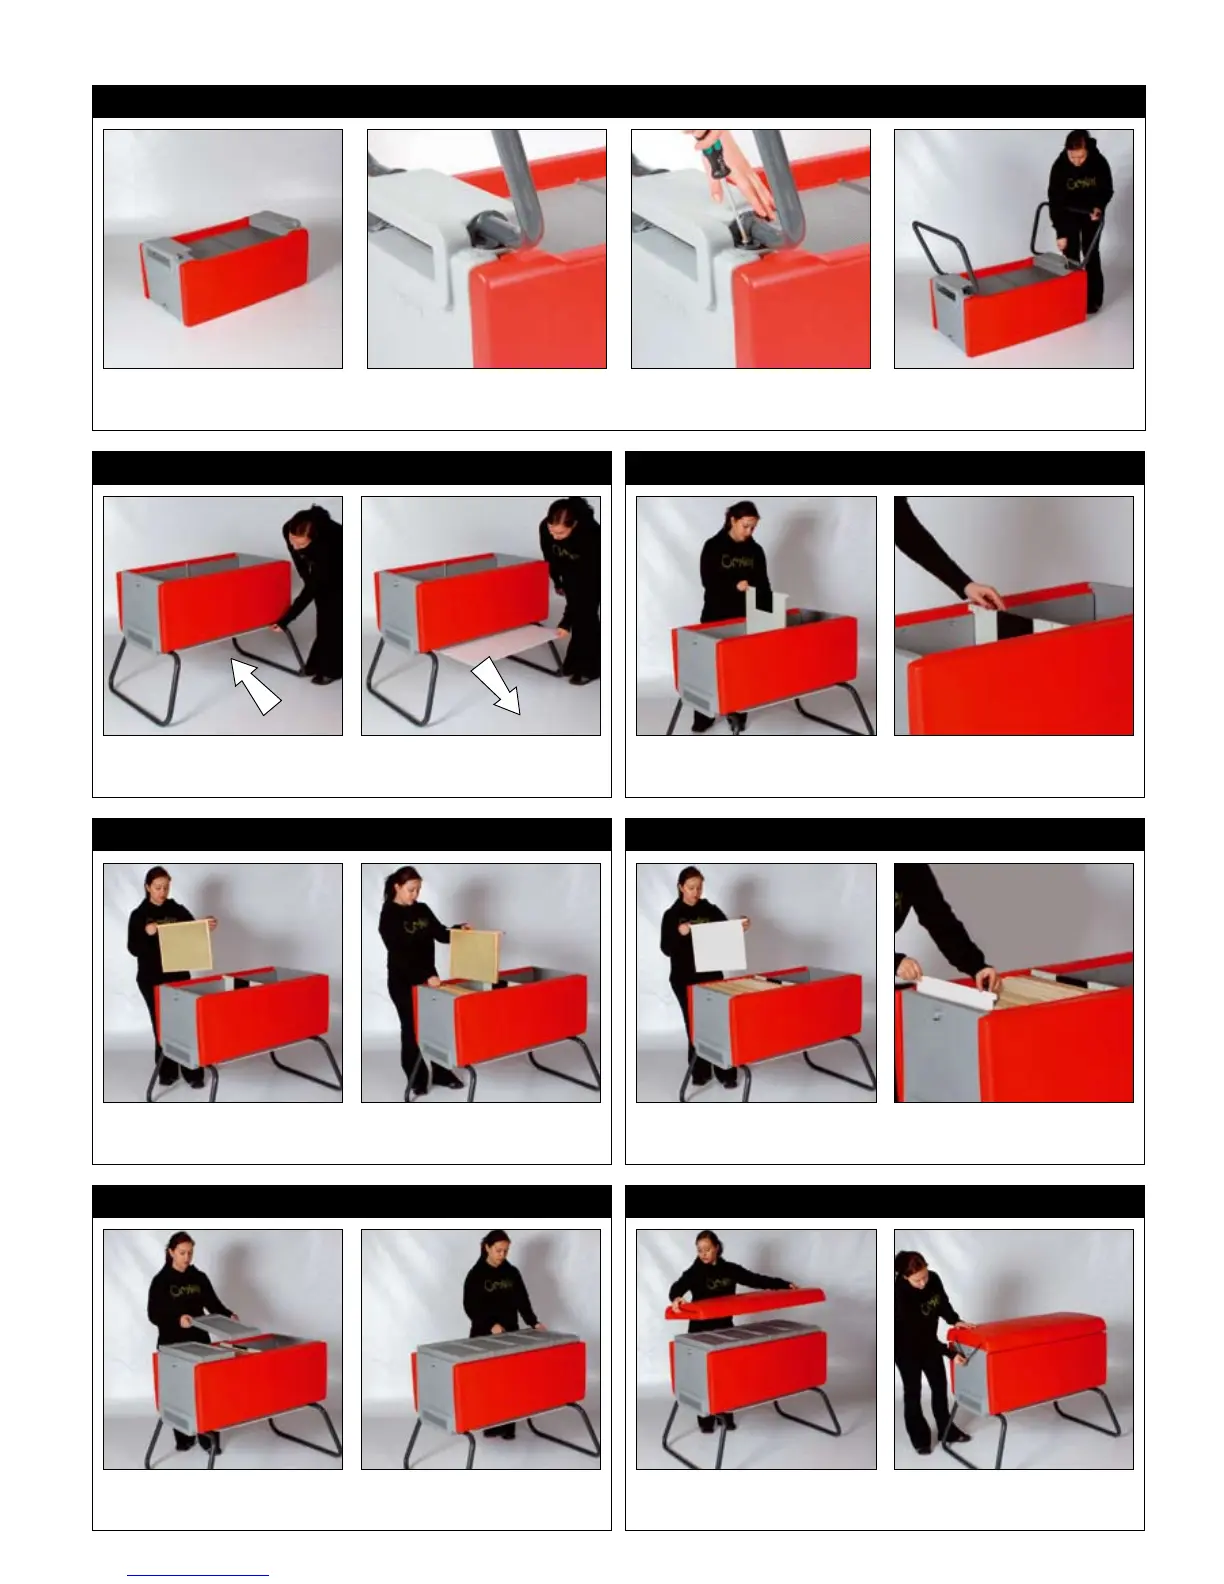
Assembly of your Beehaus
Step 1 - Attaching the legs
Bolt the legs into place using the bolts provided.
Repeat on both sides then turn the Beehaus upright.
Turn the empty Beehaus brood box upside down so the mesh faces
upward. Then line up the legs with the bolt holes.
Step 2 - Inserting the inspection tray
Slide the inspection tray on the ledge underneath the Beehaus. You
normally just leave this in for a week to monitor mite drop.
Step 4 - Inserting the brood frames
The assembled brood frames fit in the Beehaus like this.
Step 5 - Inserting the dummy board
The dummy board fits at the end of the brood frames. You use it
when you have more or less than a full set of frames.
Step 6 - Adding the cover boards
The cover boards sit on top of the brood box.
Step 7 - Adding the lid
Secure the lid by pulling the bungee cord down onto the knob.
Repeat at the opposite end.
Step 3 - Inserting the divider board
The divider fits in the middle of the Beehaus. The tabs fit over the
central rib on the side of the Beehaus.