Section 1 OUTLINE
1-14
OUTLINE
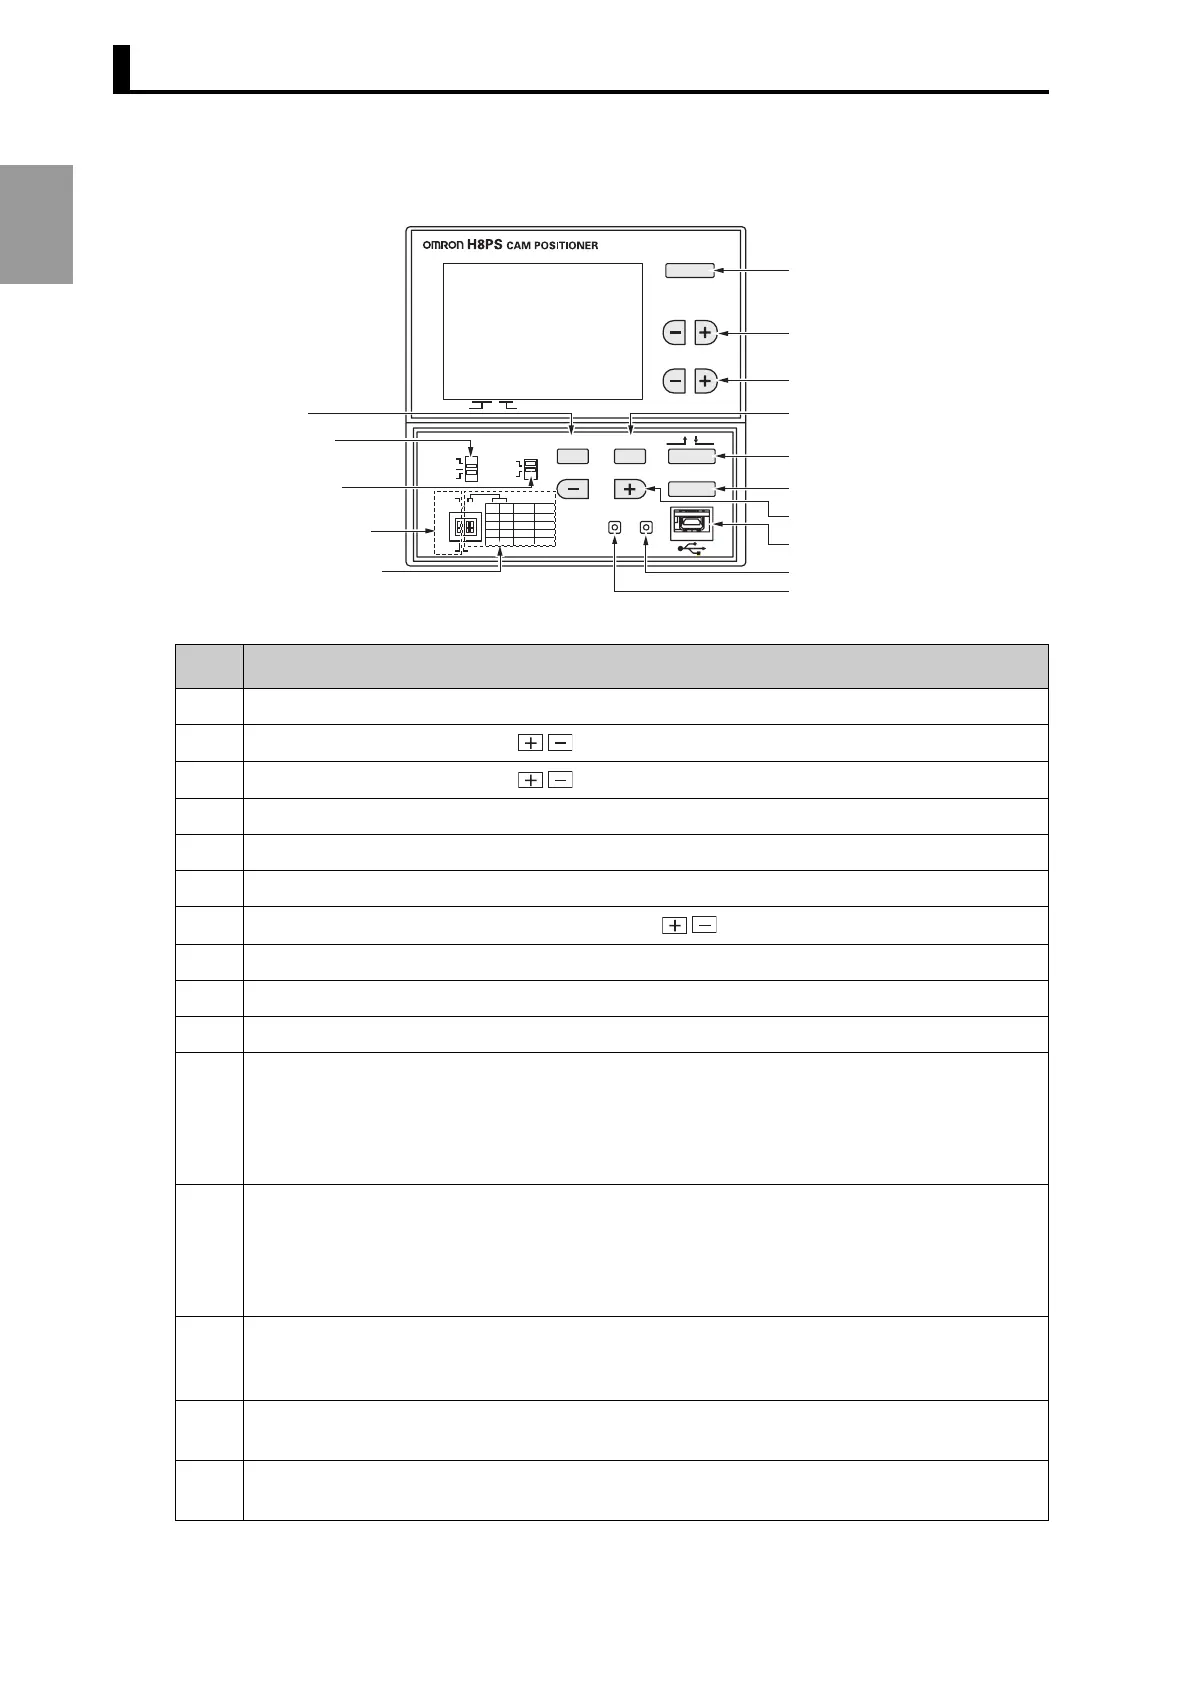
● Operation Buttons and Keys
1. CHECK key
2. CAM keys
3. STEP keys
5. ON/OFF key
6. WRITE key
7. ANGLE keys
9. CLEAR key
10. ORIGIN key
8. USB connector
4. BANK key
ON
OFF
OFF
ON
4321
OFF
OFF
ON
ON
OFF
ON
OFF
720 360
360360
360256
256256
ON
43
ORIGIN
CHECK
CAM
STEP
CLEAR
ANGLE
ADV
WRITE
DO NOT USE.
CW
CCW
PLS/R
ANG
DSPL
CAM
STEP
PRGM
TEST
RUN
TCH
MAN
BANK
13. Programming
mode switch
15. Encoder resolution
switch
12. Mode switch
14. Rotation direction
switch
11. ADV key
No. Description
1 Displays program details in Run Mode.
2
Selects the cam number with Keys.
3
Selects the step number with Keys.
4 Selects the bank number.
5 Selects the ON angle, or OFF angle.
6 Writes the set data to memory.
7
Changes the angle or other setting value with Keys.
8 USB communications are scheduled to be supported in the near future.
9 Moves to the screen for clearing settings.
10 Designates the current angle of the machine (Encoder) as the origin (0°).
11 Programming or Test Mode: Press to shift to the ADV function setting screen.
Programming Mode: Press and hold at least 3 s to shift to the Function Setting
Mode.
Run Mode: Press and hold at least 5 s to enable/disable the All Protec-
tion function.
12 Switches modes.
Programming Mode (PRGM):
Used to write cam programs, set the ADV function, etc.
Test Mode (TEST): Used to modify settings while the Encoder is running.
Run Mode (RUN): Used for normal operation and to check the cam program.
13 Select the method used for programming cams.
Teaching: ON/OFF Angles can be set based on actual machine (Encoder) operation.
Manual: ANGLE Keys can be used to set ON/OFF angles.
14 Sets the H8PS rotation direction (rotation display monitor, etc.) to the machine (Encoder)
rotation direction.
15 Sets the resolution of the connected Encoder.
Also sets the unit for angle display when using an Encoder with a resolution of 256.