Section 3 HOW TO USE THE BASIC FUNCTIONS
3-4
HOW TO USE THE
BASIC FUNCTIONS
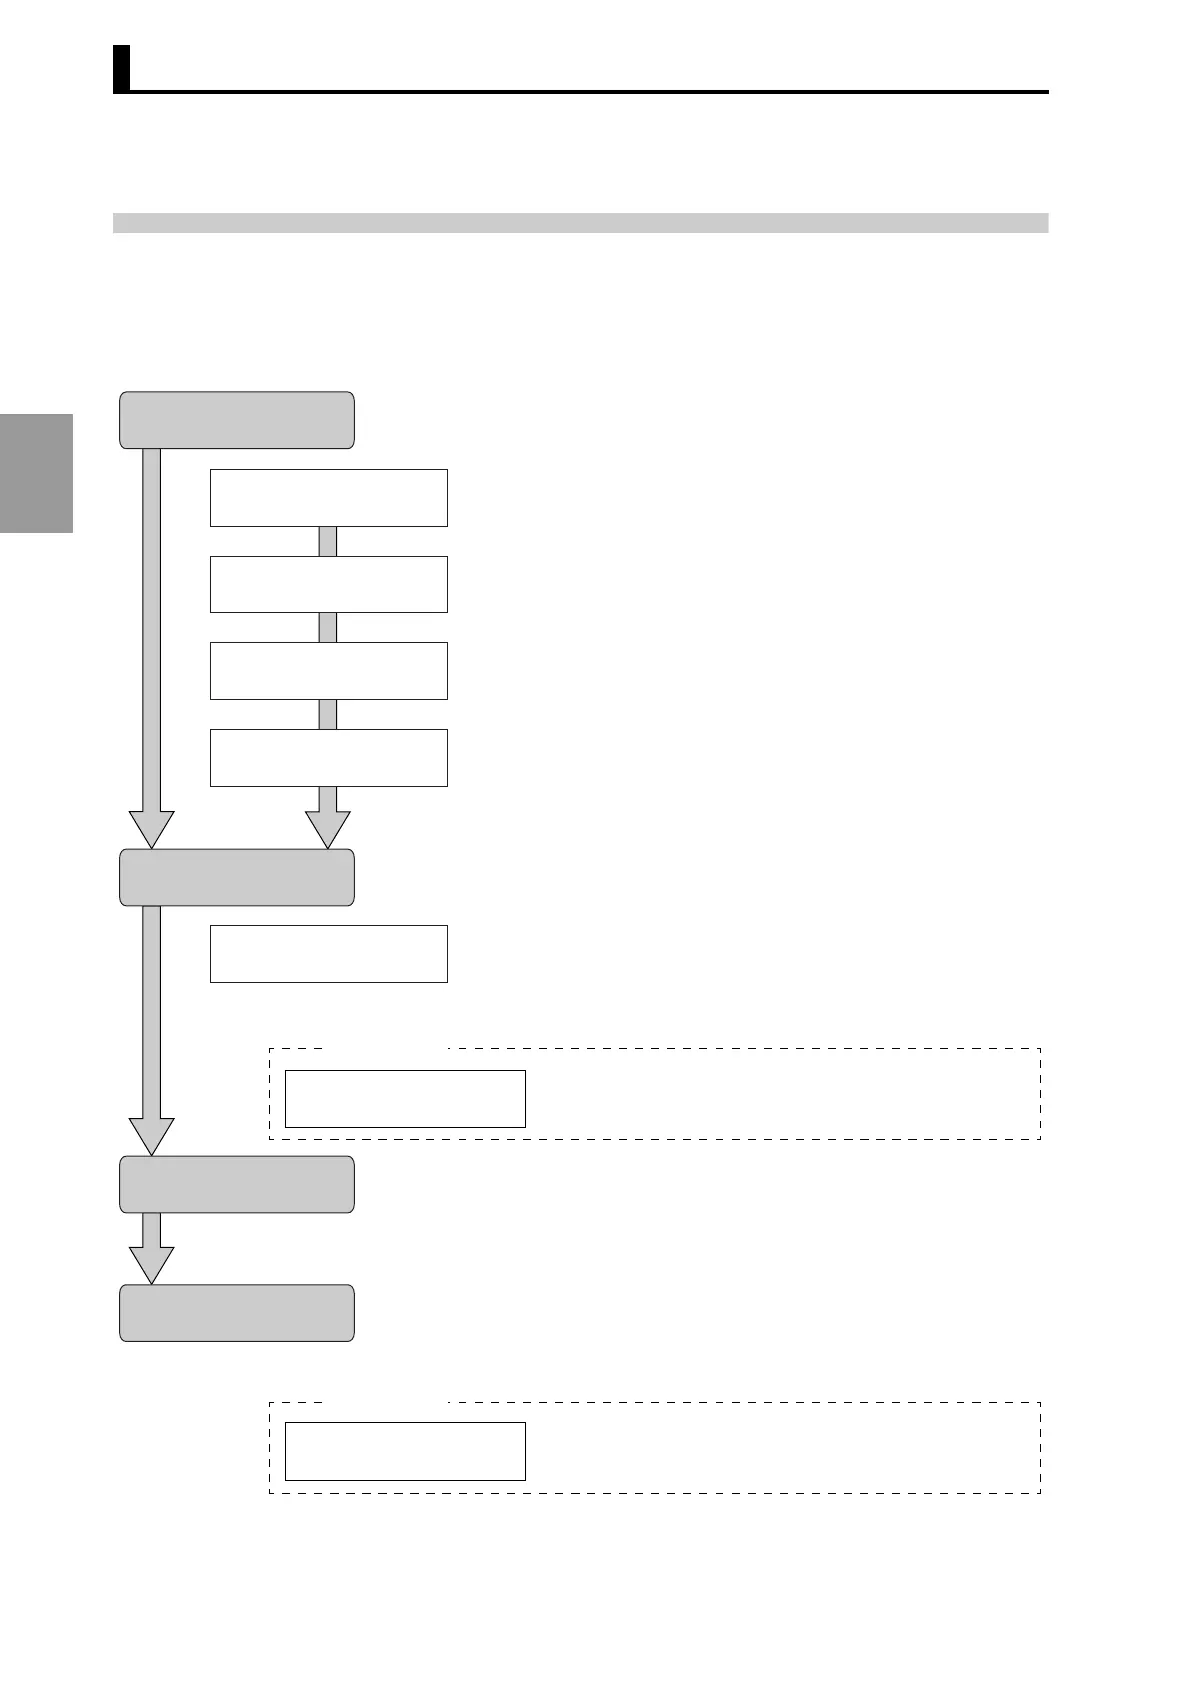
3.2 Preparatory Steps before Starting Operation
The steps to be followed before starting the operation of the H8PS Cam Positioner are explained
below.
(The steps described below are a series of preparatory steps before starting H8PS Cam Positioner
operation under the default settings.)
Initial setting
Programming Cams
(Programming Mode)
Checking Timing (Test Mode)
Operation (Run Mode)
Selecting the Encoder
Setting the rotation direction
Turning the power on
Setting the origin
Setting ON/OFF angles
Set the initial status data to use the H8PS Cam Positioner.
Select the resolution of the Encoder to be connected.
(Refer to "3.3.1 Selecting the Encoder Resolution".)
Set the rotation direction (forward/reverse) of the Encoder.
(Refer to "3.3.2 Setting the Rotation Direction".)
The DIP switch settings become effective when the power is turned on.
The operational steps below should be performed with the power on.
Set the origin of the machine (Encoder).
(Refer to "3.4 Setting the Origin".)
Program cams.
• Input angle values directly using the ANGLE keys.
(Refer to "3.5.1 Setting the ON/OFF Angles in the Manual Mode (Key
Input)".)
• Set angles in teaching operation.
(Refer to "3.5.2 Setting the ON/OFF Angles in the Teach Mode".)
Perform test operation to check the operation timing.
(Refer to "3.6 Checking the Operation Timing".)
Note: With 16-/32-output models, the start input must be turned on.
(Cam output will not turn on unless the start input is turned on.)
Start the operation.
(Refer to "3.7 Operation".)
Note: With 16-/32-output models, the start input must be turned on.
(Cam output will not turn on unless the start input is turned on.)
If necessary:
Clearing the settings
Clear the set data.
(Refer to "3.8 Clearing the Settings".)
If necessary:
Checking the ON/OFF angles
settings
Check the set data (Run mode).
(Refer to "3.9 Checking the Settings in the Run Mode".)