OP4200 User Manual OPAL-RT Technologies 13
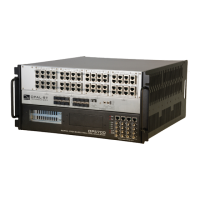
OP4200 Hardware
General Cabling Instructions
HARDWARE INSTALLATION
BASIC INSTALLATION
Follow this simple installation procedure. Make sure to respect proper grounding,
1. Place the OP4200 on a shelf or desktop.
2. Connect the power cable to the nearest power outlet
3. If using in high risk tests or environment, connect the ground screw as described in the
“Connecting Network Cable” section below
4. Connect the RJ45 cable from the OP4200 to a network jack.
OPAL-RT strongly recommends the use of anti-static wrist straps whenever handling any electronic
device provided by OPAL-RT. Damage resulting from electrostatic charges will not be covered by the
manufacturer’s warranty.
Disconnect power before servicing.
The OP4200 may be subjected to EMI when installed in proximity to other devices. Make sure to
connect the OP4200 to the nearest ground to prevent any EMI related damage to the simulator.
GENERAL CABLING INSTRUCTIONS
The OP4200 provides a number of connectors that each allow users a specific interaction with the
unit. Some connections are necessary to operate the OP4200, while others provide optional features
and interactions. This section presents the necessary connections first, then provides instructions for
optional connections.
Connect the Power Cable
The power cable is connected to the OP4200 using a special adaptor (OP5972).
3
1
2
POWER LED
Figure 3: Connecting the power cable
1. Press the power adapter box firmly into the phoenix connector on the OP4200
2. Insert power supply connector into adapter box, as shown.
3. Plug power cable into appropriate source (outlet).
Do not insert the power cord into the Vuser 24V output (square connector
on OP5972 power jack adapter). This may damage all connected devices.
Make sure to insert the power cord connector into the round connector on
the power jack adapter
Power input connector
Vuser 24V
output
connector