48 3600 Analyzer for O
2
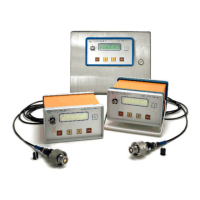
Measurement—Operator’s Manual
3600O2.OM.E9903
10–30 VDC Power Input
Connect the 10–30 VDC versions of wall mount instruments in a similar fashion
as the AC-powered versions, above. Insert the power cable through the rightmost
waterproof cable gland, and wire according to the label inside the cabinet.
2.1.2.3 Electrical Signal Connections
Wall mount instruments connections use the LEMO connectors and stainless steel
watertight glands at the bottom of the instrument housing (see wall mount
instrument bottom view illustration in section 2.1.2.1).
Connections from the instrument to the oxygen sensor and the external pressure
sensor use the LEMO receptacles on the bottom of the instrument housing.
Connections for RS-232, recorder (analog) output, and alarm relays use the
stainless steel watertight glands at the bottom of the instrument housing. These
connections must be hard-wired to a terminal block on a printed circuit board,
located at the rear of the instrument, within the wall mount housing. A wiring
diagram label inside the housing identifies each unit’s terminal strip connections.
To access this board, unlock the front panel of the wall mount unit with the key
provided to expose the instrument electronics inside.
Make to disconnect power to the instrument before opening the front
panel.
The connection board, number 1127.901 (this part number is printed on the lower
edge of the card), contains the terminal block connections and a terminal block pin
wiring label.
Connection board 1127.901, showing location of terminal blocks J5, J6, and J7
Instructions for wiring the analog recorder, alarms, and RS-232 outputs through
the cable glands are in section 2.1.7, Cable Gland Wiring Instructions.
Requirements for these user-supplied cables are in section 2.1.5, User-supplied
Cabling Requirements. Note that you must ground each cable shield properly to
assure proper operation.
2.1.3 Portable Instrument Installation
2.1.3.1 Instrument Mounting
Series 3600 portable instruments require no permanent mounting or installation.
Locate the instrument near the power source and the sensors.
2.1.3.2 Power Input
In accordance with safety standard EN 61010-1, it must be possible to disconnect
the power supply of a 3600 instrument in its immediate vicinity.
While the instrument’s electronics are well shielded, it is still advisable to locate
the instrument as far as possible from any source of electromagnetic perturbation.
AC Power Input
AC power connections for portable instruments use a standard detachable cable
on the rear panel of the instrument.
 Loading...