Issue: 1.2-17-2 Ovation Systems Ltd Page 14
www.ovation.co.uk
3.6 Make a Recording
1. Configure the unit as needed using the Wizard. See section 4 on page 15
2. Check the DVR Status LED is showing green and the Video Status LED is static or
flashing green. This indicates the unit has a good video input and the SD card is ready to
accept data. If these LEDs are not showing green, please refer to Section 3.5 above.
3. To start recording, press the record switch (or connect external “Control Input 1” to
ground). Once recording, the DVR status LED flashes green.
TIP► FlashBack-4 can be configured by the Wizard to fill the SD card and then stop, or
loop around the card. (see Section 4 on page 15).
4. To stop recording, press the blue [Stop] button (or open “Control Input 1”). The record
file is closed, indicated by fast flashing green, and the card is ready to be removed as
soon as the DVR Status LED reverts to static green.
5. Once the above is complete, the card may be removed and placed into a card reader for
viewing. See Section 5, page 17.
3.7 Switching Off
Press and hold the blue [Stop] button for 5 seconds, until the unit enters its low power mode
and all the LEDs go out.
NB► When the unit is off with DC power connected, the DVR Status LED briefly flickers
green every 7 seconds indicating the unit is in low power mode ready to wake up on
timers or triggers.
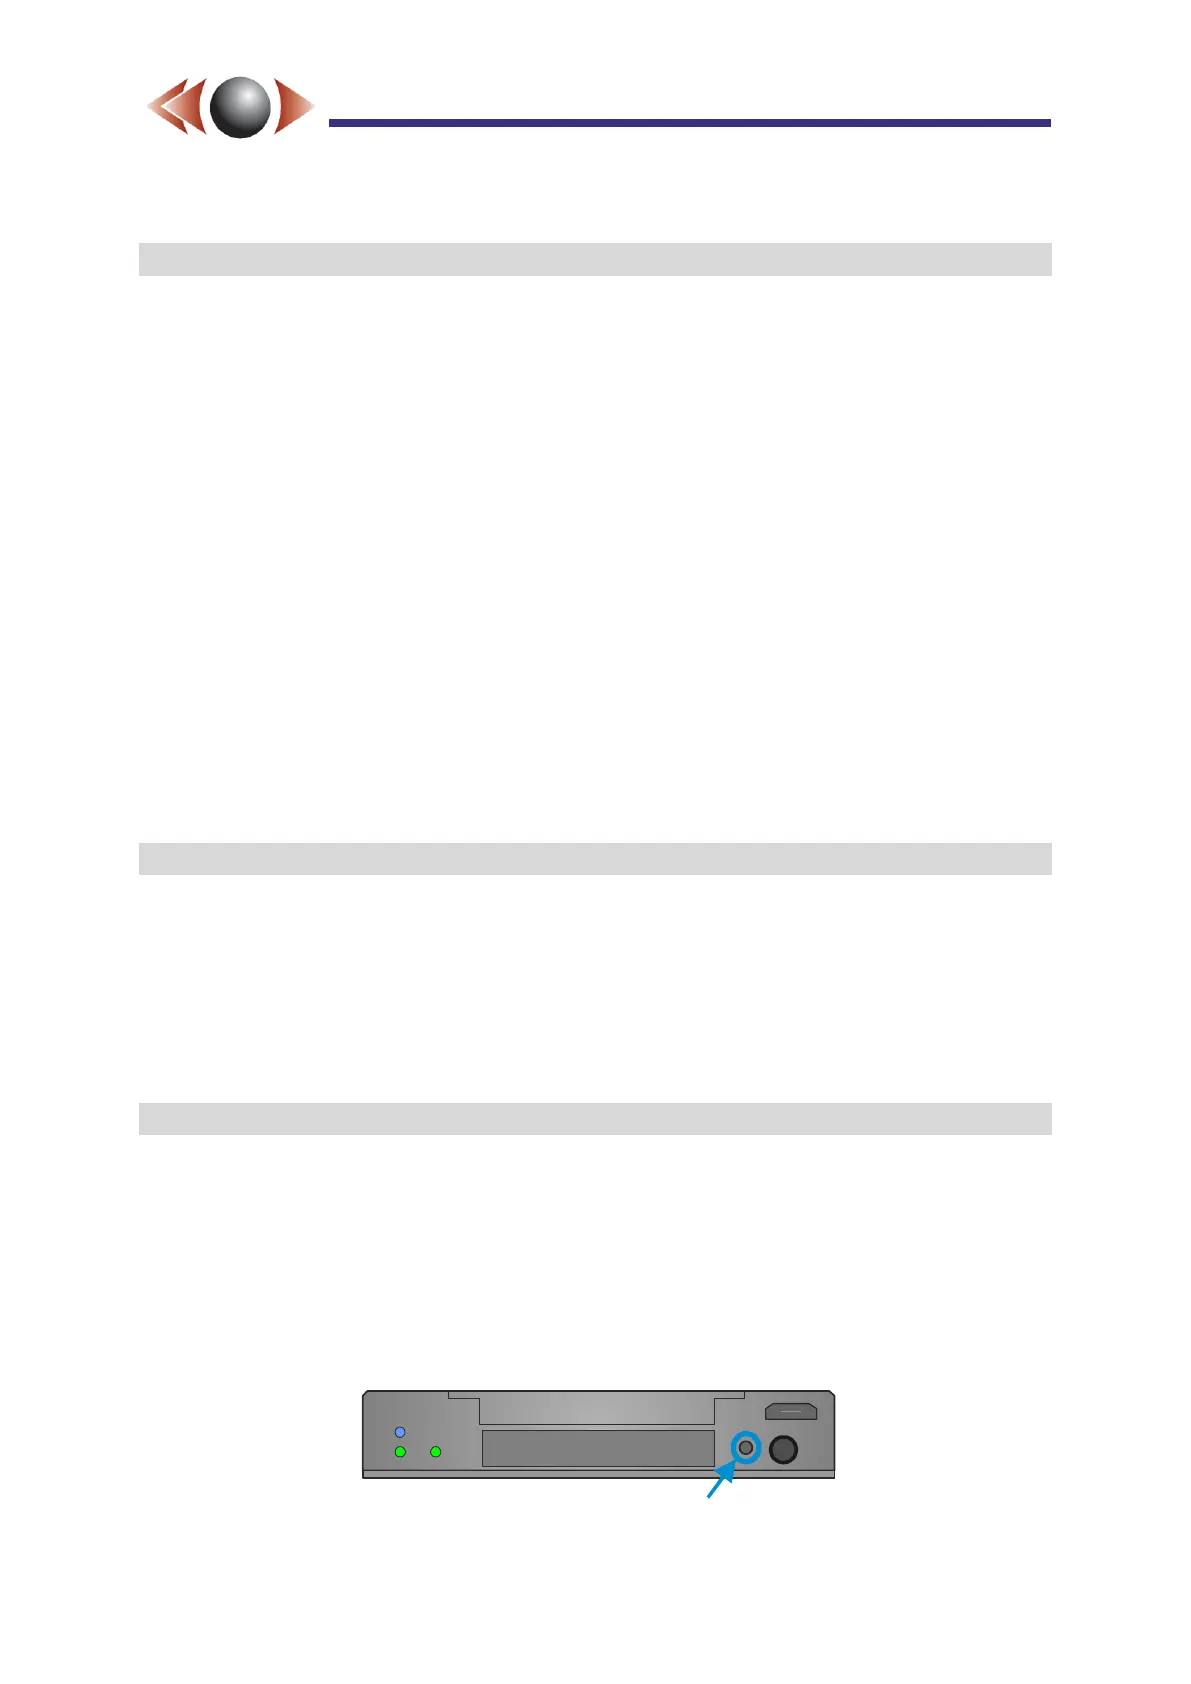
3.8 Reset to Defaults
The unit can be re-set to factory defaults with the following procedure:
1. Switch off the unit by holding the blue [Stop] button until the LEDs go out.
2. Remove the SD card.
3. Depress the format / reset button (see below).
4. The unit starts booting. Once booted, the FB4 performs a reset to defaults, which takes
up to a further 10 seconds.
5. The unit can now be configured as required using the Wizard.
Format / reset to defaults button