4.Quick Start
⑤
RS232 port
Through this interface, the generator can be connected to
a PC and controlled via PC software.
⑥
⑦
Use the specified fuse according to the voltage scale.
⑧
Switch between 110V and 220V.
⑨
Through this interface, the generator can be connected to
your local network and controlled via PC software.
⑩
USB Host port Connect as a "host device" with an external USB device,
such as connect a USB disk to the instrument.
⑪
Connect as a "slave device" with an external device, such
as connected to a PC and controlled via PC software.
⑫
Connect the generator with the logic signal output module
(optional). Then, configure specific sequence digital signal
in the generator and output the signal through the digital
module.
User Interface
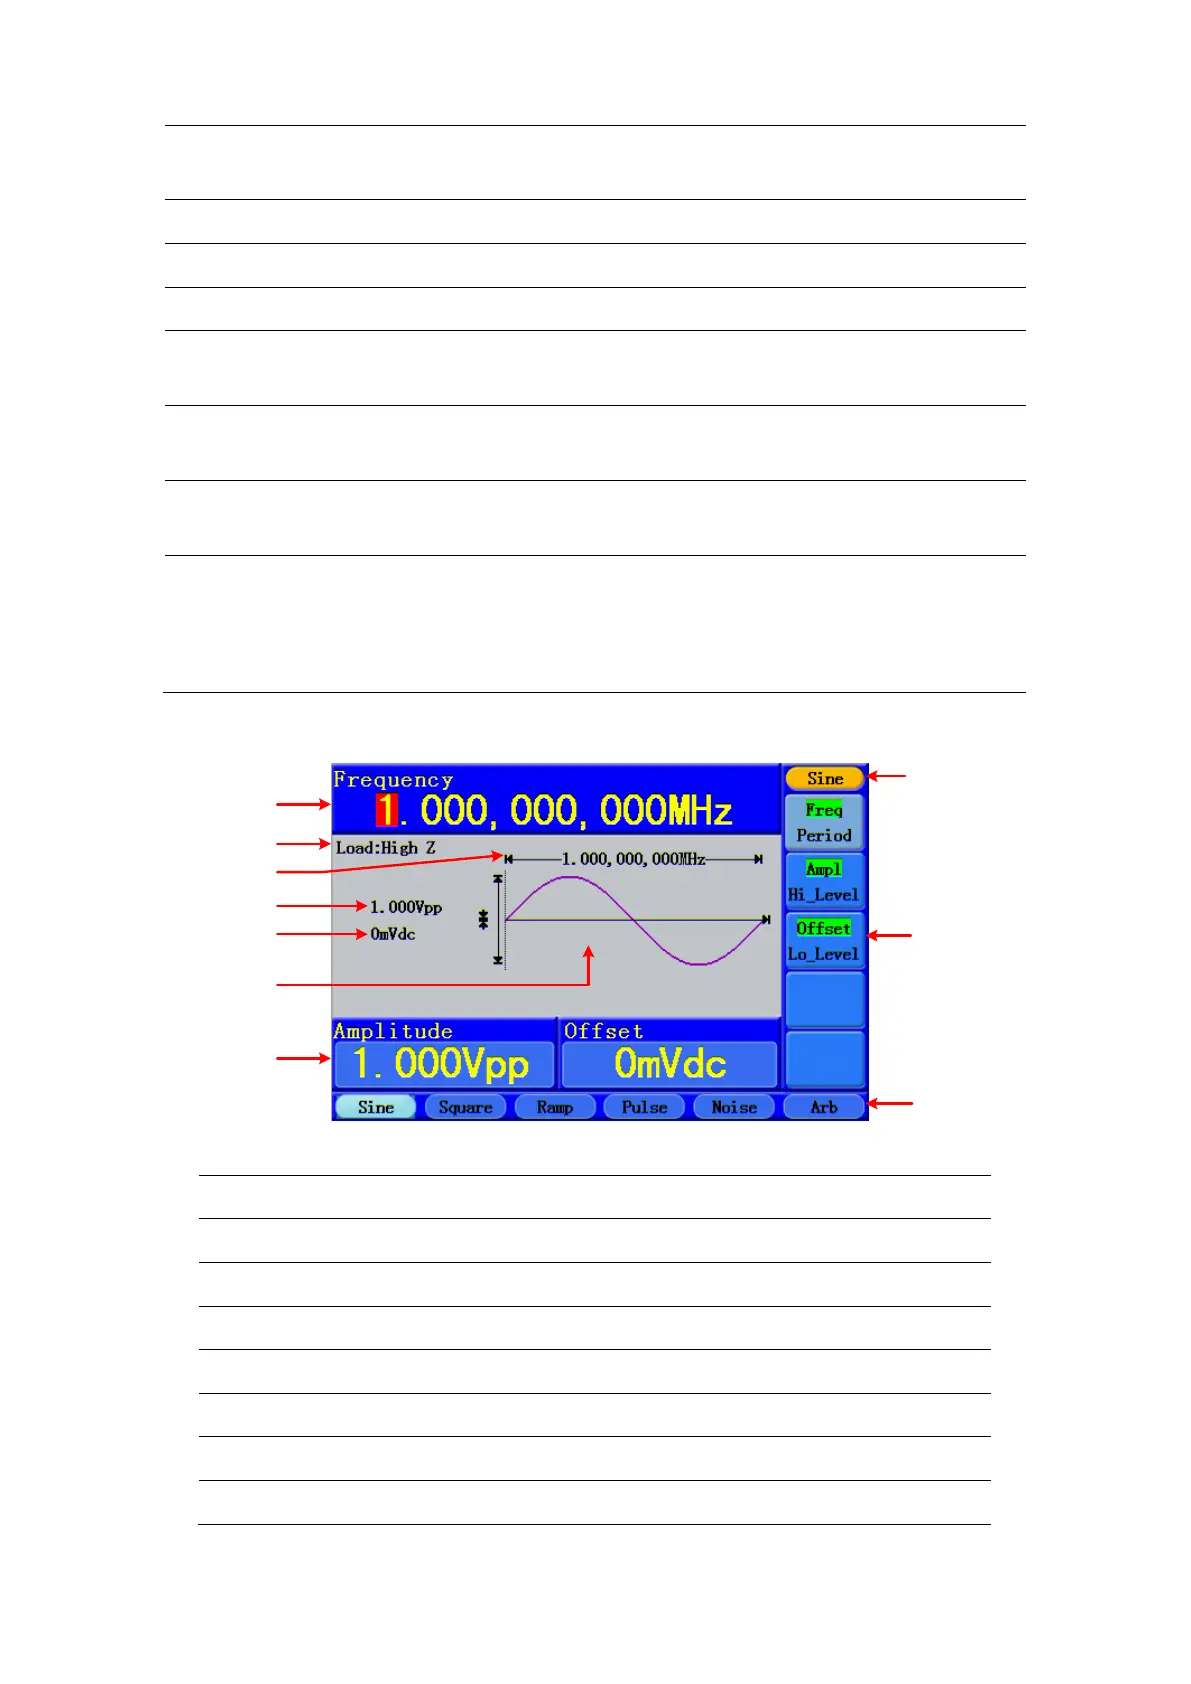
Figure 4-3 User interface (take Sine for instance)
①
Parameter bar 1, display parameters and edit the focused parameter
Load, High Z represents high resistance
Frequency/period, depends on the highlighted menu item on the right
Amplitude/high level, depends on the highlighted menu item on the right
Offset/low level, depends on the highlighted menu item on the right
Parameter bar 2, display parameters and edit the focused parameter
Current signal type or mode
7