43
12.1.7.1 Wire Stripping and Connection Requirement
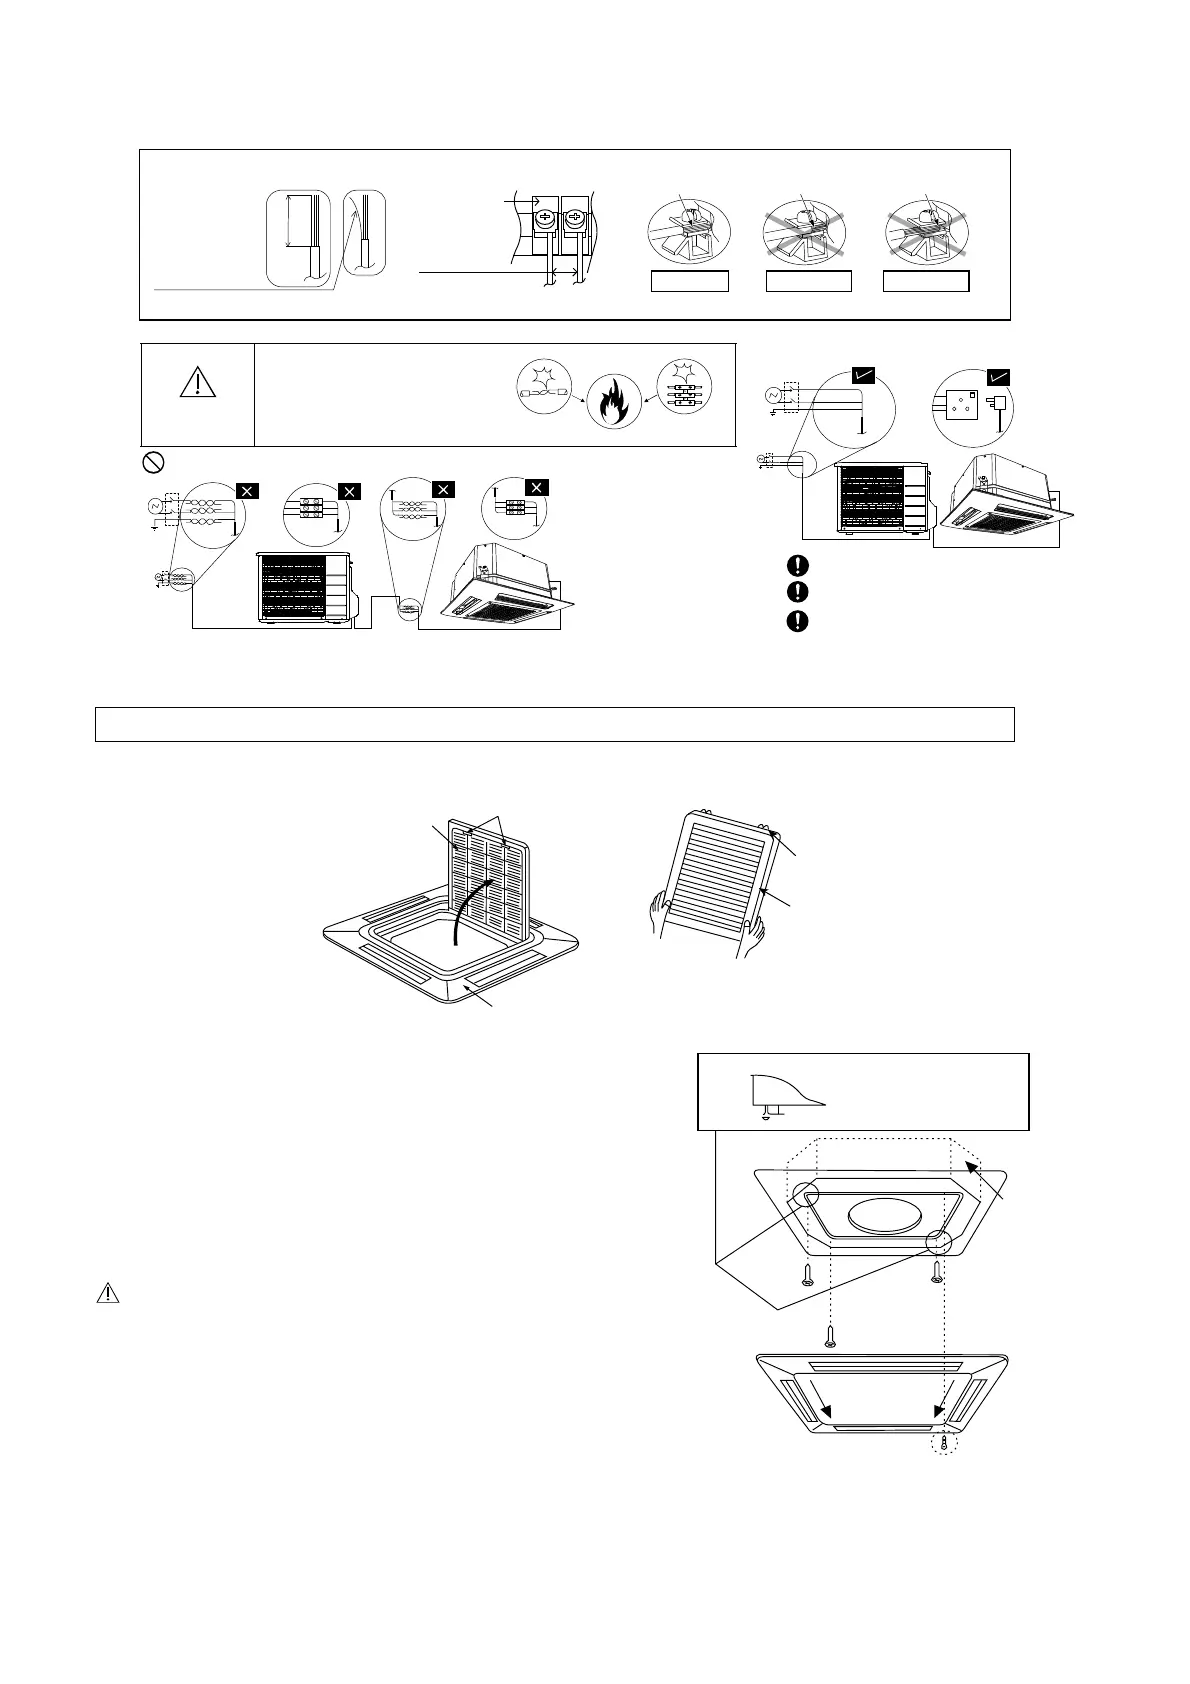
12.1.8 Installation of Decorative Panel
The decorative panel has its installation direction. Confirm the direction by displaying the piping side.
1 Remove the air inlet grille by moving the catchers to center.
2 Fitting the decorative panel
o Temporarily secure the fixing screws
(3 pcs.) before fitting the decorative
panel. (For temporarily securing the front
grille.)
o Place decorative panel on the screws
(3 pcs.) before fitting, move decorative
panel as illustrated and tighten all the
screws (4 pcs.).
Check before hand the height from the ceiling to
the unit.
The front grille fitting direction is determined by
the unit direction.
Only use the screws with the length of 35mm
which is provided, to fix the decorative panel.
Do not use other screw which is longer it may
cause damage to the drain-pan and other
components.
WARNING
RISK OF FIRE
JOINING OF WIRES M AY CAUSE
OVERHE ATING AND FIRE.
Do not joint wires
OR
OR
Use complete wire without joining.
Use approved socket and plug with earth pin.
Wire connection in this area must follow to
national wirin
rules.
OR
Wire stripping
No loose strand
when inserted
10 ± 1 mm
5 mm
or more
Indoor/outdoor
connection
terminal
board
(gap between wires)
Conductor
over inserted
Conductor
fully inserted
Conductor not
fully inserted
ACCEPT PROHIBITED PROHIBITED
* Hang the hinge on the hole of
decorative panel. (The direction of
the installation is free.)
Hinge
Air inlet grill
Air inlet grill
tc
Decorative panel
CAUTION
Front grille fixing
screws (4 pcs.)
Securing the tentative
fixing screw
Approx. 20mm
Decorative
Panel moving
direction
Piping
direction
Tighten this
screw first
after hanging the
grille frame
 Loading...