44
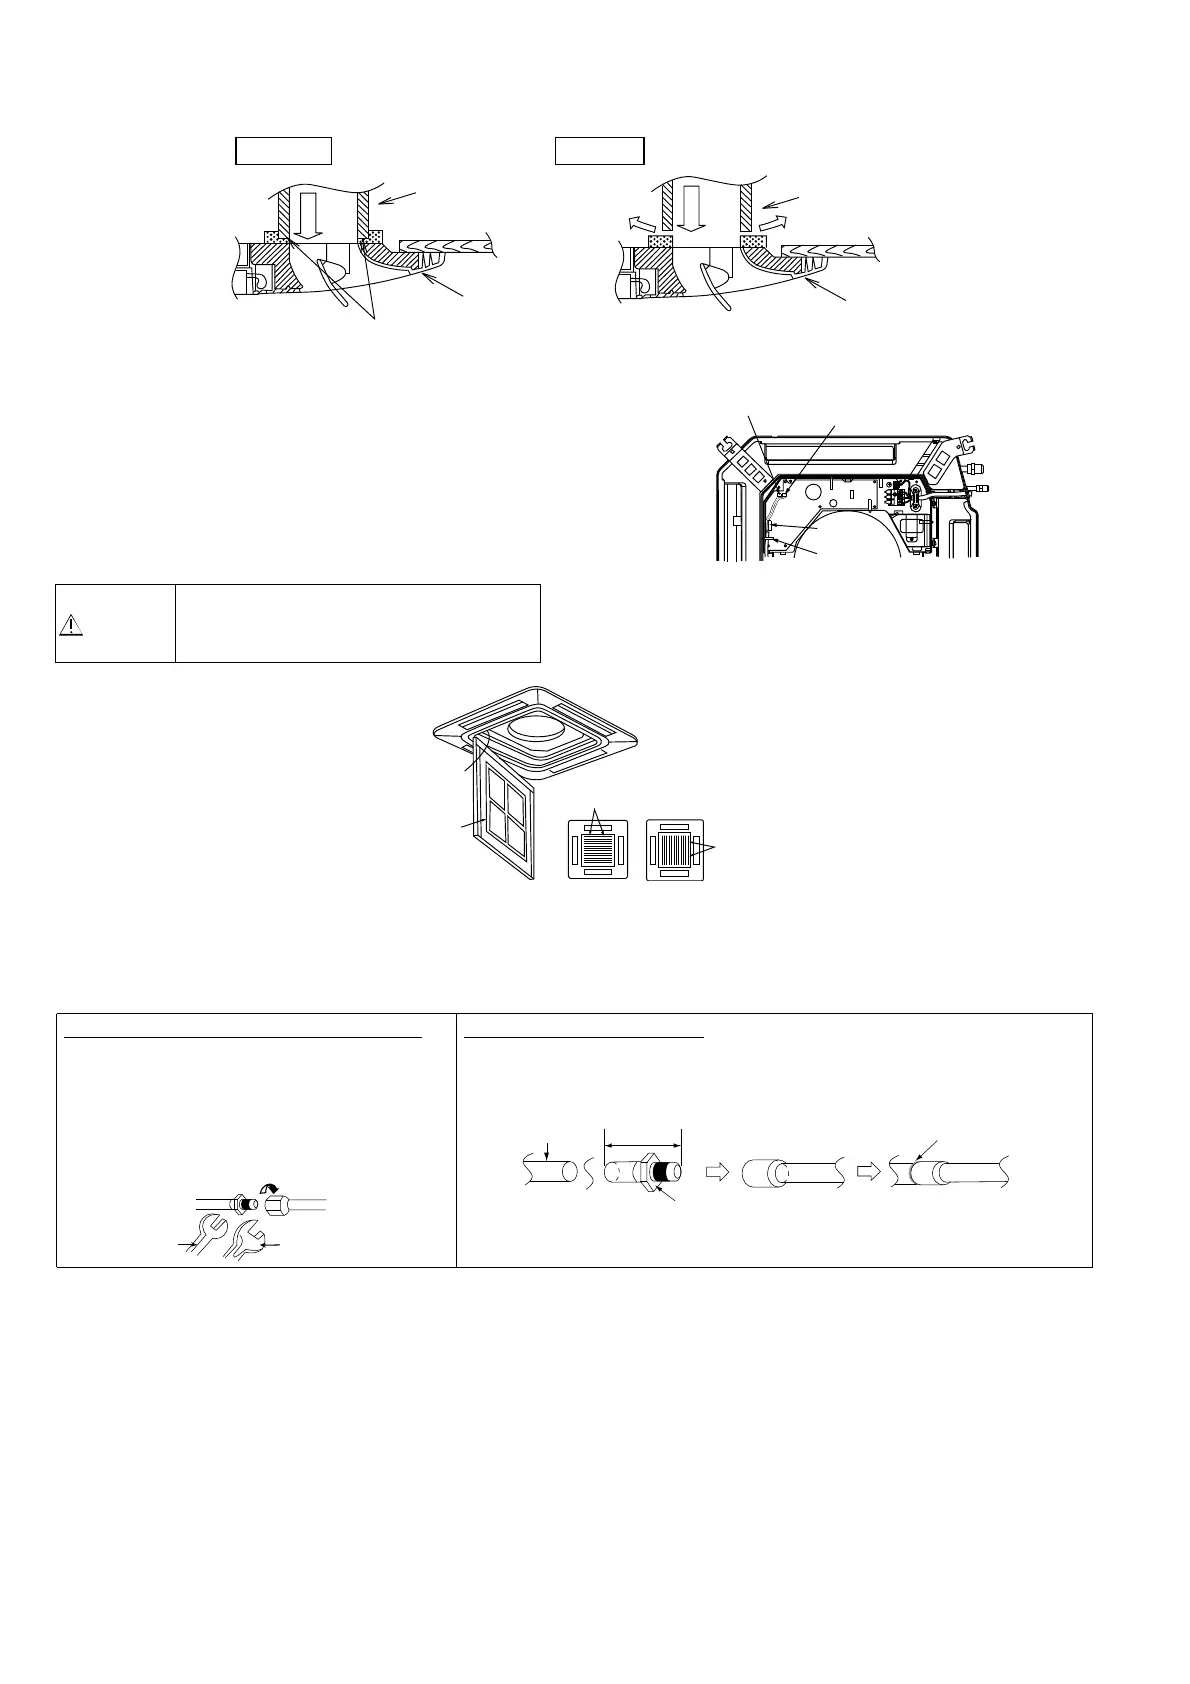
3 Fit the decorative panel and ceiling wall together and confirm no gap in between. Readjust indoor unit height,
if there is a gap between ceiling wall and decorative panel.
4 Open the indoor control box cover. (2 pcs)
5 Insert firmly the connector of cosmetic louver
to indoor pcb CN-STM1, CN-STM2 and
CN-DISP.
Be caution not to clamp the cord in between
control board and control board cover.
6 After complete, install back removed part
follow opposite procedure.
Be sure to hook the air inlet grill string,
to prevent grill from falling and causing
injury from it.
12.1.9 Connect the Piping
12.1.9.1 Connecting The Piping to Indoor
12.1.9.2 Connecting The Piping to Outdoor
Decide piping length and then cut by using pipe cutter. Remove burrs from cut edge. Make flare after inserting the
flare nut (locate at valve) onto the copper pipe. Align center of piping to valve and then tighten with torque wrench to
the specified torque as stated in the table.
Good example
Cool air leakage
(no good)
Air
Air conditioner
unit
Decorative
panel
Ceiling
Air conditioner
unit
Decorative
panel
Fit the insulator (this part) and
be careful for cool air leakage.
Ceiling
Air
Bad example
Warning
CN-STM1
-
Clamp lead
wire with band
here
CN-DISP
Hang the
string
Catcher
Catche
Air inlet grille
For connection joint of all model (except R32 model)
Please make flare after inserting flare nut (locate at joint
portion of tube assembly) onto the copper pipe. (In case
of using long piping)
Connect the piping
•
Align the center of piping and sufficiently tighten the
flare nut with fingers.
•
Further tighten the flare nut with torque wrench in
specified torque as stated in the table.
Torque wrench
Spanner or
Wrench
For connection joint of R32 models
•
Decide the length.
•
Cut and remove the tube connectors at indoor copper pipings (both gas and liquid
piping) by using pipe cutter. Remove burrs from cut edge.
•
Use pipe expander to expand the end of long piping.
•
Align the center of piping and braze the piping joints.
Indoor copper pipe
Tube connector
(40~50mm)
Brazing point
1. Cut and Remove2. 2. Expand long pipe3
3. Braze both pipe
•
Braze the piping joints carefully so that the indoor unit is not damaged by brazing flame
If necessary, cover with wet clothes to prevent parts unintentionally overburnt.
 Loading...