8-24
8
8-18. CZ-RWSC2
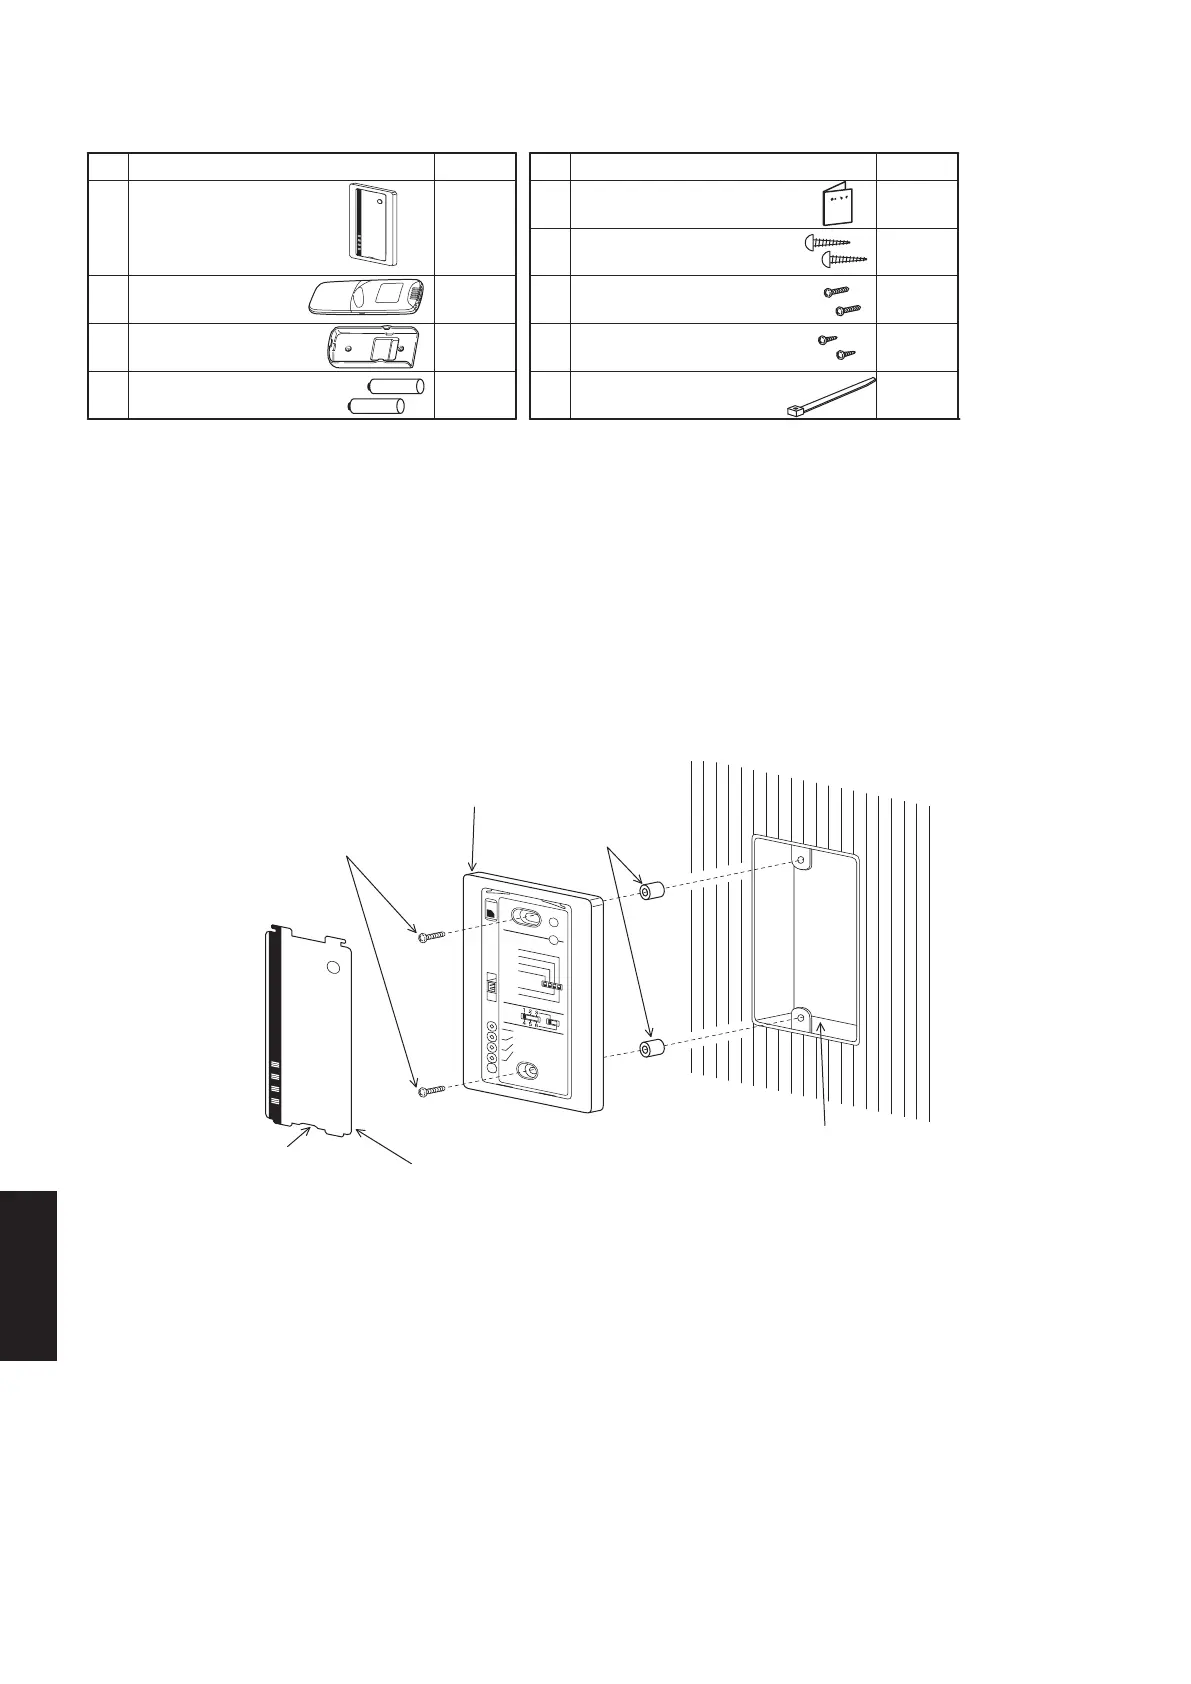
1. Accessories
2. Installing the Receiver
When using a separately installed receiver as a built-in model, install it to the JIS switch box (field supply) shown
in the diagram on the right, which has been built into the wall on site in advance.
(1) Remove the face plate of the receiver by slipping a slotted screwdriver or the like into the cutout on the bottom.
(2) Install the receiver with the 2 enclosed small M4 screws.
(3) Connect the receiver’s wiring (2 cores) with the wiring from the indoor unit. (Refer to the chapter on wiring the receiver)
When wiring receivers, be sure to double-check the terminal numbers of the indoor unit before connecting them so
there are no mistakes in the wiring. (Damage will occur if high voltage [e.g. supply voltage] is applied)
(4) Attach the face plate.
Fig. 8-24
1
Receiver
(Enclosed 200 mm wiring)
1
2
Remote Control
1
3
Remote Control Holder
1
4
2Dry-cell Batteries
1Users Manual4
5 Truss Self-Tapping Screws
4 X 16
2
6
Small screw
2
7
Wood screw
2
8
Cable tie
1
M4 X 25 Small screws (2)
Receiver Unit
Spacers
Single outlet switch box (no cover)
Face Plate
Cutout
No. Accessories Quantity No. Accessories Quantity
Sec8.indd24 2012/02/2816:14:02
SM830231-02Single欧州.indb24SM830231-02Single欧州.indb24 2014/09/0921:22:242014/09/0921:22:24

 Loading...


