30
RQT9272
Notes
When timer recording starts while recording from an external
device, timer recording takes priority and recording from the
external device stops.
If video is copied from another piece of equipment to this unit,
then the video quality will be degraded.
Recording from an External Device
Preparation:
Press [DRIVE SELECT] to select the HDD or DVD drive.
Press [REC MODE] to select the recording mode
( 26).
To reduce noise in input from a video cassette
recorder, set “Input NR” to “On” in the on-screen
display ( 63).
SELECT
INPUT
to select the input where
your external device is connected.
– Front panel inputs are AV3.
Start play on the external device.
at the point you want to
start recording to the disc.
Recording from a VCR, etc.
[HDD] [RAM] [-R] [-RW‹V›] [+R] [+RW]
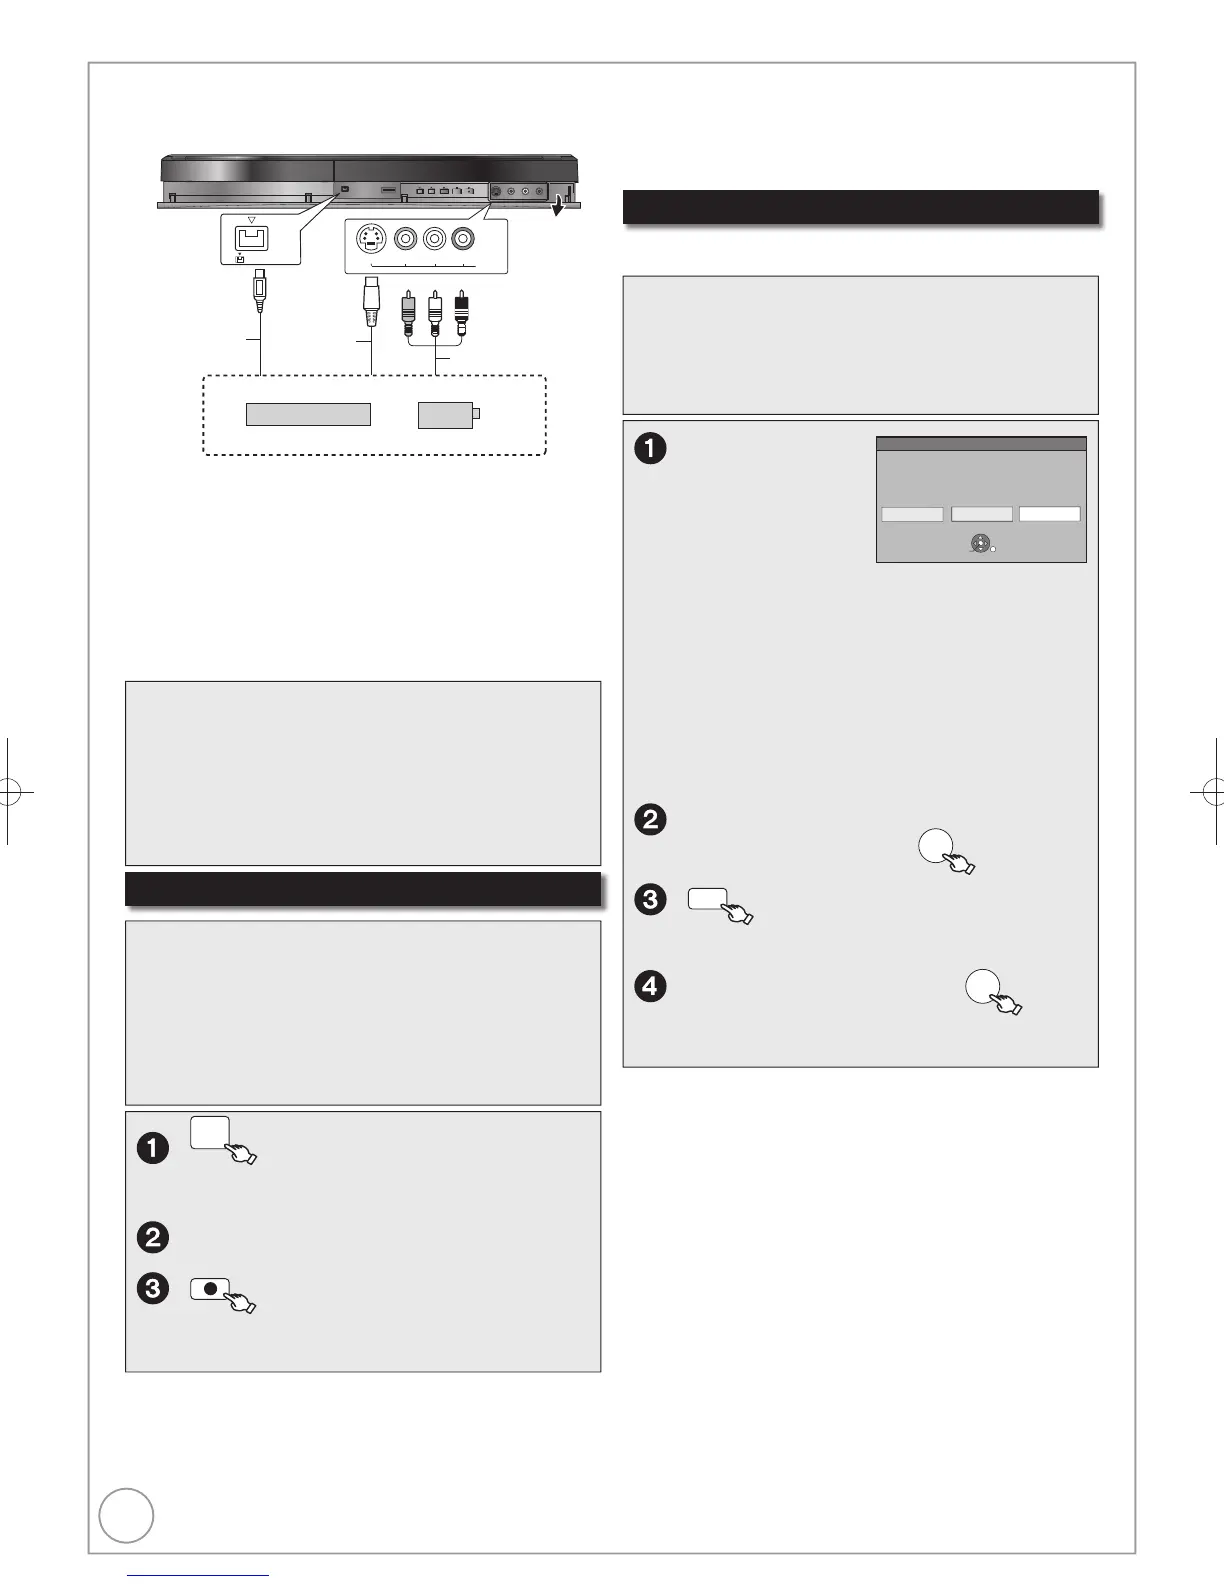
Turn off the unit and other video equipment before connecting.
1
You can get a sharper, clearer picture by connecting with an S Video
cable instead of the yellow video cable.
2
Connect to terminals of the same colour.
If the audio output of the external device is monaural, connect to L/
MONO on the AV3 input terminals at the front.
L/MONO - AUDIO- R
VIDEO
S VIDEO
DV IN
AV3 IN
This unit
S Video
1
cable
Audio/video cable
2
Other video equipment
Connect to Audio/Video output terminals.
4-pin DV cable
Preparation:
When the output signal from the external device is
NTSC, change the “TV System” to “NTSC” in the
Setup menu ( 71).
This unit cannot record NTSC signals to discs that
already have PAL signal recordings. (However, both
types of programmes can be recorded onto the HDD.)
Notes
Almost all videos and DVD-Video on sale have been treated to
prevent illegal copying. Any software that has been so treated
cannot be recorded using this unit.
Tips
To skip unwanted parts
Press [] to pause recording. (Press again to restart recording.)
To stop recording
Press [].
Using Flexible Recording ( 28), you can record the content of
a video cassette (approx. 1–8 hours) to a 4.7 GB disc with the
best possible quality of recording without wasting disc space.
DV Auto Rec
Rec to HDD Rec to DVD Cancel
DV unit is connected.
Record from the DV unit?
OK
RETURN
SELECT
Turn on the
DV equipment
and pause
play at the
point you want
to start recording.
“DV Auto Rec” screen may appear.
When “DV Auto Rec” screen does not appear
Perform steps .
1. Press [DRIVE SELECT] to select the HDD or DVD drive.
2. Press [FUNCTION MENU].
3. Press [, ] to select “Others”, then press [OK].
4. Press [, ] to select “DV Auto Rec”, then press [OK].
You can proceed to step .
, to select “Rec to HDD” or
“Rec to DVD”, then
REC MODE
to select the recording
mode ( 26).
to select “Rec”, then
OK
Recording from a DV Camcorder
Preparation:
1 Turn off the main unit and DV equipment, then
connect the equipment with the unit’s DV input
terminal ( left).
2 Turn on the main unit.
[HDD] [RAM] Programmes are recorded as a single item; breaks in the
images create chapters and playlists are created automatically.
Notes
Only one piece of DV equipment (e.g., digital video camcorder)
can be connected to the unit via the DV input terminal.
It is not possible to operate the unit from the connected DV equipment.
The DV input on this unit is for use with DV equipment only. (It
cannot be connected to a computer, etc.)
The DV equipment name may not be shown correctly.
Depending on the DV equipment, the images or audio may not be
input properly.
Date and time information is not recorded, even if displayed on
the camcorder.
You cannot record and play simultaneously.
Tips
When recording fi nishes
The confi rmation screen appears.
Press [OK] to fi nish DV camcorder recording.
To stop recording
Press [].
The confi rmation screen appears. Press [OK].
If the DV camcorder recording function does not work properly,
check the connections and DV equipment settings, and turn the
unit off and back on. If that does not work, follow the instructions for
“Recording from a VCR, etc.” ( left).
DMR-EH59EM.indb30DMR-EH59EM.indb30 2009/01/099:30:042009/01/099:30:04
 Loading...