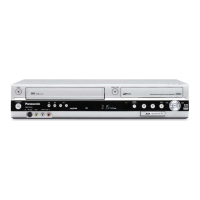
10.3. Top Cover
1. Remove the 2 screws (A) and 3 screws (B).
2. Slide Top Cover rearward and open the both ends at rear
side of the Top Cover a little and lift the Top Cover in the
direction of the arrows.
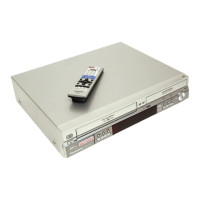
10.4. Front Panel
1. Unlock 3 tabs (A) and 2 tabs (B) in this order to remove
Front Panel.
(The tab (A) and (B) should be unlocked at the same time,
respectively.)
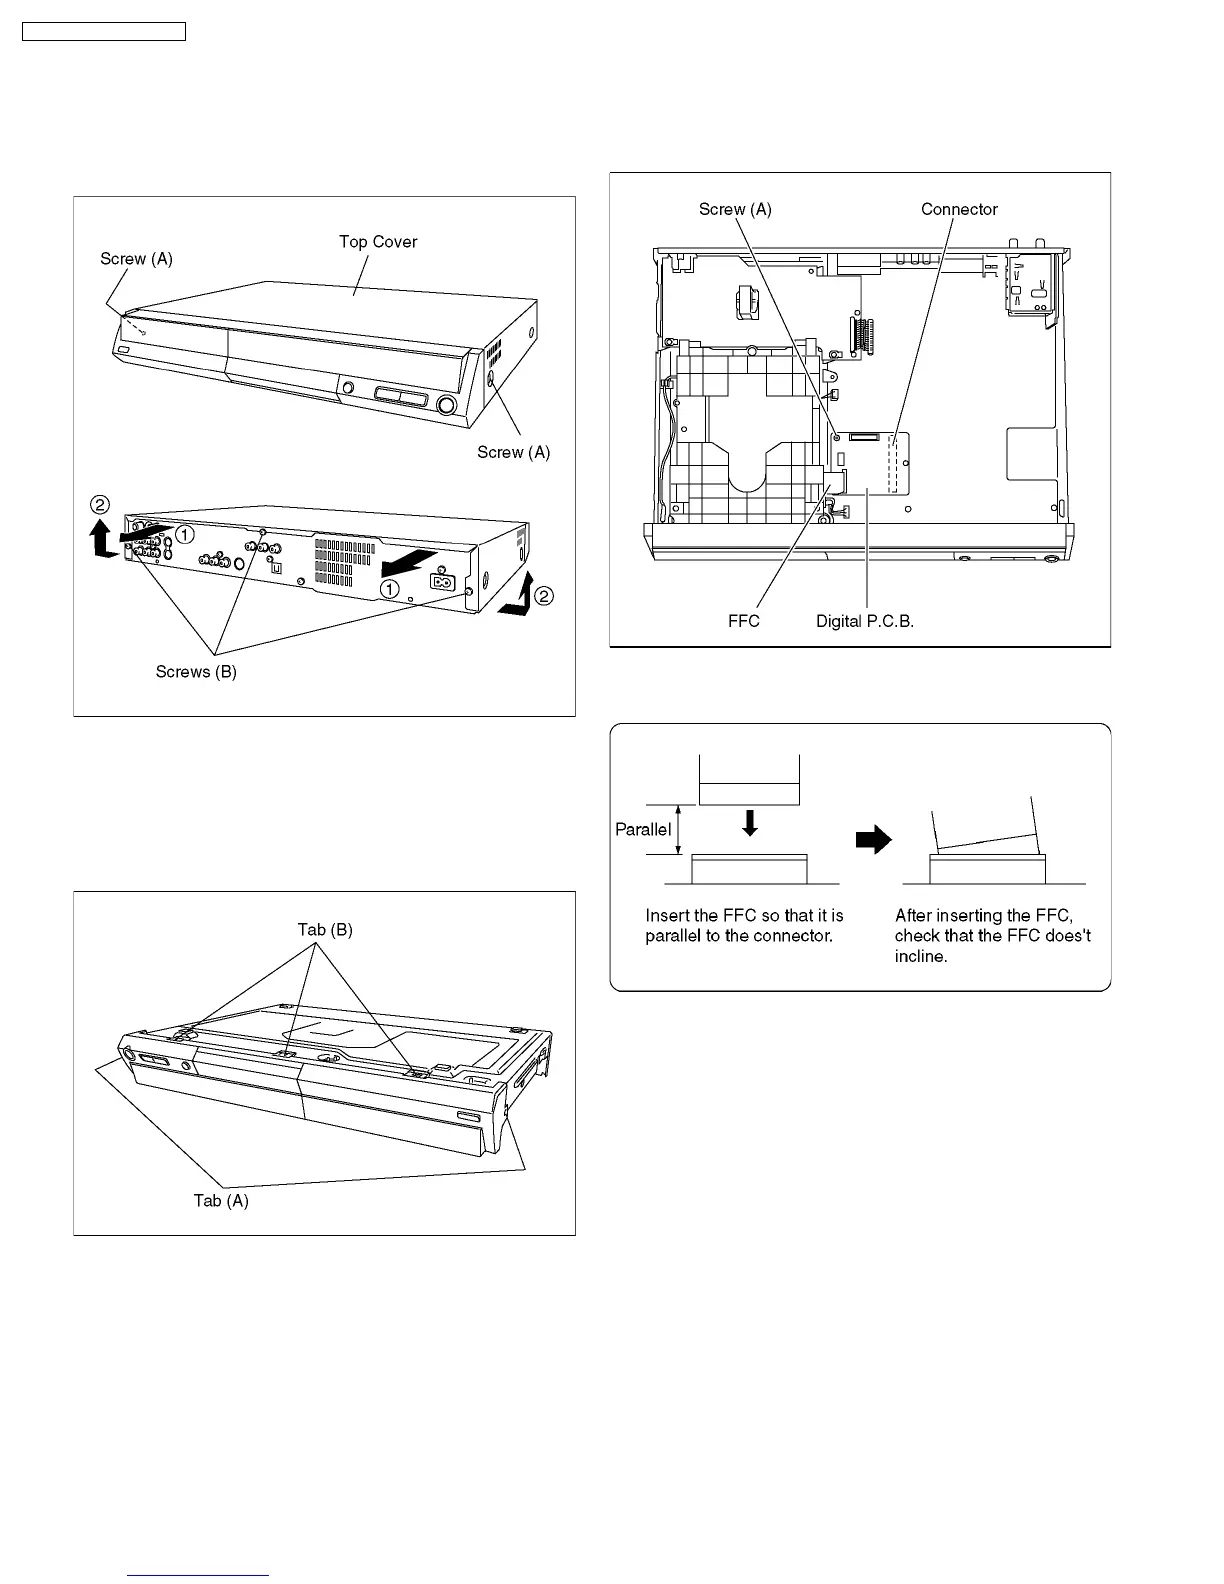
10.5. Digital P.C.B.
1. Remove FFC and a Screw (A).
2. Lift up Digital P.C.B. slightly so to disconnect Connector to
remove Digital P.C.B.
CAUTION 1:
When replacing Digital P.C.B., pay attention as below.
CAUTION 2:
Be careful to do not touch surface of CSP ICs.
If you have touched surface of CSP IC, clean up with
alcohol and so on to prevent oxidation.
20
DMR-ES10P / DMR-ES10PC
 Loading...