2
1
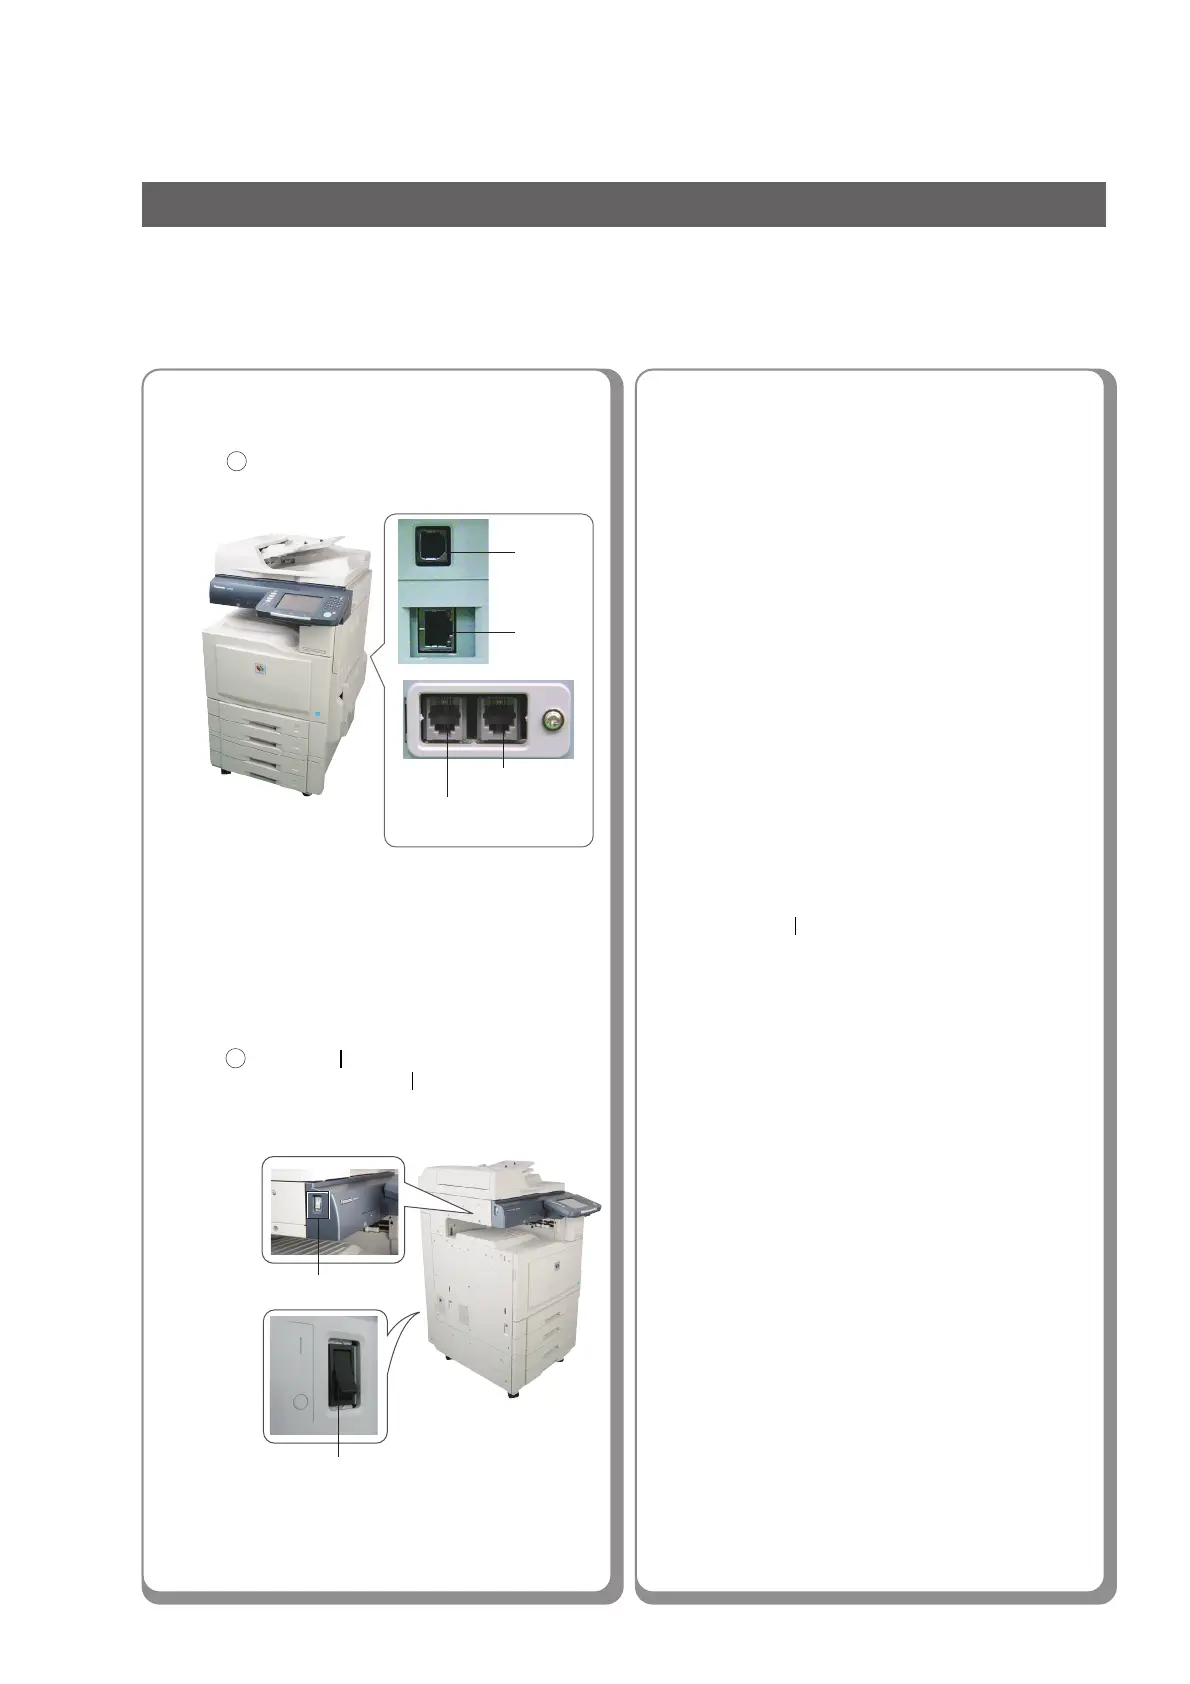
Turning the Power Switches ON
Follow the guidelines in this booklet when setting up the machine and installing each software. Please read all
procedures completely before attempting to set up this machine.
2
Setting up the Network Configuration
Set up the Network Configuration using the
Control Panel of the machine. (See pages 4 to 7)
● ●
● ●
● Network Configuration should be set up
by the system administrator.
3
Installation
■■
■■
■ Installing the Printer Driver and
Application Software
Applications selected from the Software
Selection screen will be automatically
installed. (See pages 8 to 13)
■■
■■
■ Installing the Printer Driver
Using the USB Port
Install the printer driver onto the USB Port.
(See pages 14 to 21)
●●
●●
● This machine is USB 2.0 compliant, and
backward compatible with the standard
USB revision 1.1.
●●
●●
● When connecting the USB Cable, do not
turn the Power Switch of the machine to the
ON (
) position until instructed to do so on
the PC screen.
●●
●●
● When connecting to the USB 2.0 port of
your PC, use a USB 2.0 High Speed
Cable for better performance.
■■
■■
■ Fax Driver
Install the fax driver on your PC.
(See pages 22 to 24)
Optional Fax Communication Board is
required. (Order Number: DA-FG320)
■■
■■
■
Network Update Service
Update the printer driver and application
software. (See pages 25 to 27)
●●
●●
● Network Update Service is automatically
installed when applications are installed from
the Panasonic Document Management
System CD-ROM.
Turn ON (
) the Main Power Switch first,
and then turn ON (
) the Power Switch.
Main Power Switch: Rear of the machine
Power Switch :
Left side of the machine
1
Power Switch
Main Power Switch
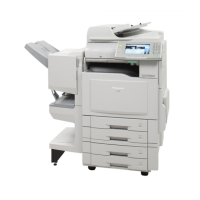
Connect all cables and the Power Cord to
the machine.
● ●
● ●
● USB Cable is used for USB Port
connection.
Telephone Cable is used for connecting
the optional Fax Communication Board
(Order Number: DA-FG320) to the
telephone line.
USB
Cable
LAN
Cable
Telephone
Line Cable
●●
●●
● Do not connect the USB cable to the
machine until instructed.
External
Telephone Cable
4
Setting up
■■
■■
■ Configuring the Shared Setting
for the Network Print Server
Windows 2000 Server
Windows Server 2003
(See pages 28 to 32)
■■
■■
■
Setting up your Client PC
Connect the shared printer on the
Network Print Server. (See page 32 to 33)
Installation Overview
2
General Installation Overview