Do you have a question about the Panasonic DP-8032 and is the answer not in the manual?
Details specifications for copier operation, including paper sizes and speeds.
Covers specifications for Fax, Printer, and Internet Fax operations.
Illustrates the interconnections of machine components and options.
Lists available optional modules and their part numbers.
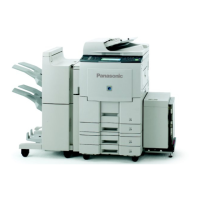
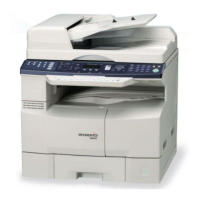
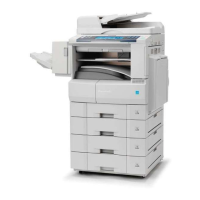
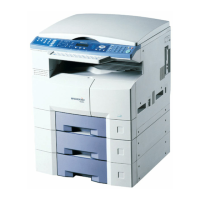
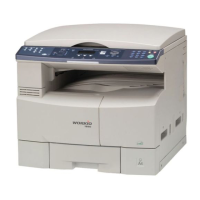
Provides visual identification of machine parts and configurations.
Explains the format and meaning of the machine's serial number.
Describes the components and layout of the machine's control panel.
Identifies the location of key fans and motors within the machine.
Lists and locates clutches and switches used in the machine's mechanisms.
Identifies the various printed circuit boards within the machine.
Outlines the general approach to disassembling the machine.
Details the step-by-step disassembly of individual machine units.
Identifies screws by reference number for correct reassembly.
Explains scheduled cleaning, parts replacement, and procedures.
Lists necessary tools for maintenance and adjustment tasks.
Illustrates key points for performing preventive maintenance.
Provides a checklist for scheduled preventive maintenance tasks.
Procedures for resetting preventive maintenance counters after service.
Details lubrication points and recommended grease types.
Covers updating firmware via LAN, USB, and Master Card.
Guides for adjusting print alignment and image positioning.
Steps to calibrate the machine's LCD display for accuracy.
Defines common electrical abbreviations used in the manual.
A step-by-step guide to diagnose common machine issues.
Steps to diagnose and resolve issues with the machine's display.
Identifies and provides solutions for various print quality problems.
Diagnoses and resolves issues related to the automatic document feeder.
Guides for diagnosing network connectivity and configuration problems.
Lists and explains error codes (U, J, E) and their possible causes.
Provides codes and explanations for facsimile communication issues.
Explains diagnostic codes for analyzing facsimile communication.
Addresses problems specifically related to the printer function.
Details service modes for checking and adjusting copier components.
Explains service modes for facsimile functions and unit condition checks.
Explains the step-by-step process of image formation and printing.
Guidelines for safe handling and storage of toner and developer.
Describes the QUANTUM II system for improved image density control.
Details the mechanical workings of scanning and transmit mechanisms.
Explains the operation and features of the ADF and i-ADF.
Describes the operation of paper feed modules and sensors.
Essential safety and environmental precautions for machine installation.
Instructions for checking and unpacking the machine and its contents.
Step-by-step guide for physically installing the machine.
Instructions for updating firmware for PCL or PS options.
Steps for installing the PCL6 printer controller module.
Steps for installing the PS/PCL6 printer controller module.
Instructions for installing the fax communication board.
Guide for installing the optional hard disk drive unit.
Steps for installing the accounting software.
Instructions for installing the expansion F-ROM board.
Guide for installing sorting image memory modules.
Steps for installing expansion flash memory cards.
Instructions for installing additional paper trays and stands.
Guide for installing the deluxe stand.
Instructions for installing the standard stand.
Steps for installing the 1-bin finisher option.
Instructions for installing the inner exit tray.
Steps for installing the outer exit tray.
Guide for installing ADF and i-ADF units.
Instructions for installing the platen cover.
Steps for installing the key counter harness kit.
Guide for installing the dehumidifier heater kit.
Detailed procedure for replacing the OPC drum.
Steps for replacing the laser unit.
How to manage machine settings using email commands.
Provides a visual representation of the machine's main electrical connections.
Details the electrical connections specific to the finisher unit.
Overview of the finisher's features and specifications.
Covers part replacement, consumables, scheduled maintenance, and disassembly.
Explains the finisher's operation modes and stapling mechanisms.
Overview of the tool's capabilities and supported systems.
Steps for installing the network firmware update tool on a PC.
Procedures for preparing the machine and firmware code for update.
Step-by-step guide for performing firmware updates via LAN.
Overview of the tool's capabilities and supported systems.
Steps for installing the local firmware update tool and drivers.
Procedures for preparing the machine and firmware code for update.
Step-by-step guide for performing firmware updates via USB or Parallel.
| Printing Technology | Laser |
|---|---|
| Print Speed (Black) | 32 ppm |
| Copy Speed (Black) | 32 cpm |
| Copy Resolution | 600 x 600 dpi |
| Scan Resolution | 600 x 600 dpi |
| Fax Speed | 33.6 Kbps |
| Duplex Printing | Yes |
| Display | LCD |
| Max Media Size | A4 |
| Functions | Print, Copy, Scan, Fax |
| Connectivity | USB, Ethernet |
| Scanner Type | Flatbed |
| Original Size | A4 |
| Reduction / Enlargement | 25% - 400% |
| Media Type | Envelopes, Labels, Plain Paper, Transparency |