Connecting to other equipment
Connecting to a PC
You can acquire recorded pictures to a PC
by connecting the camera and the PC.
The software [LUMIX Simple Viewer] or
[PHOTOfu nSTU DIO-viewe r-]
(for Windows ¢) in the CD-ROM (supplied)
allows you to easily acquire pictures
recorded with the camera to a PC, print
them and send them by e-maiL
If you use "Windows 98/98SE', install
the USB driver and then connect it to
the computer.
For information about the software in the
CD-ROM (supplied) and installing this
software, refer to the separate operating
instructions for PC connection.
• Set the camera to a mode other than
[J-h.] mode.
] Turn on the camera and the PC.
2 Connect the camera to a PC via
the USB connection cable (_)
(supplied).
• Connect the USB connection cable with
the [_m] mark facing the [1_] mark on
the [DIGITAL] socket.
• Hold the USB connection cable at @
and insert straight in or take straight
out. (If you forcibly insert the USB
connection cable at a slant or upside
down you can deform the connection
terminals and damage the camera or
the connected equipment.)
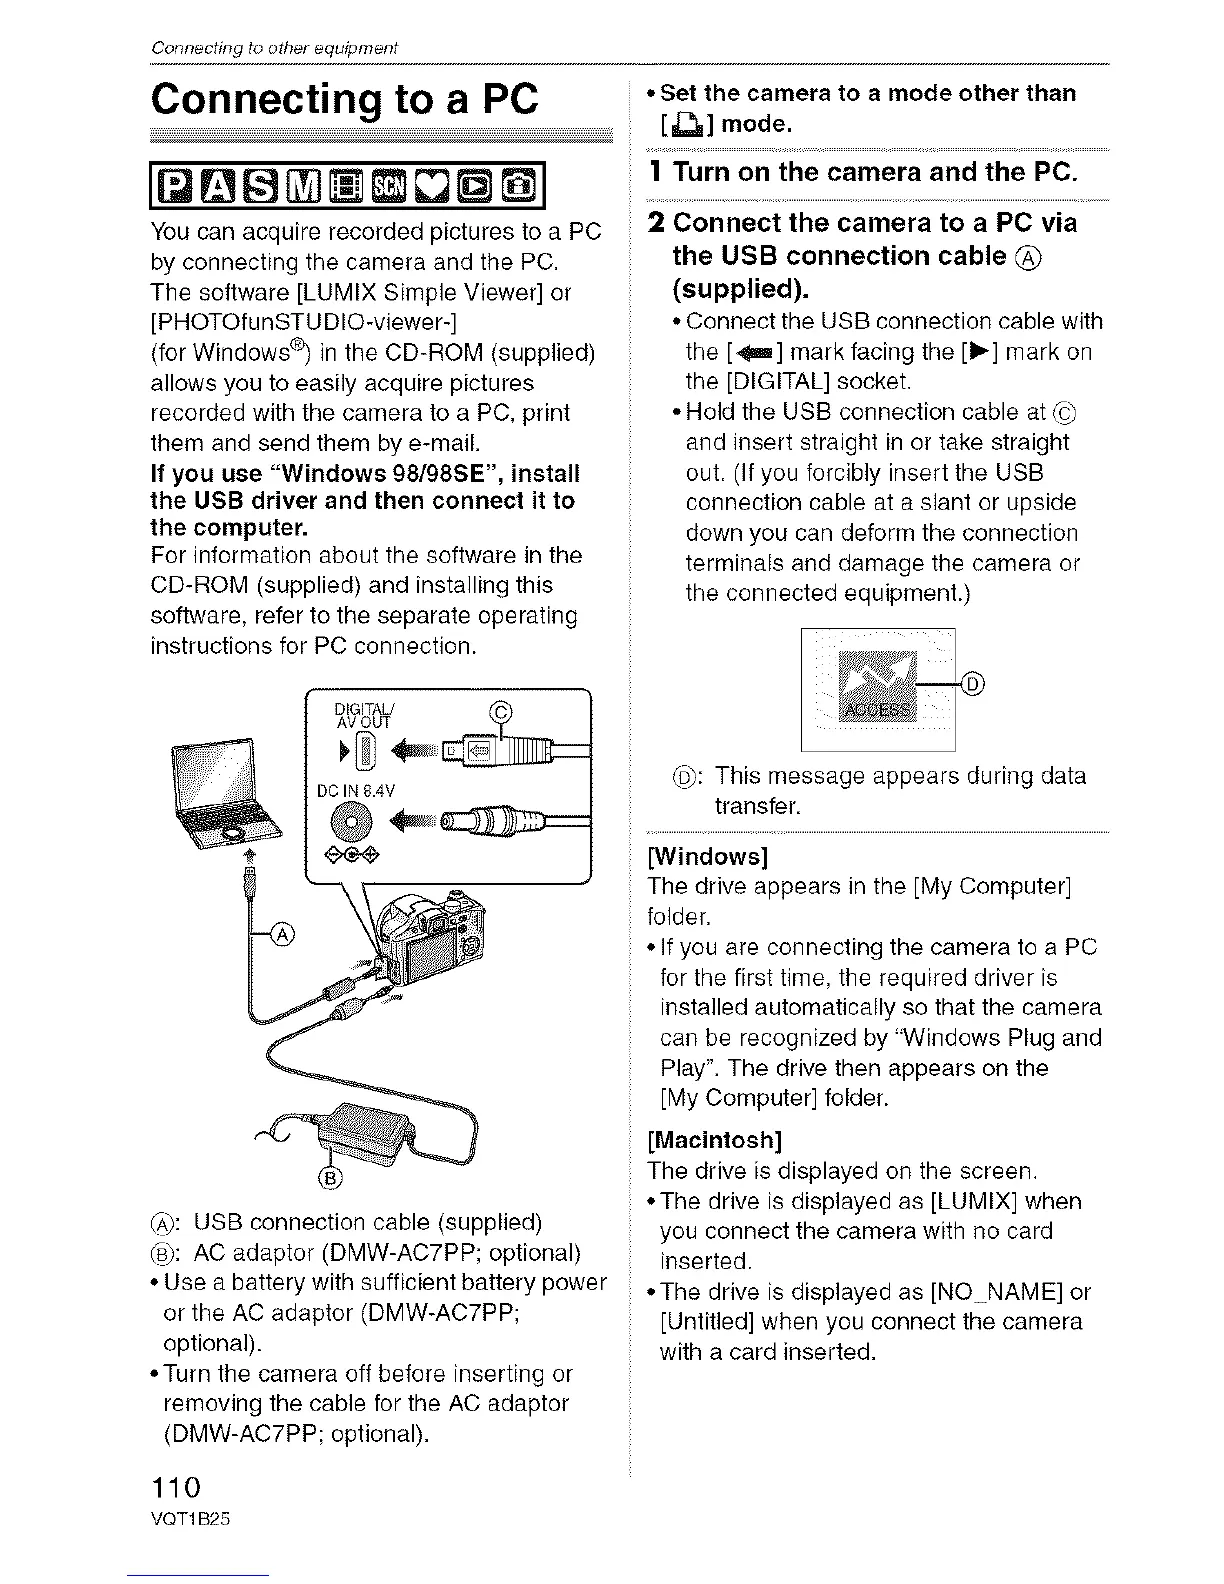
(A): USB connection cable (supplied)
(B): AC adaptor (DMW-AC7PP; optional)
• Use a battery with sufficient battery power
or the AC adaptor (DMW-AC7PP;
optional).
*Turn the camera off before inserting or
removing the cable for the AC adaptor
(DMW-AC7PP; optional).
(5): This message appears during data
transfer.
[Windows]
The drive appears in the [My Computer]
folder.
• If you are connecting the camera to a PC
for the first time, the required driver is
installed automatically so that the camera
can be recognized by "Windows Plug and
Play". The drive then appears on the
[My Computer] folder.
[Macintosh]
The drive is displayed on the screen.
• The drive is displayed as [LUMIX] when
you connect the camera with no card
inserted.
• The drive is displayed as [NONAME] or
[Untitled] when you connect the camera
with a card inserted.
110
VQT1 B25
 Loading...