Chapter 1
Preparation — About your projector
ENGLISH - 27
16 Control panel (x page 27)
17 Air lter cover
The air lter unit is inside.
18 Air intake port
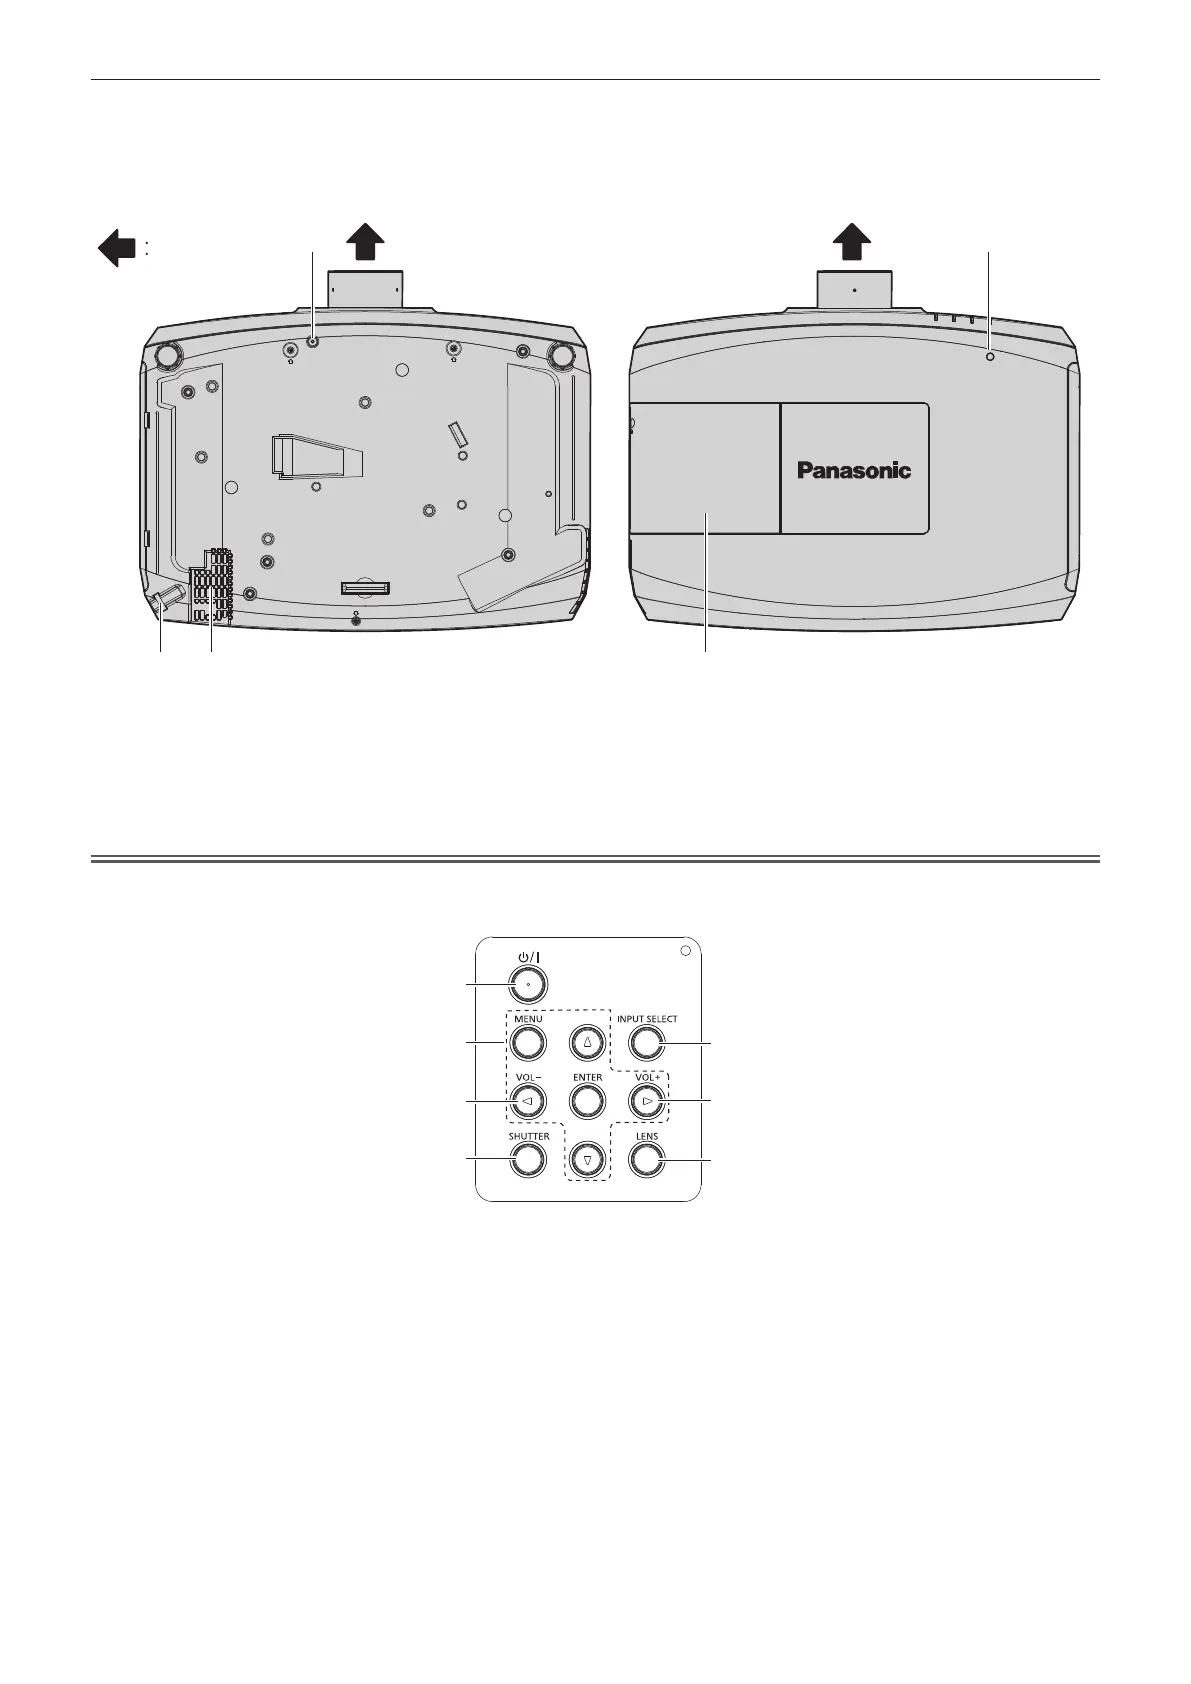
r Bottom
2220 18
21
19
r Top
Projection direction
19 Lens release button xing screw hole
When you replace the projection lens, you can use if you want
to x the lens release button.
20 Burglar hook port
Attaches a burglar prevention cable, etc.
21 Luminance sensor
Measures the brightness of the installation environment. When
the daylight view function is set to [AUTO], the vividness of the
image is automatically corrected. (x page 69)
22 Lamp cover
The lamp unit is inside.
Attention
f
Do not block the ventilation ports (intake and exhaust) of the projector.
r Control panel
6
3
5
1
2
3
4
1 Power <v/b> button (v standby/b power on)
Sets the projector to the state where the projector is switched
off (standby mode) when the <MAIN POWER> switch on the
projector is set to <ON> and in the projection mode. Also starts
projection when the power is switched off (standby mode).
2 <MENU> button/<ENTER> button/asqw buttons
Used to navigate through the menu screen. (x page 62)
Returns to the previous menu when a sub-menu is displayed.
Also used to enter a password in [SECURITY] or enter
characters.
3 <VOL
-
> button/<VOL+> button
Adjusts the volume of audio output. (x page 55)
4 <SHUTTER> button/<AV MUTE> button
(<SHUTTER> button is for PT-EZ590, PT-EW650 and
PT-EX620.
<AV MUTE> button is for PT-EW550 and PT-EX520.)
Used when temporarily turning off the image and audio.
(x page 54)
5 <INPUT SELECT> button
Switches the input signal to project. (x page 51)
6 <LENS> button
Adjusts the focus, zoom, and shift (position) of the lens.
 Loading...