Chapter 2
Getting Started — Setting up
ENGLISH - 31
Setting up
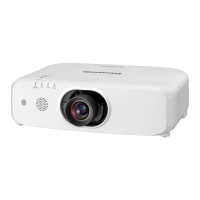
Installation mode
There are four ways to set up the projector. Set the [PROJECTOR SETUP] menu
→
[PROJECTION METHOD]
(
x
page 93) depending on the installation method.
Mounting on the ceiling and projecting forward Mounting on the ceiling and projecting from rear
(Using the translucent screen)
Menu item Method Menu item Method
[PROJECTION METHOD] [AUTO] or [FRONT/CEILING] [PROJECTION METHOD] [REAR/CEILING]
Setting on a desk/oor and projecting forward Setting on a desk/oor and projecting from rear
(Using the translucent screen)
Menu item Method Menu item Method
[PROJECTION METHOD] [AUTO] or [FRONT/DESK] [PROJECTION METHOD] [REAR/DESK]
Note
f
The projector has a built-in angle sensor. When projecting in front of the screen, if set the [PROJECTOR SETUP] menu → [PROJECTION
METHOD] → [AUTO], the projector’s posture will be detected automatically. When projecting from rear, please set the [PROJECTION
METHOD] to [REAR/DESK] or [REAR/CEILING].
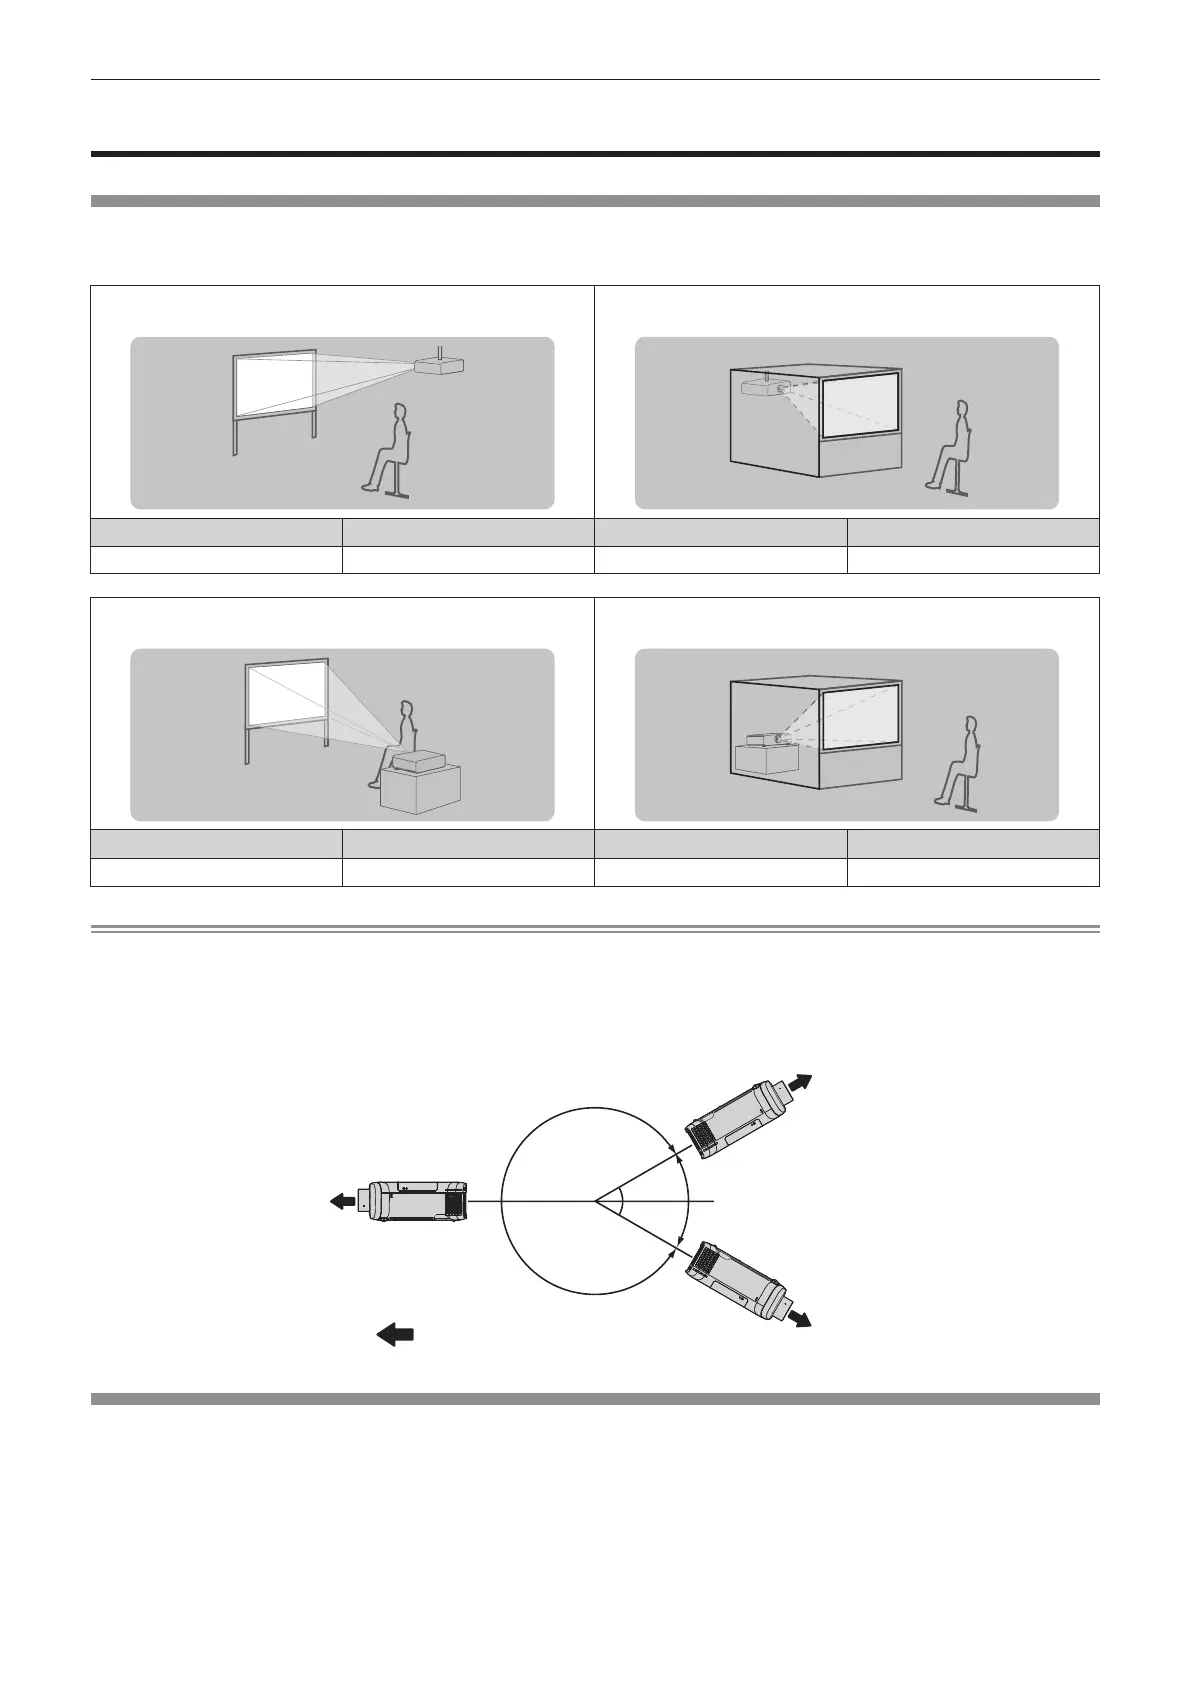
r Angle sensor
The range of installation posture detected by the projector’s built-in angle sensor is as follows.
30°
30°
:
[FRONT/DESK]
[FRONT/DESK]
[FRONT/CEILING]
Projection direction
Parts for ceiling mount (optional)
The projector can be installed on the ceiling by combining the optional Ceiling Mount Bracket (Model No.:
ET-PKD120H (for High Ceilings), ET-PKD120S (for Low Ceilings)) and ET-PKE300B (Projector Mount Bracket).
f
Be sure to use the Ceiling Mount Bracket specied for this projector.
f
Refer to the Installation Instructions supplied with the Ceiling Mount Bracket when installing the projector with
the bracket.
 Loading...