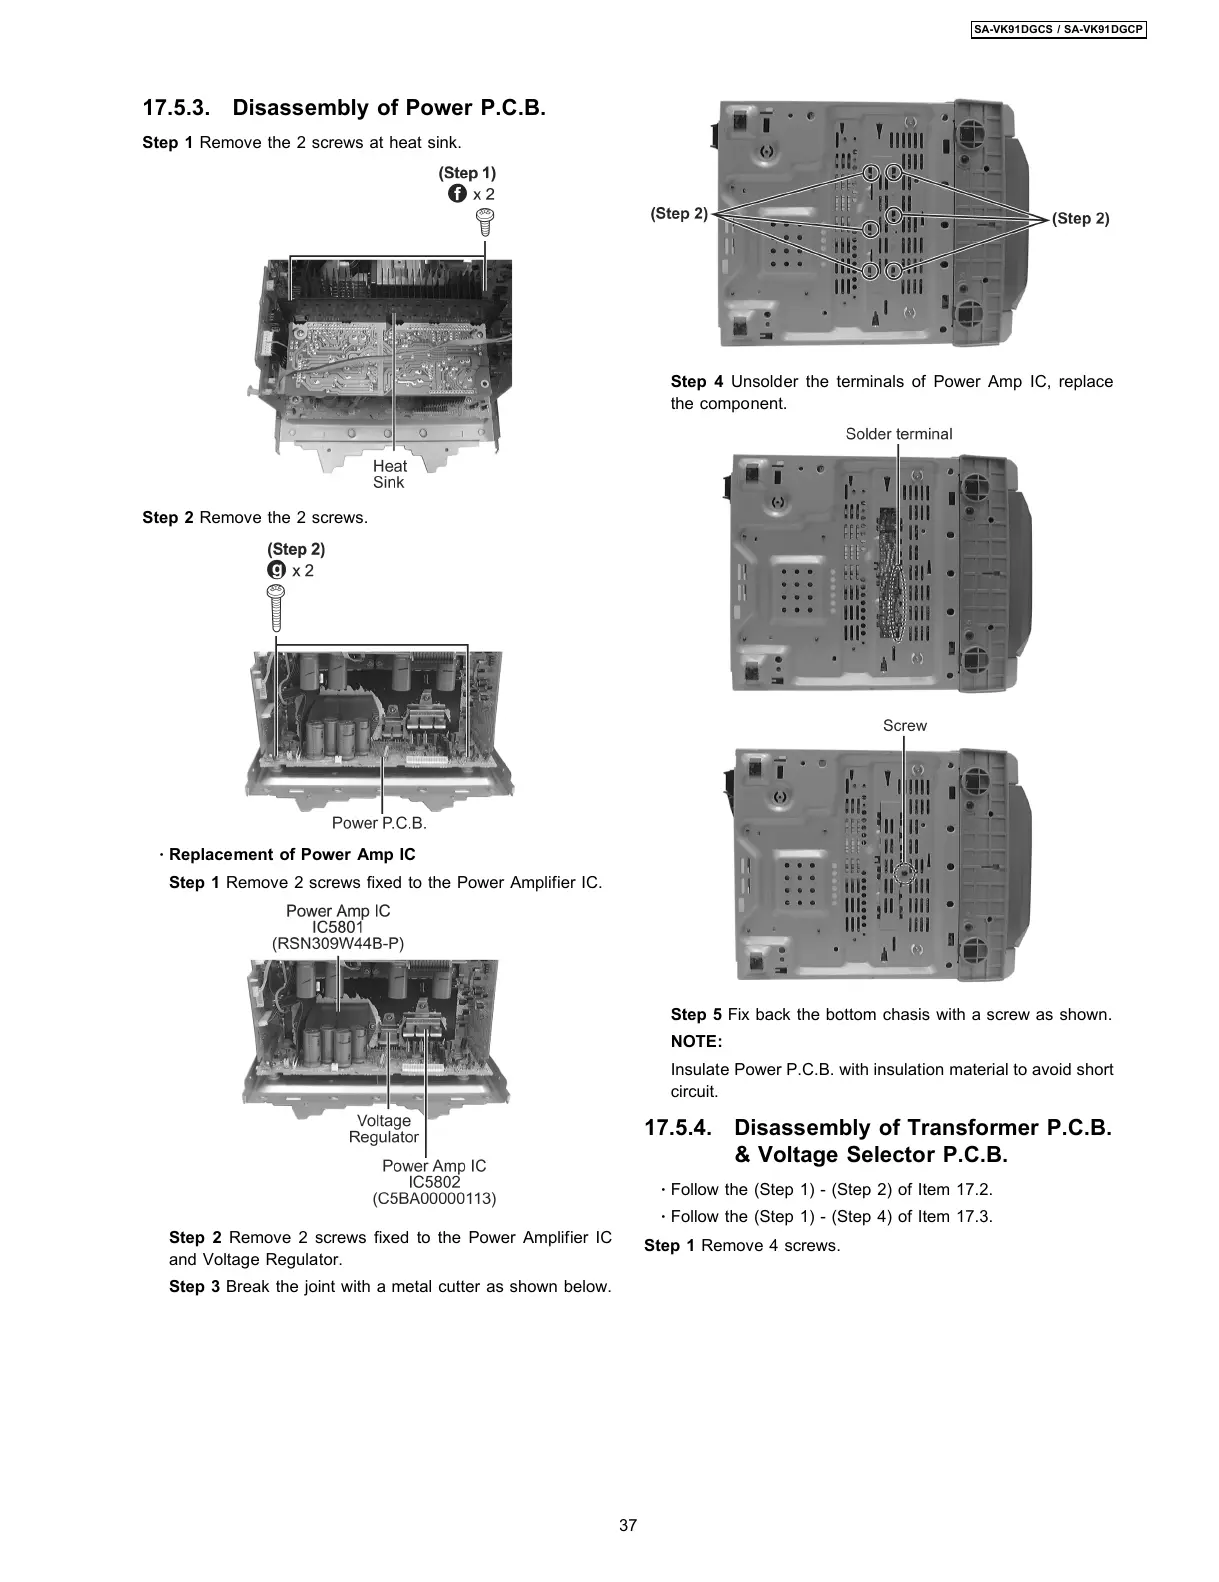
17.5.3. Disassembly of Power P.C.B.
Step 1 Remove the 2 screws at heat sink.
Step 2 Remove the 2 screws.
·
Replacement of Power Amp IC
Step 1 Remove 2 screws fixed to the Power Amplifier IC.
Step 2 Remove 2 screws fixed to the Power Amplifier IC
and Voltage Regulator.
Step 3 Break the joint with a metal cutter as shown below.
Step 4 Unsolder the terminals of Power Amp IC, replace
the component.
Step 5 Fix back the bottom chasis with a screw as shown.
NOTE:
Insulate Power P.C.B. with insulation material to avoid short
circuit.
17.5.4. Disassembly of Transformer P.C.B.
& Voltage Selector P.C.B.
·
Follow the (Step 1) - (Step 2) of Item 17.2.
·
Follow the (Step 1) - (Step 4) of Item 17.3.
Step 1 Remove 4 screws.
37
SA-VK91DGCS / SA-VK91DGCP