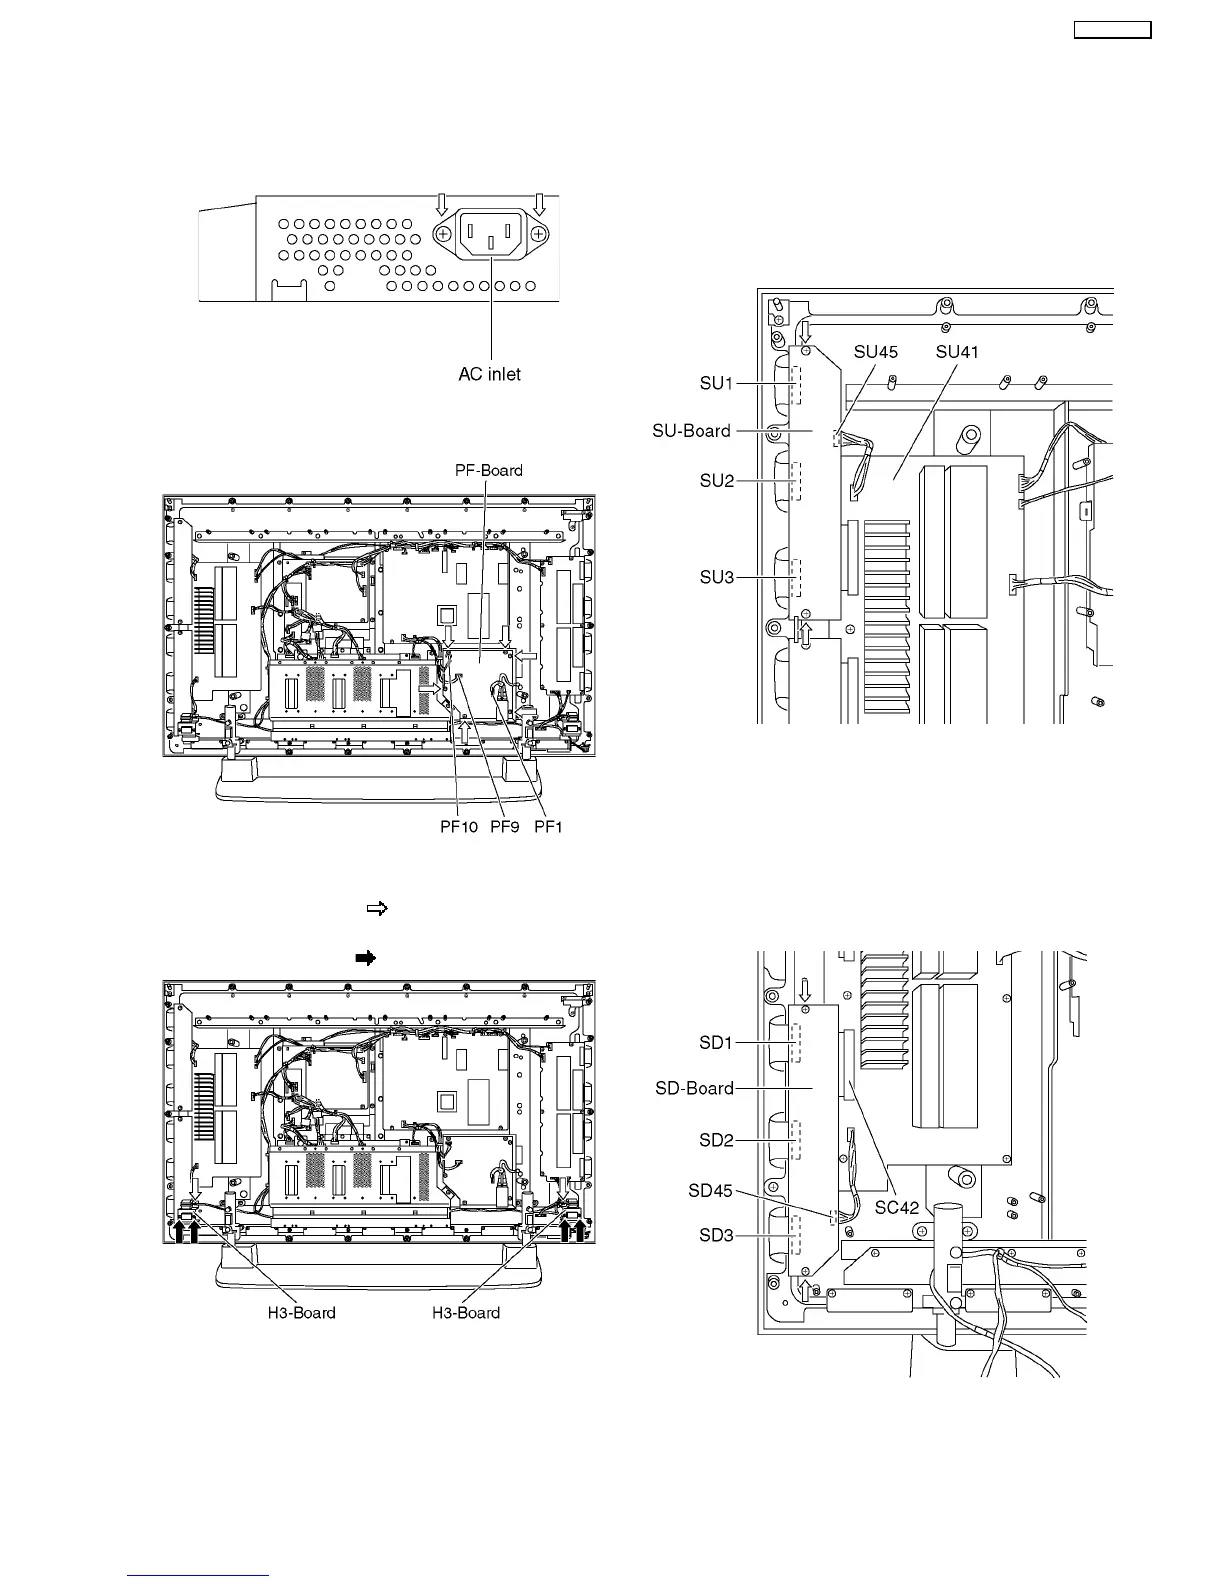
7.8. Removal of the PF-Board
a. Remove the coupler (PF1).
b. Unscrew the screws (×2) and remove the AC inlet.
c. Remove the couplers (PF9, PF10).
d. Unscrew the screws (×4), and remove the PF-Board.
7.9. Removal of the H3-Board
a. Unscrew the screws (×2 ), and remove the H3-Board
with the Bracket.
b. Unscrew the screws (×4
), and remove the H3-Board.
7.10. Removal of the SU-Board
a. Unscrew the screws (×2).
b. Slide the SU-Board to the left and disconnect from the
couplers (SC41) on the SC-Board.
c. Remove the coupler (SU45).
d. Remove the flexible cables (SU1, SU2, SU3) connected to
the SU-Board, and remove the SU-Board.
7.11. Removal of the SD-Board
a. Unscrew the screws (×2).
b. Slide the SD-Board to the left and disconnect from the
couplers (SC42) on the SC-Board.
c. Remove the coupler (SD46).
d. Remove the flexible cables (SD1, SD2, SD3) connected to
the SD-Board, and remove the SD-Board.
13
TH-37PW7BX
 Loading...