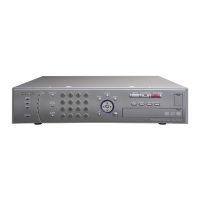
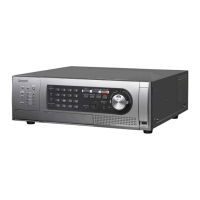
Rear view
y Power cord inlet [AC IN]
Connect the provided power cord to this inlet.
u Alarm/control connector [ALARM/CONTROL]
(D-sub 25-pin)
Connect a control switch to control the recorder using
an external device such as a sensor or a door switch or
an external alarm device such as a buzzer or a lamp.
i Network port [10/100/1000BASE-T]
Use this port to connect the recorder to a network com-
patible with 10BASE-T, 100BASE-TX or 1000BASE-T to
connect with a camera via a network. When the port is
being accessed, the access indicator (green) blinks.
When the port is being linked, the link indicator (orange)
lights.
o Spot output connector (BNC) [SPOT OUT]
Connect the live monitor. Camera images are output to
be displayed on a 1-screen.
!0 Audio output connector (RCA pin jack) [AUDIO
OUT]
Audio from live images or recorded images is output.
Connect such device as a speaker with amplifier.
!1 Monitor output connector (HDMI) [AV OUT]
This connector is used to connect to an HDMI-ready
monitor (the main monitor).
!2 HDD slots [HDD1/HDD2]
Hard disk drives (locally procured) can be installed into
these slots. Contact your dealer for installing/replacing
the hard disk drives.
!3 SIGNAL GND terminal [SIGNAL GND]
Connect this terminal with the SIGNAL GND terminals of
the devices in the system for signal ground. When oper-
ating the recorder and the devices in the system without
signal ground, oscillation or noise may be produced.

 Loading...