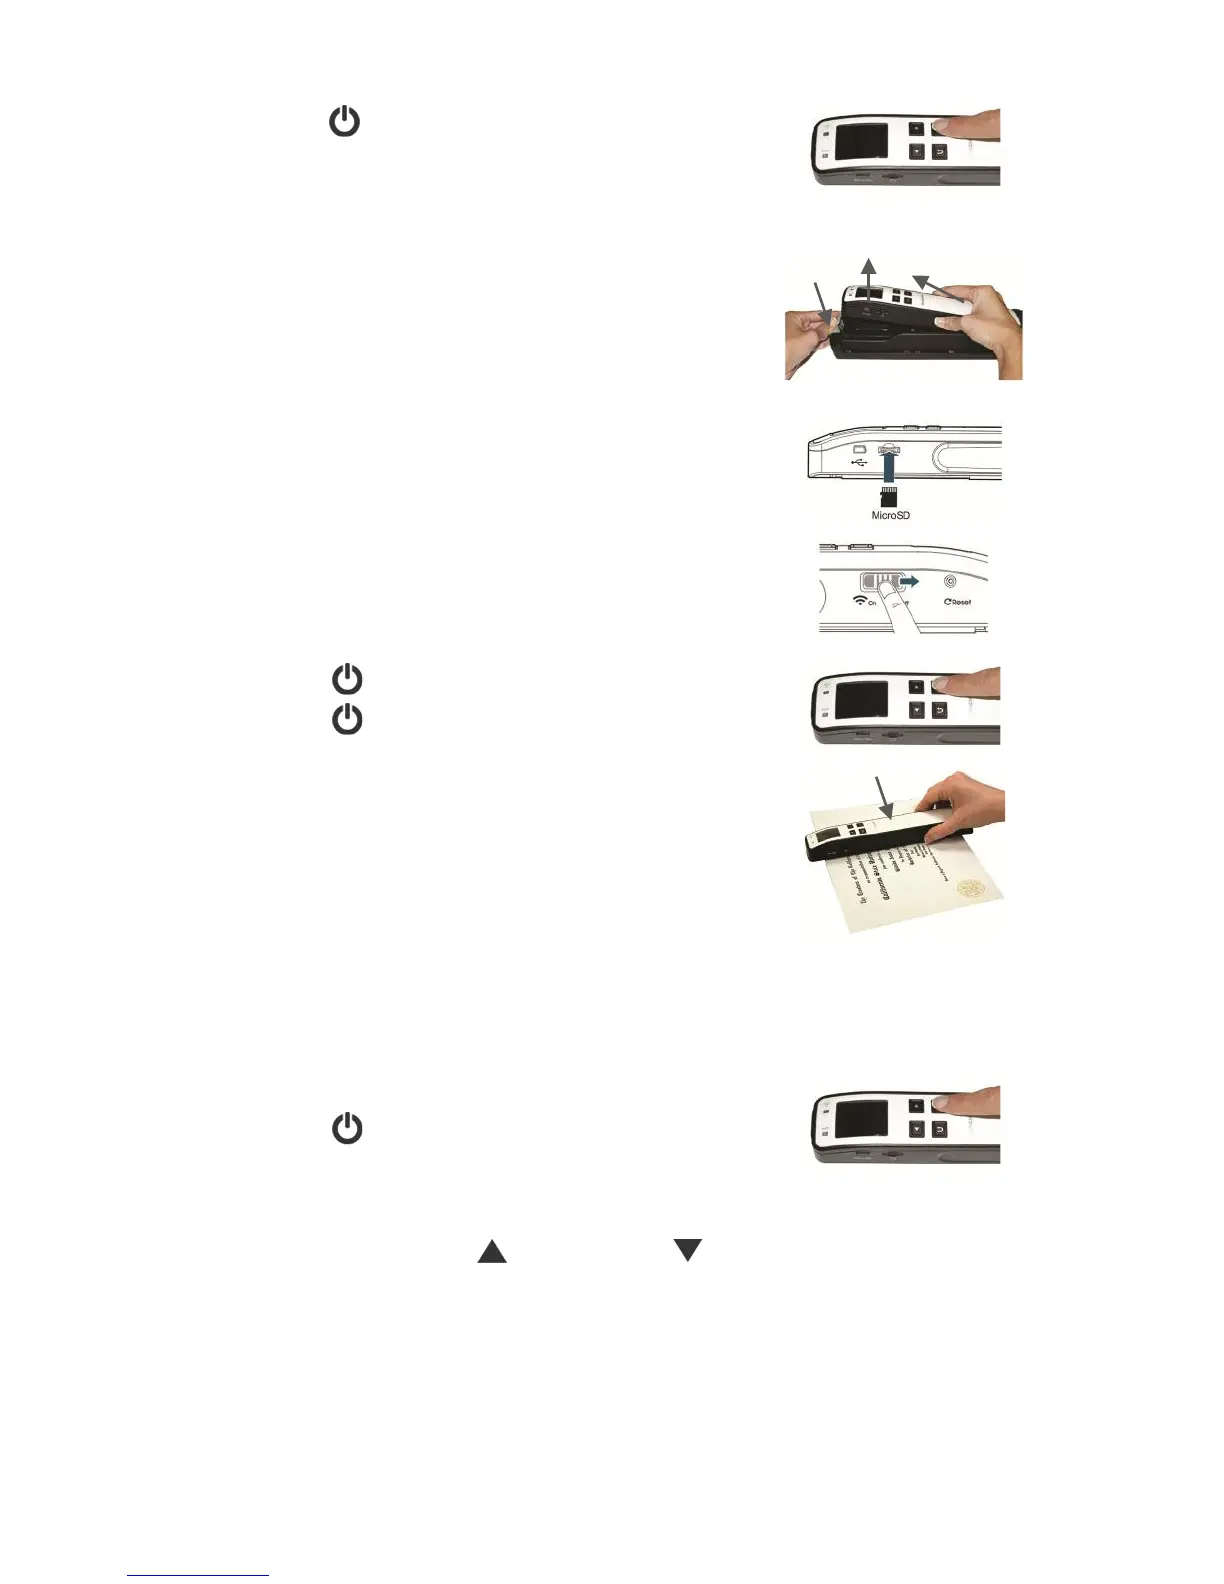
1. Press to turn scanner off.
2. Remove the scanner from the feeder dock:
a) Press the latch.
b) Lift the end of the scanner up to clear
the latch.
c) Pull the scanner out of the feeder dock to
disengage from the connector.
3. (Optional) Insert a microSD card (not
included) in the card slot to expand your
storage space.
4. Be sure Wi-Fi connection is off.
5. Press to turn scanner on.
6. Press again to initiate the scan mode.
7. With your original on a clean flat surface,
slowly slide the scanner across your original.
If scanning a document rather than a photo, if desired, change the file format setting to PDF (see the
“Set the Scanned Image File Format” section on page 21).
Moving the wand scanner over the original too fast causes an error and the scanner may stop scanning.
If the scan does complete, you may notice an abnormal image.
8. Press to stop the scan.
By default, the Preview mode is on allowing you to preview the JPG scanned image for 2
seconds immediately after scanning. Two options appear on the screen with the image
allowing you to press OK to save (default) to Delete the image immediately (delete
confirmation displays during deletion). (Refer to page 19 to change the Preview mode.)
PDF scans cannot be previewed on the LCD preview; they are always saved immediately
when scan is completed. The document thumbnails are available for Browser’s Easy View
preview and PC-connected explorer or Mac Finder preview via USB connection.
9. Wait until the indicator light stops blinking before scanning another original.
10. To view/retrieve your scanned images, refer to “Scanned Images” section on page 12.

 Loading...


