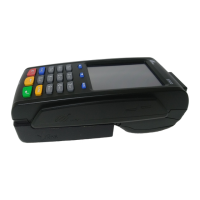
Do you have a question about the PAX PX7 and is the answer not in the manual?
Step-by-step guide to connecting the stylus to the pinpad.
Procedure to remove the plug for EMV card insertion.
Instructions for restarting the PAX device via the reset button.
Guide to connecting the Ethernet cable to the designated LAN1 port.
Steps to connect the power cord and adapter to the pinpad.
Steps to access the confirmation menu using keypad buttons.
Procedure for entering the password to access device menus.
Steps to navigate to the communication options menu.
Choosing the correct ECR communication type, such as Ethernet.
Verifying the communication port number, typically 10009.
Configuring the device to use the TCP/IP communication protocol.
Navigating to the LAN Parameters screen for network settings.
Steps to view or enter the static IP address for the pinpad.
Configuring the LAN type to Static instead of DHCP.
Verifying the IP address and optionally entering a new one.
Steps to access the merchant settings menu on the pinpad.
Steps to access the authorizations section within merchant settings.
Turning off the debit prompt feature on the pinpad.
Navigating back to the main screen after configuration.
Steps to access the merchant settings menu on the pinpad.
Steps to access the authorizations section within merchant settings.
Turning on the debit prompt feature on the pinpad.
Navigating back to the main screen after configuration.
Steps to access the merchant settings menu on the pinpad.
Accessing the additional prompts section for more options.
Turning on the cashback prompt option on the pinpad.
Steps to access the operation settings menu on the pinpad.
Accessing the peripherals settings for device configurations.
Enabling the contactless card reader function.
Navigating to the setup screen within the CRE software.
Configuring the system to process credit and debit card payments.
Selecting the PAX pinpad as the payment processor.
Inputting the IP address and port number for the PAX device.
Configuring optional features like debit card processing and pole display.
Navigating to the setup screen within the CRE software.
Configuring the system to process credit and debit card payments.
Disabling the processing of debit cards through the credit card processor.
Navigating to the setup screen within the CRE software.
Configuring the system to accept EBT payments.
Selecting which EBT payment methods to accept.
Navigating to the setup screen within the CRE software.
Configuring the system to accept gift card payments.
Navigating to the setup screen within the CRE software.
Configuring the system to process credit and debit card payments.
Setting up options for printing tip lines and prompting for tips.
Navigating to the setup screen within the CRE software.
Navigating to the payment processing and tips configuration area.
Activating the feature to prompt for tips immediately after a sale.
Starting a transaction by opening a table and adding items.
Choosing credit card as the payment method.
Inputting credit card details or preparing for card insertion.
Inserting the EMV chip card into the pinpad.
Instruction to remove the card after transaction processing.
Confirmation message indicating successful transaction.
Example of the restaurant copy of the transaction receipt.
Example of the customer copy of the transaction receipt.
Inputting the tip amount on the pinpad.
Verifying the entered tip amount for the transaction.
Waiting for the system to process the tip addition.
Confirmation message for the applied tip.
Navigating to the credit card settlement section.
Using the 'Add Tip' button to apply tips.
Inputting the invoice number for tip application.
Inputting the desired tip amount.
Verifying the entered tip amount.
Waiting for the system to process the tip addition.
Confirmation message for the applied tip.
Starting a transaction by opening an invoice and adding items.
Choosing credit card as the tender type for payment.
Inputting the tip amount directly on the PAX device.
Performing the credit card transaction via insertion or swipe.
Waiting for the device to process the credit card transaction.
Instruction to remove the card after processing.
Confirmation message indicating successful transaction.
Information shown on the customer's transaction receipt.
Information shown on the store's transaction receipt.
Choosing credit as the payment type on the CRE screen.
Inserting the EMV chip card into the pinpad.
Waiting for the EMV transaction to be processed.
Prompt for signature or PIN entry depending on card.
Instruction to remove the card after processing.
Confirmation message indicating successful transaction.
Details about signature on the transaction receipt.
Choosing credit as the payment type on the CRE screen.
Initiating the transaction by tapping the contactless card.
Waiting for the device to process the contactless transaction.
Providing a signature on the device's screen.
Confirmation that the transaction is now completed.
Receipt details showing contactless EMV and signature.
Choosing debit as the payment type on the CRE screen.
Choosing the debit option and handling cashback requests.
Swiping the debit card on the pinpad.
Inputting the PIN for debit card authorization.
Choosing EBT as payment and selecting EBT FoodStamp.
Swiping the EBT card on the pinpad.
Inputting the PIN for EBT card authorization.
Confirmation message indicating successful transaction.
Details on the receipt showing the type of EBT sale.
Choosing EBT as payment and selecting EBT Cash.
Choosing a cashback amount or declining cashback.
Inputting the PIN for EBT cash sale authorization.
Confirmation message indicating successful transaction.
Receipt showing cashback amount and transaction details.
Choosing credit card and then debit as the payment type.
Choosing the debit option on the pinpad.
Inputting the PIN for debit card authorization.
Waiting for the device to process the debit card transaction.
Confirmation message indicating successful transaction.
Choosing credit as the payment type on the CRE screen.
Inputting the complete credit card number using the keypad.
Inputting the credit card expiry date (MMYY).
Inputting the CVV2 code from the back of the card.
Inputting optional address and billing zip code.
Signing on the screen or hitting cancel for a signature line.
Confirmation message indicating successful transaction.
Steps to perform manual settlements via the Administrative menu.
Initiating the settlement process by clicking the Settle button.
Display indicating the settlement process is running.
The device returns to the main screen after settlement.
Verifying successful settlement completion within the CRE software.
Enabling and configuring automatic settlement settings.
| Connectivity | WiFi, Bluetooth, 4G LTE |
|---|---|
| Card Reader | Magnetic stripe |
| Operating System | Android |
| Certifications | PCI PTS 5.x, EMV L1 & L2 |
| Payment Methods | Credit, debit, contactless, mobile payments |
| Display Resolution | 320 x 480 pixels |