However, the quick and simple method
described first does not employ arming at all
but rather draws on the fact that a counter of
this type tends to self-synchronize its internal
processes to the input signal.
Our task is to synchronize the start of the
measurement (start trigger) to the leading
edge of the first pulse. Depending on the
signal timing, this can be easy, difficult, or
very difficult.
■ A. Auto Synchronization Without
Arming
If we are lucky, we can manage without using
the arming function at all. Often, the counter
can automatically synchronize the measure-
ment start to the triggering of the first pulse.
The conditions for success are that the PRF is
not too high, preferably below 50 Hz and cer-
tainly not above 150 Hz. The duration of a
pul
se burst (between first and last pulse)
should be substantially less than the distance
to the next burst, and the number of pulses in
the burst should be more tha
n 100 to avoid
occasional miscounts.
Do the following steps to perform auto syn-
chronization without arming:
Connect the burst signal to input A.
Adjust the manual sensitivity and trigger
level until the burst signal triggers the
counter correctly.
Use the MEAS/FUNC key to select Pulse
Width A.
Use Pacing Time to select a value that
approaches the time between the bursts.
Absolute synchronization will not be guaran-
teed in this way, but there is a high
probability that auto-synchronization will
work anyway. However, occasional
erroneous values will be displayed. To
achieve guaranteed synchronization, use the
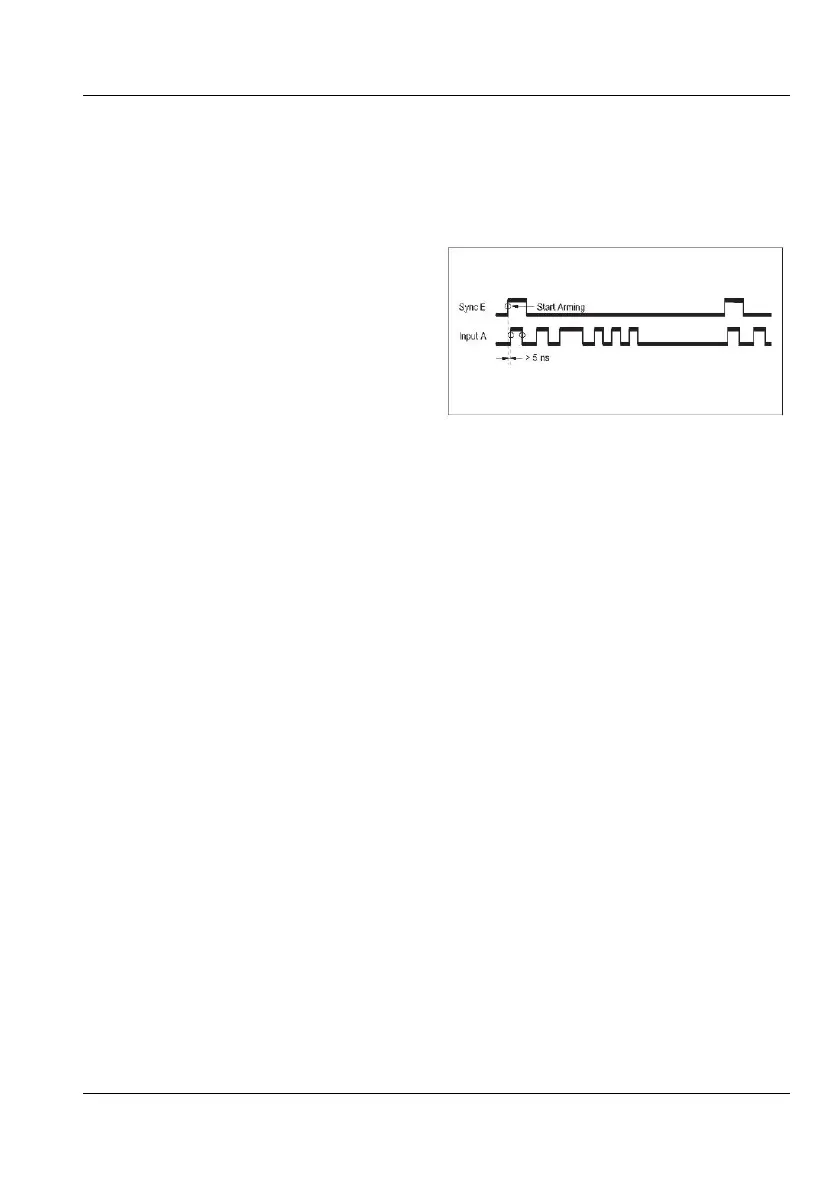
■ B. Synchronization Using Start Arming
The SYNC signal can be directly used to arm
the measurement. This requires that the leading
edge of the SYNC signal occurs more than 5
nanoseconds before the leading edge of the
first pulse in the burst. See Fig. 5-9.
Synchronization using start arming.
Do the following steps to perform synchroni-
zation using start arming:
Connect the burst signal to input A.
Adjust the trigger level to match the burst
signal under study.
Select Start Arm Delay = 0 and Start Chan
E.
Use MEAS/FUNC to select Pulse Width A.
If there is no (or too little) time difference be-
tween the arming signal and the first pulse in
the pulse burst, arming must be combined with
a delay. See example C.
■ C. Synchronization Using Start Arming
With Time Delay
If the pulse bursts have a stable repetition fre-
quency, you synchronize the measurement us-
ing Start Arming with Time Delay. Here you
use the SYNC pulse belonging to a preceding
burst to synchronize the start of measurement.
USER MANUAL ● CNT 9x Series ● Rev.22 February 2020
5-9