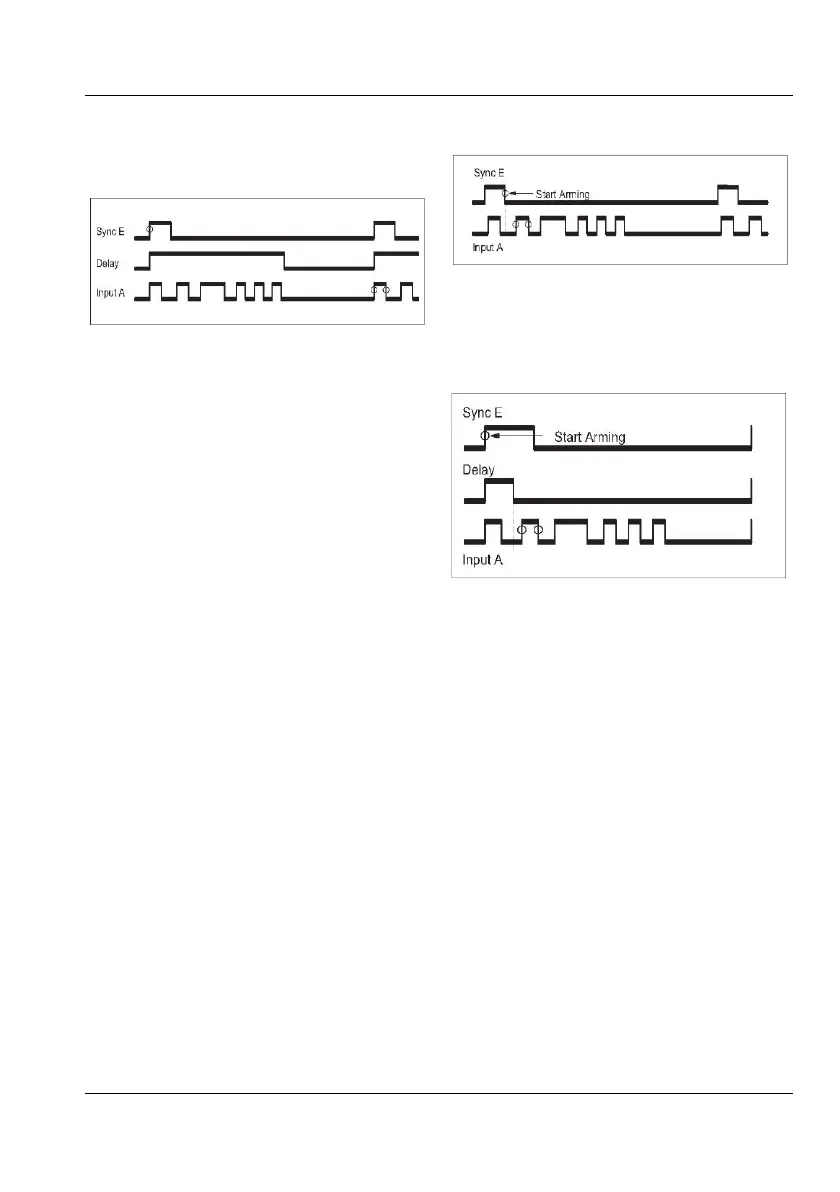
Set the time delay to a time longer than the
duration of a pulse burst and shorter than the
repetition time of the pulse bursts.
See Fig. 5-10.
Synchronization using start arming
with time delay.
Use the same test setup as in the preceding ex-
ample but enter a suitable Start Arm Delay.
#2 Measuring the Second Burst
Pulse
The next task is to measure the width of the
second pulse in the pulse train from example 1.
How can we now synchronize the measure-
ment start to the start of the second pulse? In
this case auto-synchronization, without the use
of the arming function, cannot work.
Auto-synchronization can be used only to syn-
chronize on the first trigger event in a burst.
Depen
ding on the SYNC signal's position rel-
ative to the burst, and the duration of the
SYNC signal, the measurement can be per-
formed with or without
using arming delay.
If the trailing edge of the SYNC signal occurs
after the leading edge of the first pulse but be-
fore the second pulse in the pulse burst, then
n
ormal start arming without delay can be used.
Select triggering on positive slope on input A
and negative slope on input E. The slope for
the active arming channel is set in the
SETTINGS Arm Start Slope menu. This
example is shown in the following figure:
If the SYNC-pulse timing is not so suitable as
in the above measurement example, then
Fig. 5-11 If the trailing edge of the sync signal
appears before the second pulse
use arming without delay.
arming must be used combined with a time
delay; see the following figure:
Use arming with delay if the
trailing edge of the sync signal
appears too late to be useful.
Use the same test setup as in the preceding ex-
ample but enter a suitable Start Arm Delay.
The set delay time must be set to expire in the
gap between pulse #1 and #2.
5-11
USER MANUAL ● CNT 9x Series ● Rev.22 February 2020