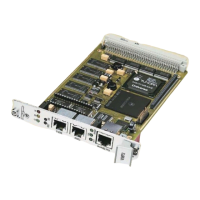
VMP2 VMP1-IO1 Module (Optional)
ID 24855, Rev. 02Page A - 8 © 2002 PEP Modular Computers GmbH
A.6 Board Installation
In order to keep the installation process as simple and easy as possible please follow
the recommended order of work:
1. Instal the PMC module on the VMP1-IO1
2. Instal the package, VMP1-IO1 plus PMC module, on the baseboard (in this case
the VMP2)
Installation of the VMP1-IO1 Module on the VMP2 Baseboard
3. Place the VMP1-IO1 exactly above the VMP2
4. Plug them togethor
5. Use 4 screws (2.5
× 6 mm) to secure the board to the VMP2
PMC Module Installation
6. Place the EMC gasket on the bezel of your PMC-Module
7. Push the PMC bezel into the window of the front-panel of the VMP2 and plug the
connectors together.
8. Use three screws (M2.5
× 6mm) to secure the module to the board
ESD Equipment!
Your carrier board and PMC module contain electrostatically sen-
sitive devices. Please observe the necessary precautions to avoid
damage to your board:
• Discharge your clothing before touching the assembly. Tools
must be discharged before use.
• Do not touch components, connector-pins or traces.
• If working at an anti-static workbench with professional dis-
charging equipment, please do not omit to use it.