18
2. Adjustment of feed dog in sideways direction
Requirement:
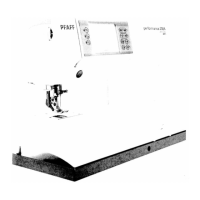
The distance of the feed dog to the right and left edges of the feed slot must be equal (fig. 2).
Check:
• Carry out a visual check of the feed dog position.
Adjustment:
• Tilt the machine toward the rear.
• Unhook spring 3 (fig. 3).
• Unscrew and remove screw 4.
• Turn the handwheel until lobe of drive eccentric 5 is positioned at the rear.
• Fold feed regulator 6 downwards and remove this and link 7 from the connecting bar rod to the left.
• Remove slide block 8 with spring to the right.
• Loosen screw 22 (fig. 4).
• Pull out pin 23 to the right.
• Unhook spring 9 (fig. 3).
• Loosen screws 10 and 11.
• Re-position the driving shaft together with the two cylindrical pins 12 and 13 sideways without play
until the feed dog is positioned in the middle of the feed slot.
• Tighten screw 10.
• The pressure of the right cylindrical pin must be 1 kg.
• Tighten screw 11.
• Remove the needle plate.
• Use your finger to pull the feed dog to the front, then release it.
• The complete feed driving shaft 14 must slide slowly to the rear.
• Fit pin 23 without any play and tighten screw 22 (fig. 4).
• Move the top feed lever assembly to the front and rear.
The complete top feed lever assembly must move easily and without binding (if necessary remove
cause of binding).
• Re-position crank pin 24 with pull rod 26 sideways until the complete top and bottom feed moves
easily (fig. 5).
• Tighten screw 25 and check again whether the feed system moves freely.
• Loosen screw 15 (fig. 3).
• Push slide lever shaft 16 complete with stepping motor 15 about 1 mm to the right.
• Push slide block 8 with spring onto the pin and install it in slide way 13 in the correct curve radius.
• Check whether the slide block can be moved easily, but without play or binding.
• Push slide lever shaft 16 complete with stepping motor 17 carefully to the left until there is a
clearance of 0.05 mm between slide block 8 and connecting bar 19.
• Tighten screw 15 and check whether the slide block moves easily and without play.
• Push link 7 complete with feed regulator 6 to the right onto the connecting bar pin.
• Push feed regulator 6 to the rear, and then upward over feed eccentric 5.
• Position screw 4 in clamping plate 21 and tighten it a little.
• Move stud 20 sideways a little until link 7 and connecting rod 19 have a slight play and move easily.
• Tighten screw 4.
• Attach the two springs 3 and 9.
Cross-check:
• The feed dog must be in the exact center of the feed slot.