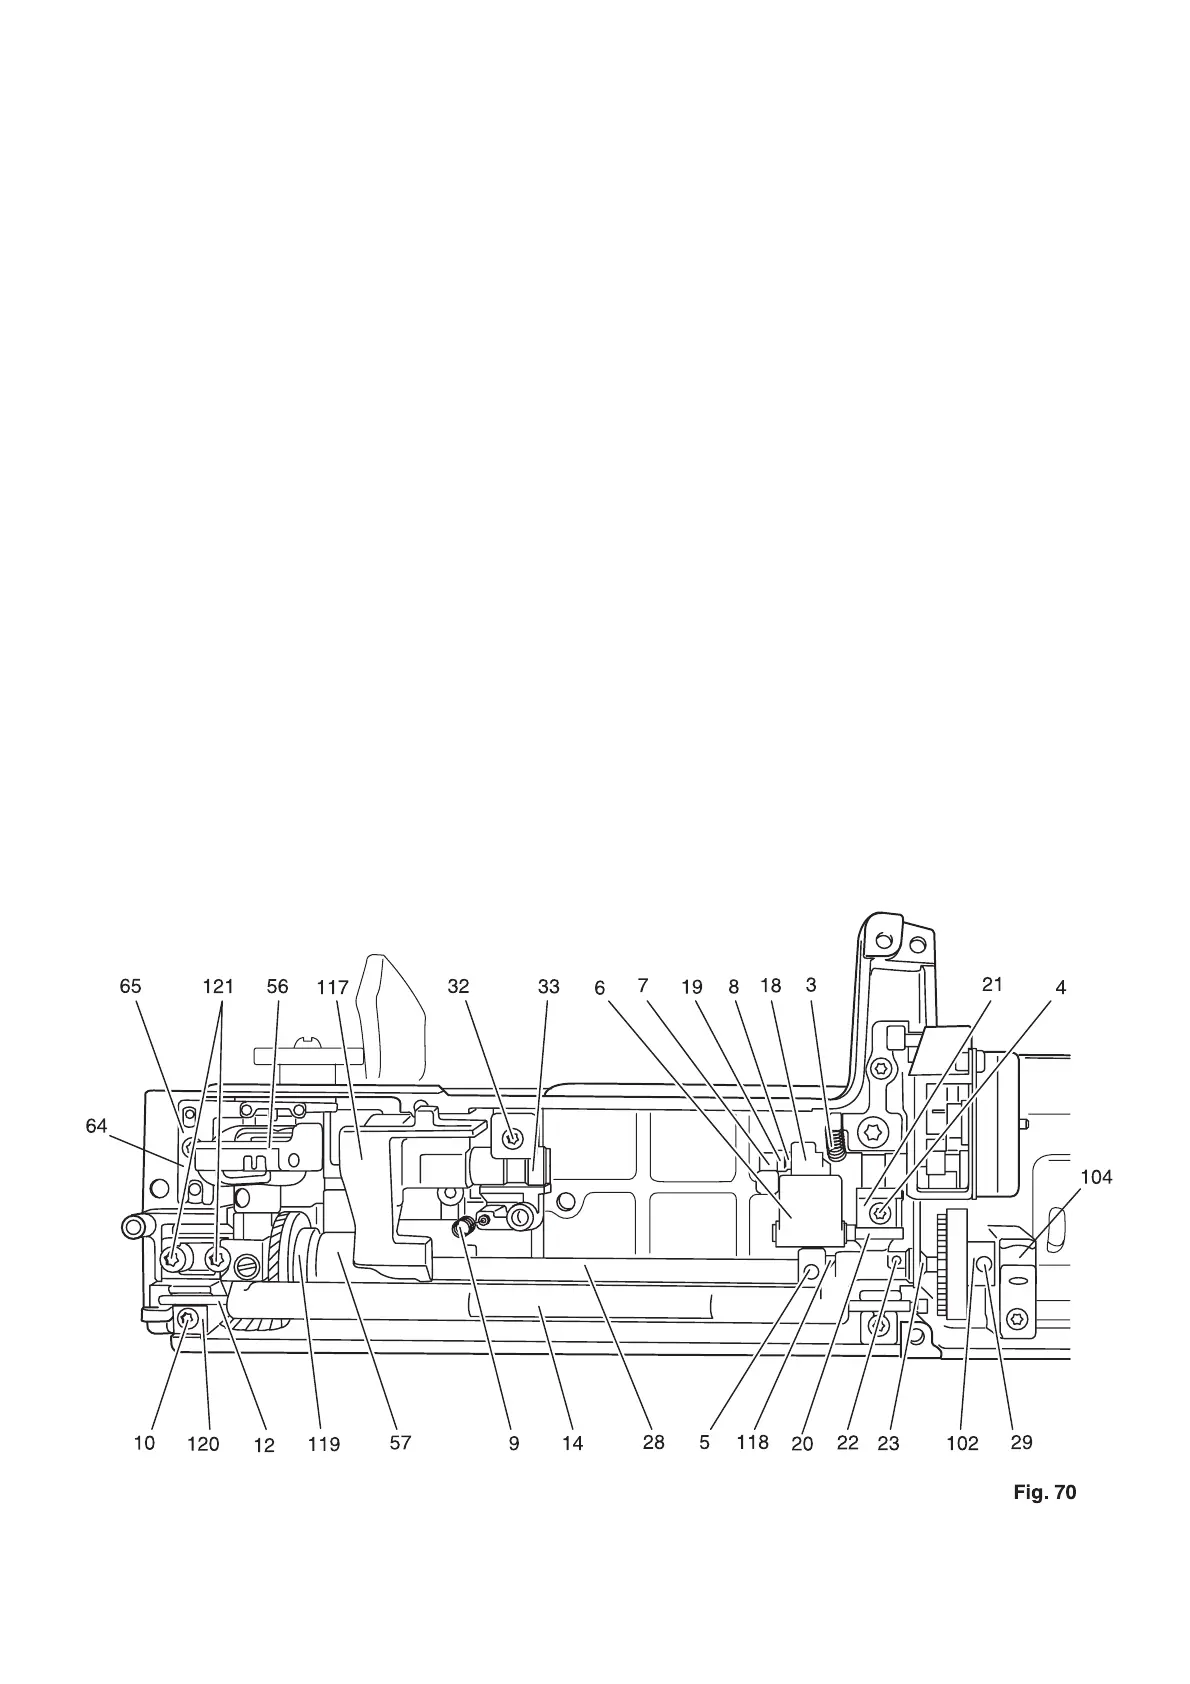
69
Now the following adjustments are to be carried out:
• Section 3: Timing of the feed motion
• Section 4: Adjustment of feed dog height
• Section 5: Adjustment of synchronizer
• Section 12: Adjustment of hook-to-needle clearance
• Section 14: Hook timing
• Section 15: Adjustment of needle bar height
• Section 16: Adjustment of bobbin case position finger
• Install cable.
• Insert the buttonhole sensor.
• Attach the free-arm cover and secure with both fastening screws 7.
• Bring the feed dog lowering mechanism to its normal working position.
• Engage both feed regulators 8.
• Attach the cable clip.
• Secure the base plate with the three fastening screws to the housing.
Now the following adjustments are to be checked or carried out:
• Section 19: Adjustment of bobbin thread tension
• Section 20: Adjustment of needle thread tension
• Section 22: Adjustment of equal forward and reverse stitch length.