84
Maintenance
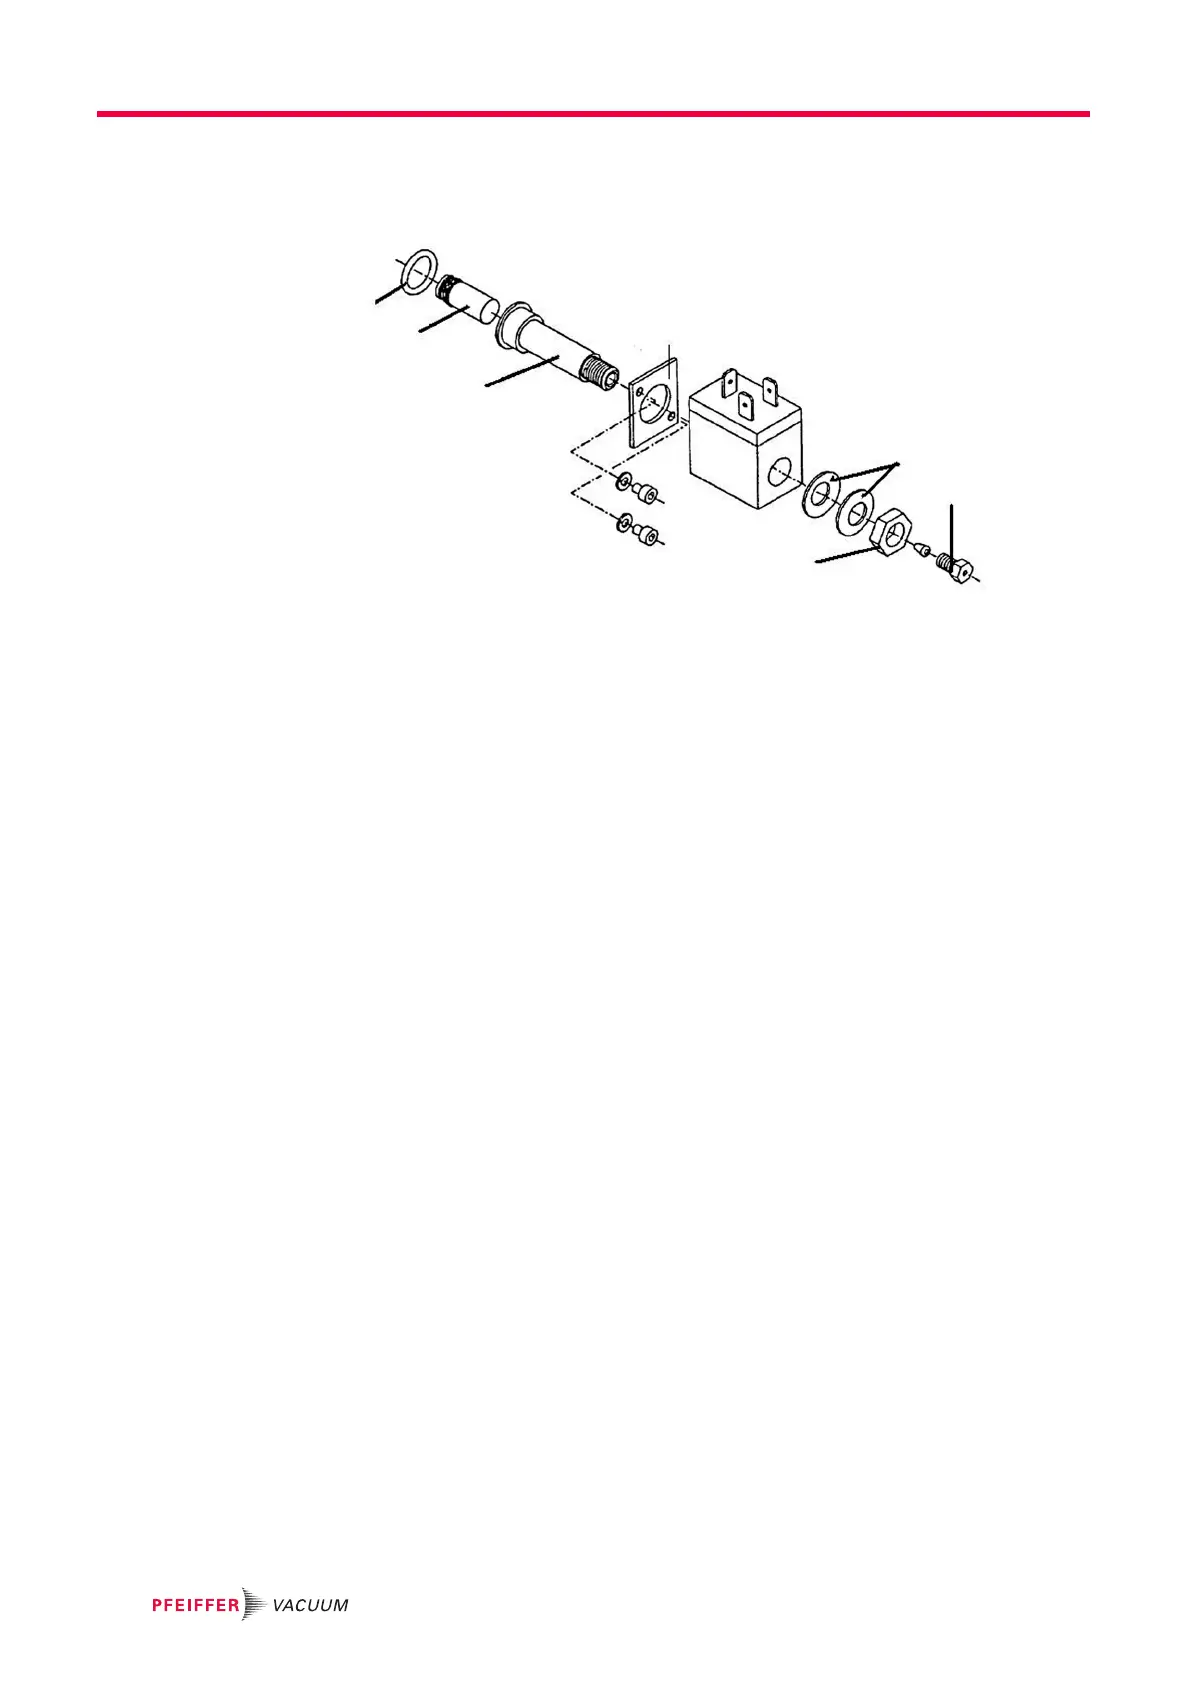
13 Replace the plunger with spring, seal, and O-ring 12.42 X 1.78 (Refer to
Figure 10-24). Check the sealing surfaces and clean them if necessary.
Figure 10-24 Removing the plunger
1 . . . . . . . . O-Ring
2 . . . . . . . . Plunger
3 . . . . . . . . Guiding tube
4 . . . . . . . . Nut
5 . . . . . . . . VICI Pressing Screw
6 . . . . . . . . Spring Washers
14 Check the sealing surfaces of the gas inlet and gas inlet flange and clean them if
necessary.
15 Replace the O-rings 9.25 x 1.78 and 18.77 x 1.78. (See Figure 10-25.)
16 Replace the pressing screw and orifice of the gas inlet flange if necessary.
(See Figure 10-25.)
17 Proceed in reverse order to reassemble the valve.



 To Next Page