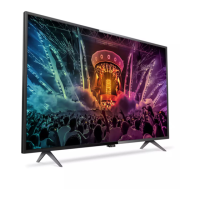
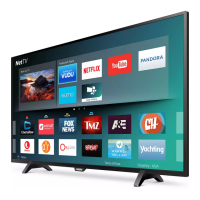
Do you have a question about the Philips 43HFL5114 and is the answer not in the manual?
Legal and copyright notices regarding product specifications and changes.
Information on accessing Philips support website, documentation, and ticketing system.
Explains technical terms, acronyms, and abbreviations used in the manual.
Guides on using remote control buttons to navigate menus and make selections.
Details about master and guest remote controls required for installation.
Describes the 22AV9573A and 22AV9574A master remote controls for installation.
Details the 22AV1905A and 22AV1905B guest remote controls for installation.
Lists and describes various accessory remote controls available for use.
Instructions on how to set up different remote controls for TV operation.
Guide for setting up the Master Remote Control 22AV9574A.
Instructions for configuring the guest remote for multi-remote functionality.
Steps to reset a guest remote control to its default factory settings.
Guide for setting up the Healthcare Remote Control 22AV1604B.
Instructions for setting up the Easy Remote Control 22AV1601B.
Detailed steps for upgrading the TV's software via USB.
Details the folder structure for clone files on a USB device.
How to identify if the TV is in its initial factory 'Virgin' state.
How to check and toggle the Professional Mode status on the TV.
Accessing and using the Customer Service Menu for TV information.
Options for reinstalling the TV software and settings.
Step-by-step guide to manually reinstall the TV to factory defaults.
How to automate TV reinstallation using a script within a clone file.
Guides users through the initial setup of a new TV.
Overview of the IIC process for initial TV setup and configuration.
Steps to perform a virgin installation when starting with a new TV.
Combined procedure for initial cloning and software upgrade using USB.
Configuration options available during the virgin installation process.
General introduction to changing professional settings on the TV.
How to save settings applied within the Professional Settings menu.
Explains the concept and behavior of a professional session on the TV.
Steps for exiting the professional menu after installing applications.
Describes the overview screen within the Professional Settings menu.
Navigating and performing software upgrades and cloning operations.
Process for upgrading the TV firmware using a USB storage device.
Procedure to copy clone data from a USB device to the TV.
Process for cloning TV settings and data from the TV to a USB device.
Method for cloning TV settings and data over an IP network.
Configuration for automatic firmware and clone upgrades.
Settings related to upgrading firmware via RF signals.
Procedure to clone TV settings and data over RF signals.
Configuring channel display and filters upon TV startup.
Defining which features or apps launch automatically at TV startup.
Setting default sound modes and volume preferences at startup.
Configuring default picture format and style for startup.
Options to enable or disable subtitles by default.
Managing guest-related settings like country and menu language.
Setting a minimum rating level to restrict viewing of rated programs.
Configuring how messages are displayed to the user.
Setting the default Wi-Fi frequency for the hotspot feature.
Settings for identifying the TV and its location.
Setting a unique Room ID for identifying TVs via CMND.
Defining a custom name for the location or premises.
Assigning a Geonames ID for weather service integration.
Setting a custom name for the TV, visible on mobile devices.
Inputting details about the installer for tracking purposes.
Options for managing guest-related TV settings.
Enabling download of guest profile and image from Google account.
Options for clearing user data upon check-out or standby.
Configuring TVs for PMS integration and Room ID assignment.
Customizing the TV's dashboard interface.
Customizing the default Philips Home Dashboard appearance and content.
Setting up a custom dashboard using a browser-based interface.
Configuring fallback behavior for the dashboard when network is unavailable.
Managing automatic reloading of the dashboard when network connection restores.
Configuring and managing various TV features.
Configuring and managing installed applications on the TV.
Setting up and using the SmartInfo feature for displaying information.
Configuring sharing options like Google Cast and Internet Hotspot.
Enabling and displaying weather information on the dashboard.
Configuring the TV's welcome screen and screensaver.
Enabling and managing ThemeTV for channel list customization.
Setting up and managing the MyChoice subscription service.
Setting content rating levels for parental control.
Configuring the display and format of the TV's clock.
Setting up schedules for TV actions or channel changes.
Enabling and configuring banner messages for customer communication.
Enabling and configuring the TalkBack accessibility feature.
Managing channels: renaming, reordering, hiding, showing, blanking, re-numbering.
Options to enable or disable specific channel types (RF/IP, Media, OTT).
Managing and enabling external input sources for the TV.
Configuring the TV's date, time, and timezone.
Selecting the source for obtaining clock information.
Configuring NTP server settings for automatic time synchronization.
Manually setting the date and time on the TV.
Setting the correct timezone for accurate time display.
Enabling or disabling automatic adjustment for daylight saving time.
Adjusting the time by fixed offsets in 30-minute increments.
Selecting the preferred clock display format (12-hour or 24-hour).
Configuring whether the clock is displayed on screen.
Selecting the desired format for displaying the date.
Step-by-step guide to connect the TV to a network.
Accessing and configuring various network settings.
Displaying current network configuration details on the TV.
Selecting the Wi-Fi country or region for optimal performance.
Configuring network connection type (DHCP or Static IP).
Inputting IP address, netmask, gateway, and DNS server details.
Configuring the TV to wake up via a wired network connection.
Configuring the TV to wake up via a wireless network connection.
Removing saved Wi-Fi network connections from the TV.
Selecting between Wired, Wireless, or WPS network connections.
Enabling or disabling notifications for lost network connections.
Controlling the TV over IP network.
Configuring web services for controlling the TV over IP.
Setting the server URL for IPTV detection in CMND.
Enabling TV discovery service for IPTV over IP.
Enabling service for requesting professional settings via IPTV.
Enabling service for cloning and software updates over IP.
Enabling PMS service for IPTV integration.
Configuring how the TV responds to remote and keyboard inputs.
Locking or unlocking the physical keyboard buttons on the TV.
Configuring remote control behavior and key mappings.
Mapping the SmartInfo button to specific apps or functions.
Mapping the TV Menu button to launch specific apps.
Mapping the Watch TV button to sources or apps.
Mapping RC5 commands to existing remote control keys.
Configuring multiple remote controls to operate individual TVs in a room.
Configuring settings for a connected USB keyboard.
Future use menu for Bluetooth settings.
Pairing and managing Bluetooth remote controls with the TV.
Accessing advanced system configurations.
Enabling or disabling the professional mode for TV configuration.
Configuring power on modes and standby behavior.
Adjusting the intensity of touch control LEDs.
Configuring PIN locks and access methods for professional menus.
Setting a PIN to lock access to the professional menu.
Enabling keyboard access to the professional menu.
Enhancing security for professional menu access.
Configuring VSecure for content protection.
Configuring baud rate settings for Serial Xpress connection.
Configuring On-Screen Display (OSD) visibility.
Managing system settings like Web Listening Services and CDB.
Enabling and configuring diagnostic logging for troubleshooting.
Selecting control applications like Crestron Connected.
Accessing and configuring various TV settings.
Adjusting picture quality settings like color, contrast, and sharpness.
Configuring audio settings, volume, and sound styles.
Setting preferred audio languages for broadcasts.
Setting preferred subtitle languages for broadcasts.
Configuring features for users with hearing or visual impairments.
Enabling special functions for visually or hearing impaired users.
Enabling adapted audio and subtitles for hearing impaired users.
Enabling accompanying audio commentary and adjusting its settings.
Detailed picture adjustments including color enhancement and temperature.
Adjusting color intensity, saturation, and temperature.
Adjusting contrast levels and dynamic contrast modes.
Adjusting sharpness for lines and contours.
Reducing image noise and MPEG artifacts.
Configuring maximum volume and sound placement.
Setting the maximum volume limit for guest control.
Managing TV speakers, headphones, and automatic muting.
Optimizing sound acoustics based on TV placement (wall or stand).
Configuring surround mode, auto volume, and clear sound.
Selecting sound effects like Stereo or DTS TruSurround.
Setting preferred audio languages for broadcasts.
Setting preferred subtitle languages for broadcasts.
Configuring features for users with hearing or visual impairments.
Enabling special functions for visually or hearing impaired users.
Enabling adapted audio and subtitles for hearing impaired users.
Enabling accompanying audio commentary and adjusting its settings.
Accessing Android-specific settings, recommended for developers.
Options to reset various TV settings to factory defaults.
Resets most TV settings to factory defaults, excluding some specific ones.
Clears channel lists, apps, and dashboard data without resetting settings.
Reinstalls the TV software, resetting it to factory state and IIC mode.
Guides through setting up TV for professional use.
Customizing the appearance and content of the Philips Home Dashboard.
Enabling or disabling the 'Manage Account' icon on the dashboard.
Enabling or disabling the 'Click to speak' assistant icon on the dashboard.
Configuring recommended apps and channels displayed on the dashboard.
Changing the overall look and feel of the TV's menu interface.
Enabling, disabling, or changing the dashboard background image.
Customizing the logo and colors of the TV's side panel.
Managing installed applications on the TV.
Wizard for configuring app settings and profiles.
Guide to installing applications from the Google Play Store on the TV.
Using the AppControl portal for remote app management.
Managing app profiles and creating custom configurations.
Managing pre-authorized applications like Netflix.
Installing local applications directly onto the TV.
Uninstalling or updating locally installed applications on the TV.
Configuring the TV's welcome screen and screensaver.
Configuring the screensaver behavior and content.
Customizing the TV's welcome screen content and appearance.
Adding and organizing themes for the channel list.
Setting up and managing the MyChoice subscription service.
Explains the functionality and requirements of the MyChoice service.
Steps to configure MyChoice packages and unlock content.
Information on platform-specific MyChoice package durations.
Key combinations for debugging and managing MyChoice subscriptions.
Automating MyChoice package activation remotely via clone files.
Setting up and managing schedules for TV actions.
Setting up schedules for TV actions or channel changes.
Renaming, reordering, hiding, showing, blanking, and re-numbering channels.
Steps to rename a channel in the channel list.
Hiding or showing channels in the channel list.
Changing the order of channels in the list.
Blanking or unblanking channels to hide video and audio.
Deleting channels from the channel list.
Changing the channel number for reordering purposes.
Guides through the process of installing TV channels.
Wizard for installing channels via RF signals.
Installing channels from OTT apps or via TIF.
Installing channels via IP streams.
Installing local media files as channels.
Wizard for connecting the TV to a network.
Guides through the setup of Crestron Connected integration.
Configuring display name, hostname, username, and password for Crestron.
Configuring SSL certificates for secure connections.
Enabling auto-discovery for Crestron control systems.
Configuring settings for virtual control and physical Crestron controllers.
Configuring Room View software for display identification.
Enabling or disabling the Fusion in the Cloud feature.
Information about About, Save Settings, and Reset Settings buttons.
Lists features not applicable or supported by the Crestron integration.
Details on cloning Crestron settings and configuration files.
Illustrative examples and practical use cases.
Procedures for managing custom channel logos.
Steps to extract channel logos from the TV to a USB stick.
Adding custom channel logos manually or via CMND.
Troubleshooting issues with downscaled channel logos in the overview.
Understanding and editing the ChannelList.xml file within a clone file.
Adding RF channel entries to the ChannelList.xml file.
Adding media channel entries to the ChannelList.xml file.
Adding IP channel entries to the ChannelList.xml file.
Adding HLS channel entries to the ChannelList.xml file.
Configuring room-specific settings within a clone file.
Adding a local custom dashboard via the clone file.
Customizing the Terms & Conditions text for the hotspot feature.
Steps required to install and use the Netflix application.
Procedure for capturing TV logs onto a USB stick for troubleshooting.
Initial setup recommendations for IPTV installations.
Configuring professional settings required for IPTV setup.
Configuring web services for controlling the TV over IP.
Setting the server URL for IPTV detection in CMND.
Enabling TV discovery service for IPTV over IP.
Enabling service for requesting professional settings via IPTV.
Enabling service for cloning and software updates over IP.
Enabling PMS service for IPTV integration.
Adding IP channels to the TV list by editing ChannelList.xml.
Adding RF channel entries to the ChannelList.xml file.
Adding media channel entries to the ChannelList.xml file.
Adding IP channel entries to the ChannelList.xml file.
Adding HLS channel entries to the ChannelList.xml file.
Configuring room-specific settings within a clone file.
Using DOCSIS cable modem for IP network distribution.
Steps to connect the TV to the CMND server using IP settings.
Modifying server URL and professional settings for CMND connectivity.
Redirecting CMND server access via a local DNS server.
How the TV finds the CMND server using fallback URLs.
Connecting the TV to CMND using RF signals.
Developing and using a custom dashboard hosted on a server or locally.
Developing and using a custom dashboard as an Android app.
Procedures for managing custom channel logos.
Steps to extract channel logos from the TV to a USB stick.
Adding custom channel logos manually or via CMND.
Troubleshooting issues with downscaled channel logos in the overview.
Understanding and editing the ChannelList.xml file within a clone file.
Adding RF channel entries to the ChannelList.xml file.
Adding media channel entries to the ChannelList.xml file.
Adding IP channel entries to the ChannelList.xml file.
Adding HLS channel entries to the ChannelList.xml file.
Configuring room-specific settings within a clone file.
Adding a local custom dashboard via the clone file.
Customizing the Terms & Conditions text for the hotspot feature.
Steps required to install and use the Netflix application.
Procedure for capturing TV logs onto a USB stick for troubleshooting.
| Screen shape | Flat |
|---|---|
| Response time | - ms |
| Display diagonal | 43 \ |
| Display brightness | 250 cd/m² |
| Native aspect ratio | 16:9 |
| Contrast ratio (typical) | - |
| Audio decoders | Dolby Atmos, DTS Studio Sound |
| RMS rated power | 20 W |
| Number of speakers | 2 |
| Product color | Black |
| Panel mounting interface | 200 x 200 mm |
| Music apps | YouTube Music |
| Video apps | Netflix, YouTube |
| Lifestyle apps | Google Apps |
| Operating system version | 9 (Pie) |
| Operating system installed | Android |
| Tuner type | Analog & digital |
| Analog signal format system | PAL |
| Digital signal format system | DVB-C, DVB-T, DVB-T2 |
| Wi-Fi standards | 802.11a, 802.11b, 802.11g, Wi-Fi 4 (802.11n), Wi-Fi 5 (802.11ac) |
| HDMI version | 1.4 |
| PC in (D-Sub) | No |
| RF connector type | IEC |
| USB 2.0 ports quantity | USB 2.0 ports have a data transmission speed of 480 Mbps, and are backwards compatible with USB 1.1 ports. You can connect all kinds of peripheral devices to them. |
| Ethernet LAN (RJ-45) ports | 1 |
| Consumer Electronics Control (CEC) | EasyLink |
| Common interface Plus (CI+) version | 1.3.2 |
| Audio formats supported | AAC, MP3, WAV, WMA, WMA-PRO |
| Image formats supported | BMP, GIF, JPG, PNG |
| Video formats supported | AVC, AVI, H.264, HEVC, MKV, MPEG1, MPEG2, MPEG4, VC-1, VP9, WMV9 |
| Subtitle formats supported | SMI, SRT, TXT |
| Cables included | AC |
| AC input voltage | 220 - 240 V |
| AC input frequency | 50 - 60 Hz |
| Energy efficiency scale | A to G |
| Power consumption (standby) | 0.3 W |
| Power consumption (typical) | 48 W |
| Operating temperature (T-T) | 0 - 40 °C |
| Harmonized System (HS) code | 85287280 |
| Depth (with stand) | 194 mm |
|---|---|
| Height (with stand) | 624 mm |
| Weight (with stand) | 7300 g |
| Depth (without stand) | 81 mm |
| Width (without stand) | 970 mm |
| Height (without stand) | 563 mm |
| Weight (without stand) | 7200 g |


 Loading...