INTELIA 05 TROUBLESHOOTING
Saeco International Group Rev. 01 / September 2011 Page / 11
5.1.1. Intelia Cappuccino test mode
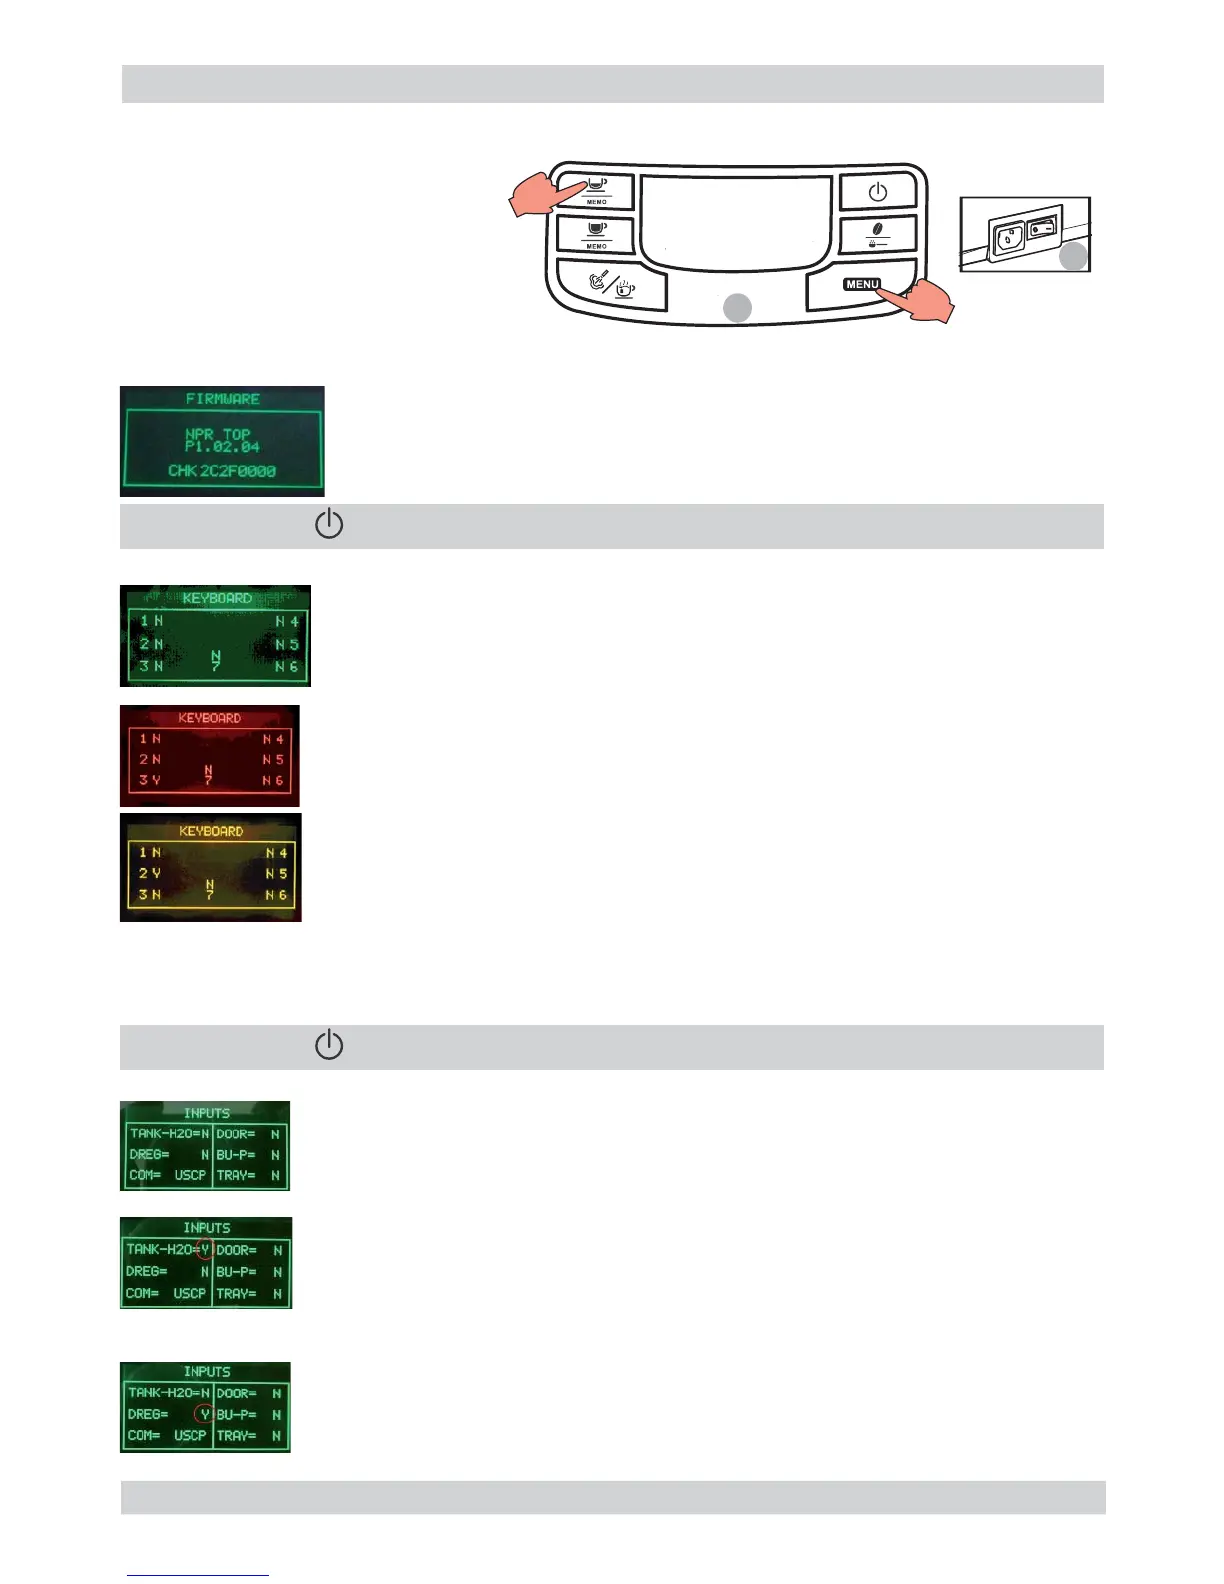
Entry into Test Mode results in a screen divided into sections, as illustrated in the diagram below.
Entry into Test Mode results in a screen divided into sections, as illustrated in the diagram below.
Firmware Software version
Firmware Software version
Operational check microswitches and sensors
Operational check microswitches and sensors
Shows the version of the fi rmware loaded and the internal checksum (it
Shows the version of the fi rmware loaded and the internal checksum (it
gives univocal traceability)
gives univocal traceability)
The letter next to it changes from N to Y when only one button is pressed.
The letter next to it changes from N to Y when only one button is pressed.
By pressing buttons 1, 3, 4, 6 the display color changes from GREEN to RED.
By pressing buttons 1, 3, 4, 6 the display color changes from GREEN to RED.
By pressing buttons 2, 5 and 7 the display color changes from GREEN to
By pressing buttons 2, 5 and 7 the display color changes from GREEN to
Button 4 must be pressed at the end only once, since pressing it moves on to
Button 4 must be pressed at the end only once, since pressing it moves on to
The letters do not change from N to Y or are always Y, in this case check the fl at communication
The letters do not change from N to Y or are always Y, in this case check the fl at communication
cable with the Control Board/Power Board, if it does not change color check the cable JP4 too.
cable with the Control Board/Power Board, if it does not change color check the cable JP4 too.
Insert full water tank
The TANK-H20 indicator must change from “N” to “Y”
If the indication does not change, check the capacitive sensor and relative wiring
If the indication does not change, check the capacitive sensor and relative wiring
(JP23).
01
To enter Test Mode
Hold down the buttons Espresso 1.
and Menu.
Turn on the main switch at the 2.
rear of the machine
1
2
” to move to the next screen
” to move to the next screen
The DREG indicator must change from “N” to “Y”
The DREG indicator must change from “N” to “Y”
If the indication does not change, check the microswitch on the dreg drawer
If the indication does not change, check the microswitch on the dreg drawer
and relative wiring (JP16).
and relative wiring (JP16).
” to move to the next screen
” to move to the next screen