EasyManua.ls Logo

Philips HD 8753 - User Manual

Philips HD 8753
61 pages
Print Icon
To Next Page IconTo Next Page
Loading...
All parts of this document are the property of Saeco International Group.
All rights reserved. This document and all the information herein is provided without liability deriving from any errors or omissions. Furthermore, no part may be reproduced,
used or collected, except where express authorisation has been provided in writing or through a contractual agreement.
Published by Saeco International Group
Subject to modi cation EN 4219 400 00014
Service
Service
Service
Service
Co ee Machine
HD 8753 HD 8751 HD 8752
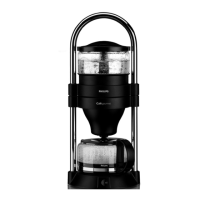
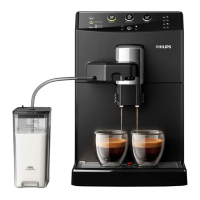
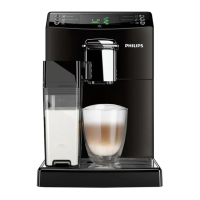
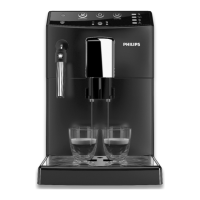
Intelia
Table of contents Page
1. Introduction
1.1. Documentation required 1
1.2. Tools and equipment required 1
1.3. Material 1
1.4. Safety warnings 1
1.5 Intelia range 2
1.6.1. External machine parts 3
1.6.2. Internal machine parts 4
2. Technical speci cations
2.1. Technical speci cations 1
2.2. Machine parameters and performance 2
3. User instructions
3.1. Intelia Cappuccino customer and programming
menu
1
3.2. Intelia Focus and Class customer and programming
menu
2
3.3. Operation, cleaning and maintenance 3
4. Operating logic
4.1. Water circuit 1
4.2. Co ee cycle 3
4.3. Single microswitch 4
4.4. Temperature sensor 4
4.5. Co ee grinder 5
4.6 Low bean level detection, dose quantity
adjustment, co ee grinder blocked
5
2011-Sept-30
Table of contents Page
4.7. Dose self-learning (SAS) 6
4.8. Water level detection (water tank) 7
4.9. Descaling request 7
4.10. Water  lter 8
4.11
Intelia Cappuccino milk carafe
8
5.
Troubleshooting
5.1.1. Intelia Cappuccino test mode 1
5.1.2. Intelia Focus and Class Test mode 6
5.2. SteamOut 10
5.3. Error messages 11
6.
Standard checks
6.1. Repair schedule 1
6.2. Service schedule 1
6.3. Final test 2
7.
Disassembly
7.1. Intelia Cappuccino outer Shell 1
7.2. Intellia Class and Focus outer Shell 2
7.3. Co ee grinder 2
7.4. Grinder blades 3
7.5. Co ee grinder adjustment 4
7.6 Intelia Cappuccino three-way solenoid valve 4
7.7 Intelia Class and Focus two-way solenoid valve 5
7.8 Intelia Cappuccino carafe  tting body 5
7.9 Pump 6
Service
Service
Manual
Manual
Rev. 01 September 2011

Questions and Answers

  • P
    Patricia AguilarAug 20, 2025
    What to do if the number remains 0 when activating the coffee grinder on my Philips HD 8753 Coffee Maker?
    • K
      Kristen CruzAug 20, 2025
      If the number remains 0 when you activate the coffee grinder on your Philips Coffee Maker, check the Hall sensors, their wiring, or the CPU/POWER input (JP2). If the motor doesn't run, the issue might be in the chain (JP8), the coffee grinder wiring, or the coffee grinder itself.
  • R
    Ryan BaileyAug 22, 2025
    What to do if the absorbed current exceeds 300 mA and the display turns red with brewing unit on Philips HD 8753 Coffee Maker?
    • T
      Tiffany MendezAug 22, 2025
      If the absorbed current exceeds 300 mA and the display turns red with the brewing unit in your Philips Coffee Maker, check the brewing unit, the gears on the motor, and the motor housing in its seat.
  • C
    Christina BrooksAug 25, 2025
    What to do if the absorbed current exceeds 200 mA and the display turns red without brewing unit on Philips Coffee Maker?
    • K
      Kelly BarronAug 25, 2025
      If the absorbed current exceeds 200 mA and the display turns red without the brewing unit in your Philips Coffee Maker, check the gears on the motor and the motor housing in its seat.
  • L
    Lisa DayAug 26, 2025
    What to do if the pulses remain at 0 with the pump activated in Philips HD 8753 Coffee Maker?
    • M
      Melissa RogersAug 26, 2025
      If the pulses remain at 0 when the pump is activated on your Philips Coffee Maker, check the wiring on the flow meter (JP5). If no water is coming out, inspect the pump, the connected water circuit, or the pump wiring (JP24).
  • E
    ebony94Aug 28, 2025
    What to do if the temperature is not absorbed after activating the boiler on Philips Coffee Maker?
    • A
      Antonio GeorgeAug 28, 2025
      If the temperature is not absorbed after activating the boiler in your Philips Coffee Maker, check the boiler resistor, its wiring, and the connection to the CPU/POWER in (JP19). Also, check the wiring on the NTC (JP13).
  • T
    tranmelissaAug 29, 2025
    Why does the WORK indicator remain permanently on 'N' on my Philips HD 8753 Coffee Maker?
    • E
      Erica GreenAug 30, 2025
      If the WORK indicator remains permanently on 'N' on your Philips Coffee Maker, check the microswitch, the unit motor (it may be blocked), and the wiring JP16 and JP14.
  • E
    Elijah TurnerAug 31, 2025
    What to do if the HEATER indicator shows the word "SHORT" on my Philips Coffee Maker?
    • W
      wwashingtonSep 1, 2025
      If the HEATER indicator shows the word "SHORT" on your Philips Coffee Maker, check the wiring of the NTC or the CPU/POWER in (JP13).
  • A
    Aaron SandovalSep 2, 2025
    What to do if the HEATER indicator shows the word "OPEN" on my Philips HD 8753?
    • S
      staceyperkinsSep 3, 2025
      If the HEATER indicator shows the word "OPEN" on your Philips Coffee Maker, check the continuity of the NTC wiring and the connection to the CPU/POWER in (JP13).
  • M
    Mark LeonardSep 4, 2025
    What to do if the indication does not change for DOOR indicator on Philips Coffee Maker?
    • D
      Danielle OlsonSep 4, 2025
      If the DOOR indicator does not change on your Philips Coffee Maker, check the Microswitch on the hatch and relative wiring (JP14), and ensure that the dreg drawer is correctly in position.
  • G
    Gina DixonSep 6, 2025
    What to do if the indication does not change for DREG indicator on Philips HD 8753?
    • A
      Anna GreenSep 6, 2025
      If the DREG indicator doesn't change on your Philips Coffee Maker, check the microswitch on the dreg drawer and its wiring (JP16).

Summary

Introduction

General Safety Precautions

Provides critical safety warnings for appliance repair, including power disconnection and insulation class.

Technical Specifications

Coffee Machine Technical Specifications

Details electrical, mechanical, and performance specifications of the coffee machine.

User Instructions

Alarm Signals and User Actions

Describes red alarm signals and the corresponding actions required by the user.

Operation, Cleaning, and Maintenance Guide

Provides instructions for operating the machine and performing regular cleaning and maintenance tasks.

Operating Logic

Dose Self-Learning (SAS) Functionality

Describes the automatic dose adjustment system based on power consumption and aroma selection.

Troubleshooting

Intelia Cappuccino Test Mode Entry

Guides on how to enter the test mode and navigate through firmware version and key checks.

Solenoid Valve and Pump Checks

Guides through testing solenoid valves (EV1, EV2) and the water pump for proper function.

Coffee Grinder and Boiler Operational Checks

Details checks for the coffee grinder, its temperature, and the boiler's heating element.

Intelia Focus and Class Test Mode Entry

Guides on entering test mode and performing key, microswitch, and sensor checks for Focus/Class.

Coffee Machine Error Codes and Descriptions

Lists common error codes and their corresponding descriptions and potential causes.

Standard Checks

Final Test Procedures and Tolerances

Describes tests for espresso, coffee, noise, cream, temperature, and grinding level with specified tolerances.

Disassembly

Intelia Cappuccino Outer Shell Disassembly

Provides step-by-step instructions and illustrations for removing the outer shell of the Intelia Cappuccino.

Intellia Class;Focus Outer Shell Disassembly

Details the process for disassembling the outer shell of the Intelia Class and Focus models.

Gear Motor Disassembly

Details steps for removing finger protection, covers, front panel, and milk jug plug body.

Control Board and Display Disassembly

Instructions for removing the front panel, frame, and disconnecting the control board and display.

Water Circuit Diagram

Intelia Cappuccino Water Circuit Diagram

Detailed schematic illustrating the water flow and components for the Intelia Cappuccino.

Intelia Focus and Class Water Circuit Diagram

Detailed schematic illustrating the water flow and components for the Intelia Focus and Class.

Electrical Diagram

Intelia Focus and Class Wiring Diagram

Schematic showing electrical connections and components for the Intelia Focus and Class models.

Philips HD 8753 Specifications

General IconGeneral
Coffee Bean Container Capacity250 g
Pump Pressure15 bar
Weight7.2 kg
Coffee Strength SelectionYes
Milk FrotherYes
Water TankRemovable
Keep Warm FunctionYes
Anti-Drip SystemYes
ColorBlack
Appliance TypeEspresso Machine
Water Tank Capacity1.8 L
Filter TypeMetal

Related product manuals