Change settings 19
Projector settings
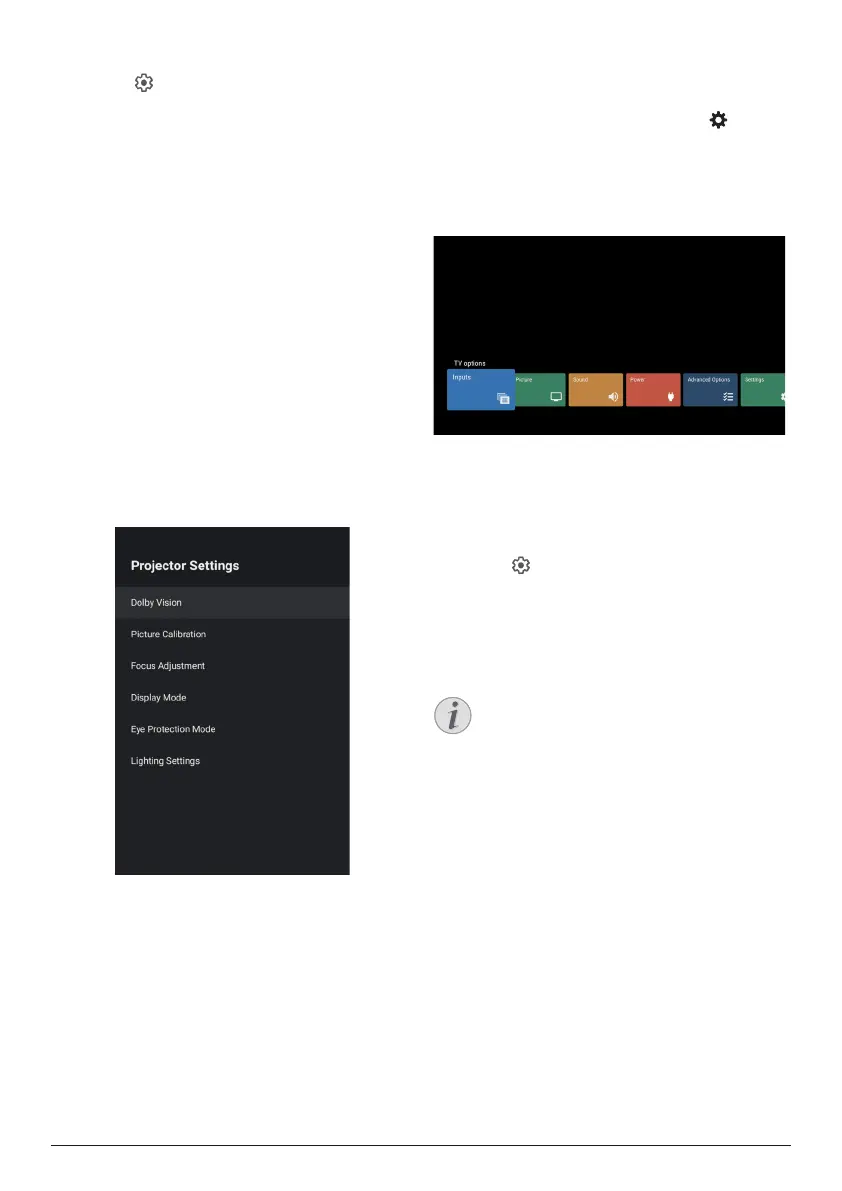
1 Select to access Settings menu.
2 Select Projector Settings, and then press
OK.
3 Through the Projector Settings, you can
make the following changes:
• Dolby Vision: Change the screen size
and gain.
• Picture Calibration: 8-Point image
calibration.
• Focus Adjustment: Enter the Focus
Adjustment screen.
• Display Mode: Choose your projector
installation mode: Front Desktop,
Front Hoisting, Rear Desktop, or Rear
Hoisting.
• Eye Protection Mode: You can turn eye
protection mode On or Off. If turned On,
the image will be dimmed if the system
detects a movement.
• Lighting Settings: Choose Standard,
High Light, or Energy Saving lighting
mode.
Quick settings
Quick settings appear when you are in HDMI™
input. If you plug an external device, select this
device in the HDMI™ input and press on
the remote control, a new horizontal menu will
appear in the bottom of screen.
From the quick settings, you can access inputs,
picture, sound and power settings, advanced
options and more settings.
Factory reset
If the projector does not function normally,
reset the projector to the default settings. It will
delete all the current settings.
1 Select to access Settings menu.
2 Select Device Preferences - About -
Factory reset, and then press OK�
3 Follow the on-screen instructions to start or
cancel resetting.
Notice
After resetting to the default settings, all
the apps you installed and system and
app data are completely erased.