Simple Home Theater Guide
02
10
En
If no operations are performed for 10 seconds while the
speaker configuration check screen is being displayed,
the Auto MCACC Setup will resume automatically. In this
case, you don’t need to select ‘OK’ and press ENTER in
step 6.
•With error messages (such as Too much ambient
noise! or Check microphone) select RETRY after
checking for ambient noise (see Problems when
using the Auto MCACC Setup below) and verifying the
mic connection. If there doesn’t seem to be a
problem, you can simply select GO NEXT and
continue.
The configuration shown on-screen should reflect the
actual speakers you have.
If you see an error message (ERR) (or the speaker
configurat
ion displayed isn
’t correct), there may be a
problem with the speaker connection. If selecting RETRY
doesn’t work, turn off the power and check the speaker
connections. If there doesn’t seem to be a problem, you
can simply use / to select the speaker and / to
change the setting and continue.
6 Make sure ‘
OK
’ is selected, then press
ENTER
.
A progress report is displayed on-screen while the
receiver outputs more test tones to determine the
optimum receiver settings for Channel Level, Speaker
Distance, Standing Wave, Acoustic Cal EQ and Full Band
Phase Control.
Again, try to be as quiet as possible while this is
happening. It may take 3 to 10 minutes.
7 The Auto MCACC Setup has finished! Press
RETURN
to go back to the
HOME MENU
.
1
Be sure to disconnect the microphone from this receiver
upon completion of the Auto MCACC Setup.
The settings made in the Auto MCACC Setup should give
you excellent surround sound from your system, but it is
also possible to adjust these settings manually using The
Advanced MCACC menu on page 43 or The System Setup
menu on page 55.
2
Problems when using the Auto MCACC Setup
If the room environment is not optimal for the Auto
MCACC Setup (too much background noise, echo off the
walls, obstacles blocking the speakers from the
microphone) the final settings may be incorrect. Check
for household appliances (air conditioner, fridge, fan,
etc.), that may be affecting the environment and switch
them off if necessary. If there are any instructions
showing in the front panel display, please follow them.
• Some older TVs may interfere with the operation of
the microphone. If this seems to be happening,
switch off the TV when doing the Auto MCACC Setup.
Playing a source
Here are the basic instructions for playing a source (such
as a DVD disc) with your home theater system.
1 Switch on your system components and receiver.
Start by switching on the playback component (for
example a DVD player), your TV
3
and subwoofer (if you
have one), then the receiver (press RECEIVER).
•Make sure the setup mic is disconnected.
2 Select the input source you want to play.
You can use the input source buttons on the remote
control, INPUT SELECT, or the front panel INPUT
SELECTOR dial.
4
1 You can also choose to view the settings from the MCACC Data Check screen. See Checking MCACC Data on page 51 for more on this.
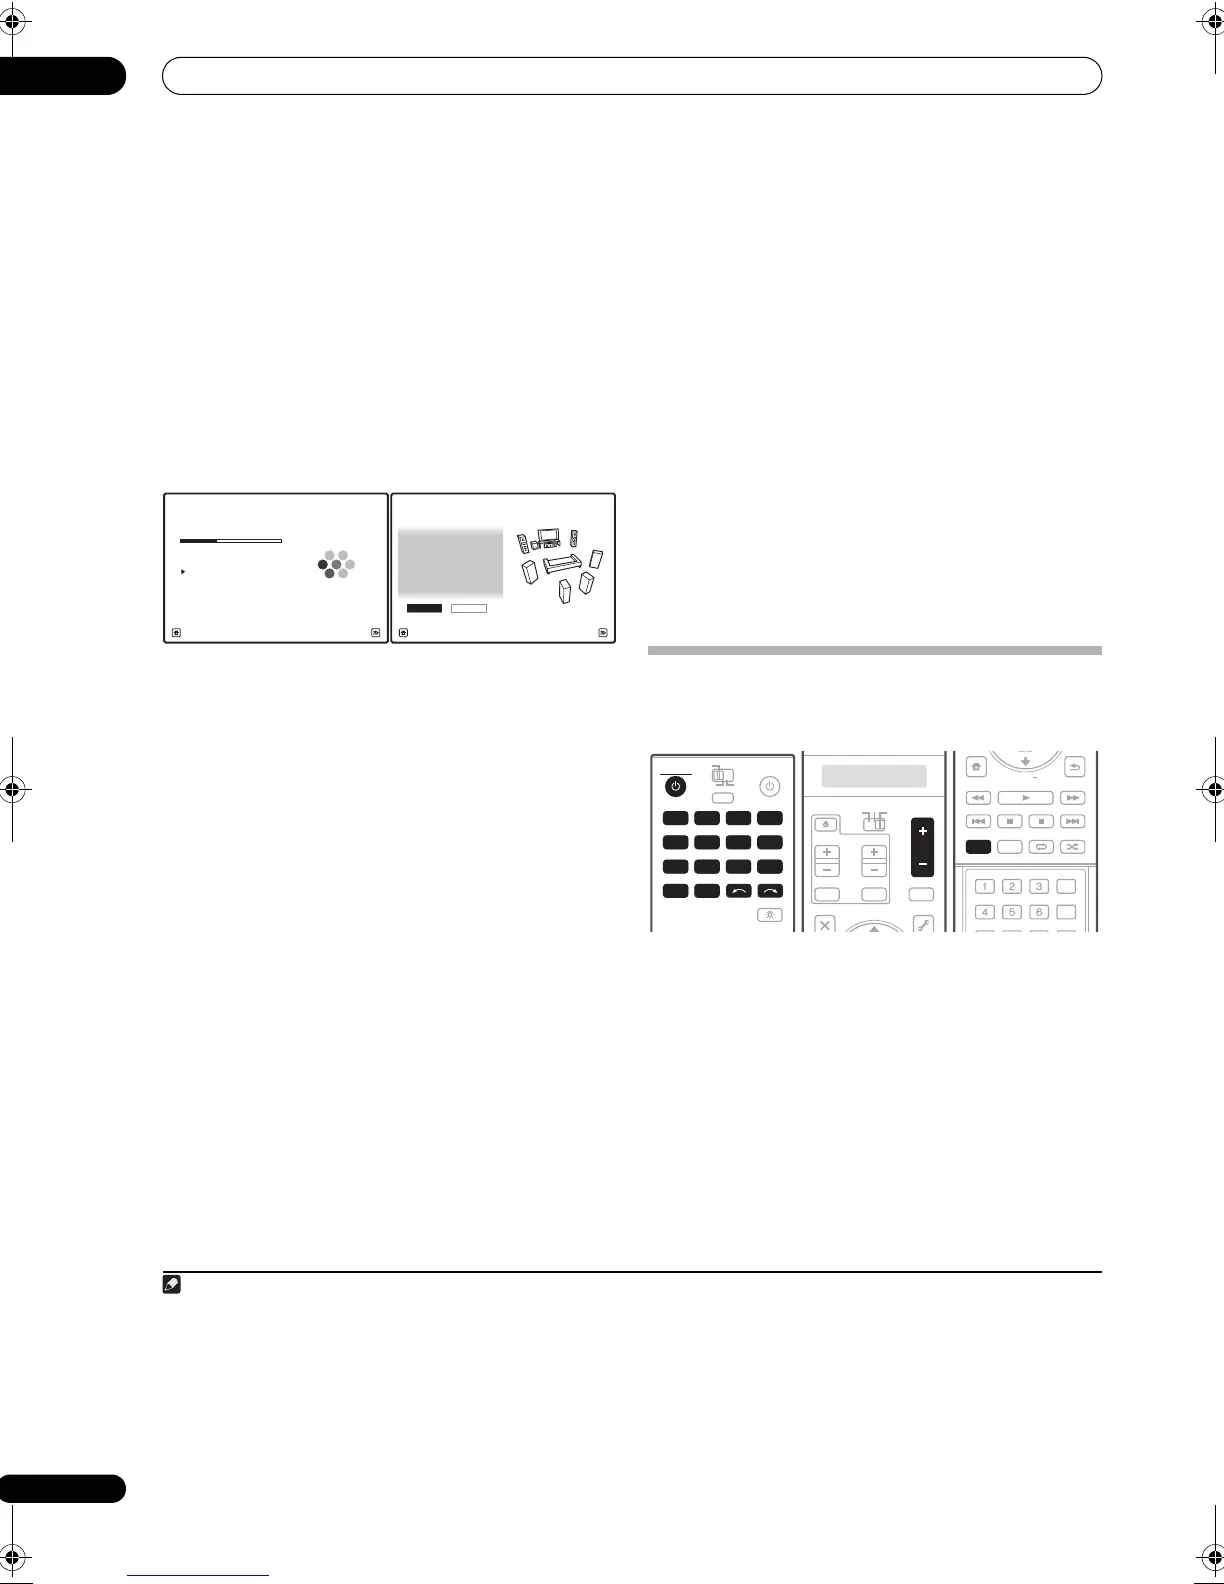
Now Analyzing... 2/10
Environment Check
1a.Full Auto MCACC
A/V RECEIVER
Exit Cancel
Ambient Noise : OK
Microphone :
Speaker YES/NO :
L : YES
R : YES
C : YES
1a.Full Auto MCACC
SR : YES
SBR : YES
SBL : YES
SL : YES
SW : YES
10
OK RETRY
A/V RECEIVER
Exit Cancel
2• Depending on the characteristics of your room, sometimes identical speakers with cone sizes of around 12 cm will end up with different size
settings. You can correct the setting manually using the Manual speaker setup on page 55.
• The subwoofer distance setting may be farther than the actual distance from the listening position. This setting should be accurate (taking
delay and room characteristics into account) and generally does not need to be changed.
• If Auto MCACC Setup measurement results are incorrect due to the interaction of the speakers and viewing environment, we recommend
adjusting the settings manually.
3Make sure that the TV’s video input is set to this receiver (for example, if you connected this receiver to the VIDEO 1 jacks on your TV, make
sure that the VIDEO 1 input is now selected).
4 If you need to manually switch the input sign
al type press SIGNAL SEL (pag
e 38).
RECEIVER SOURCE
MAIN
MULTI
OPERATION
ZONE2 3
INPUT SELECT
RECEIVER
DVD
VIDEO1
GALLERY
HOME MEDIA
CD
HDMI
TUNER
PHONO
VIDEO2 VIDEO3
TV
BD DVR1 DVR2
CD-R
AUDI O
PARAMETER
EXIT
TOOLS
VIDEO
PARAMETER
SOURCE
TV RCV
INPUT MUTE MUTE
VOL
VOL
TV CONTROL
CH
TUNE +
VOL
iPod CTRL
HOME
MENU
STATUS
THX MPX
PHASE CTRL CH LEVEL
PGM
STEREO/
A.L.C.
BD MENU
SIGNAL SEL SLEEP AUDIODIMMER
SR+ SBch MCACC
A.ATT GENRE
HDMI OUT
DISP
AUTO/
DIRECT
STANDARD ADV SURR
RETURN
SEARCH
EON
TUNE
PGM
AUTO/
DIRECT
SCLX81_71.book 10 ページ 2008年7月25日 金曜日 午後3時1分

 Loading...