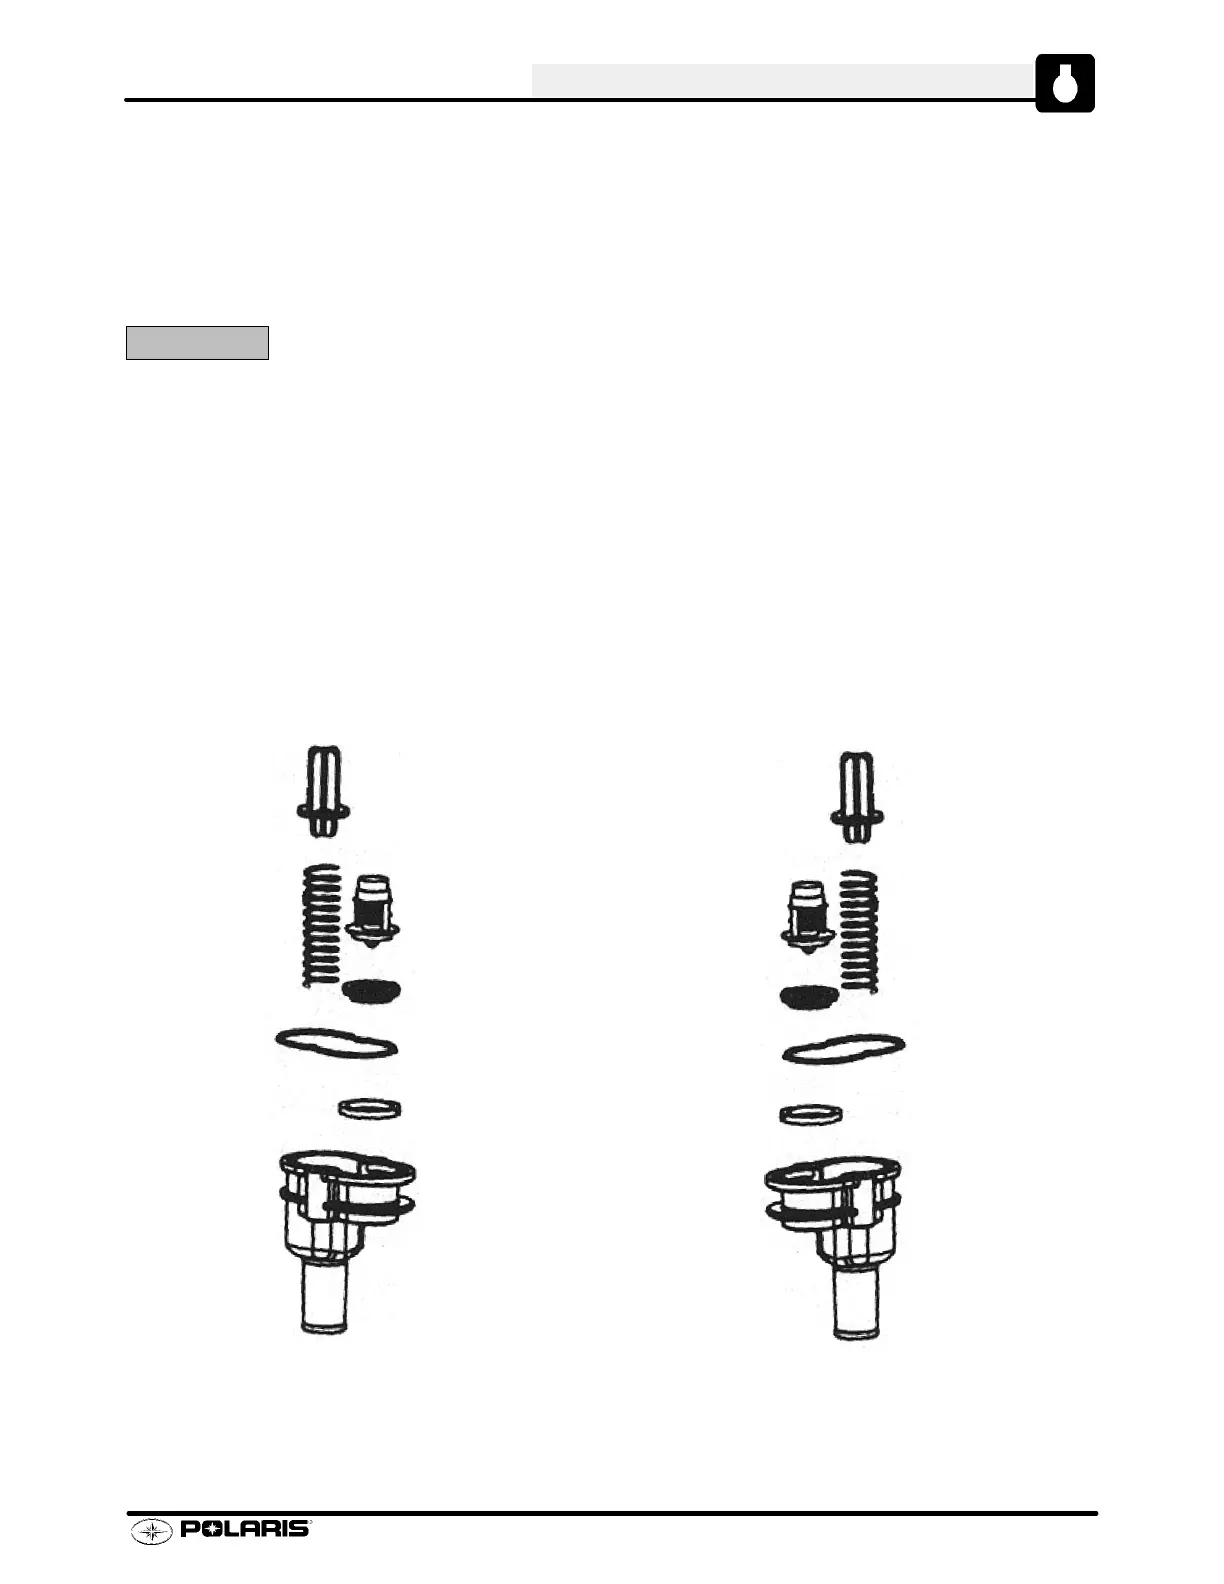
Thermostat Housing
Models:
Freedom / Virage / ALL DIt
Reversed T h ermostat Housing
Models:
Virage TX / Genesis
PTO Side PTO Side
Engine / Cooling
3.65
Cooling System Overview
Thermostat Pop Off Assembly
If low end performance of the watercraft begins to deteriorate, and the jet pump intake area is free of debris and
weeds; or if the overheat alarm sounds, the thermostat pop off assembly should be checked for debris and
cleaned. Also inspect the thermostat pop off assembly if the watercraft has been stored for more than 30 days
or has been used in salt water. To do this, use a 3/16² (.5 cm) Allen wrench and a flat screwdriver.
CAUTION:
If the thermostat pop off assembly is reassembled incorrectly severe engine damage will result within a very short
period of operation.
NOTE: Do not perform this maintenance while the watercraft is in the water . The thermostat pop off assembly
is under tension from an internal spring. When the screws are removed, the assembly will come apart quickly if
not held together firmly.
1. Remove screws while holding thermostat pop off assembly firmly together. Carefully take assembly apart. Be
careful not to lose any parts.
2. Check thermostat pop off assembly for debris, such as seaweed, and clean it out.
3. Check condition of rubber elements. Also check thermostat and housing for corrosion. Replace any parts that
appear in poor condition.
4. Assemble thermostat pop off assembly in correct sequence, and by holding the entire assembly together .
Assemble carefully to ensure proper alignment between all internal parts and be sure the gasket or O-ring is
properly positioned.
5. Attach thermostat pop off assembly using screws removed in step one and Loctitet 242 (blue).
 Loading...