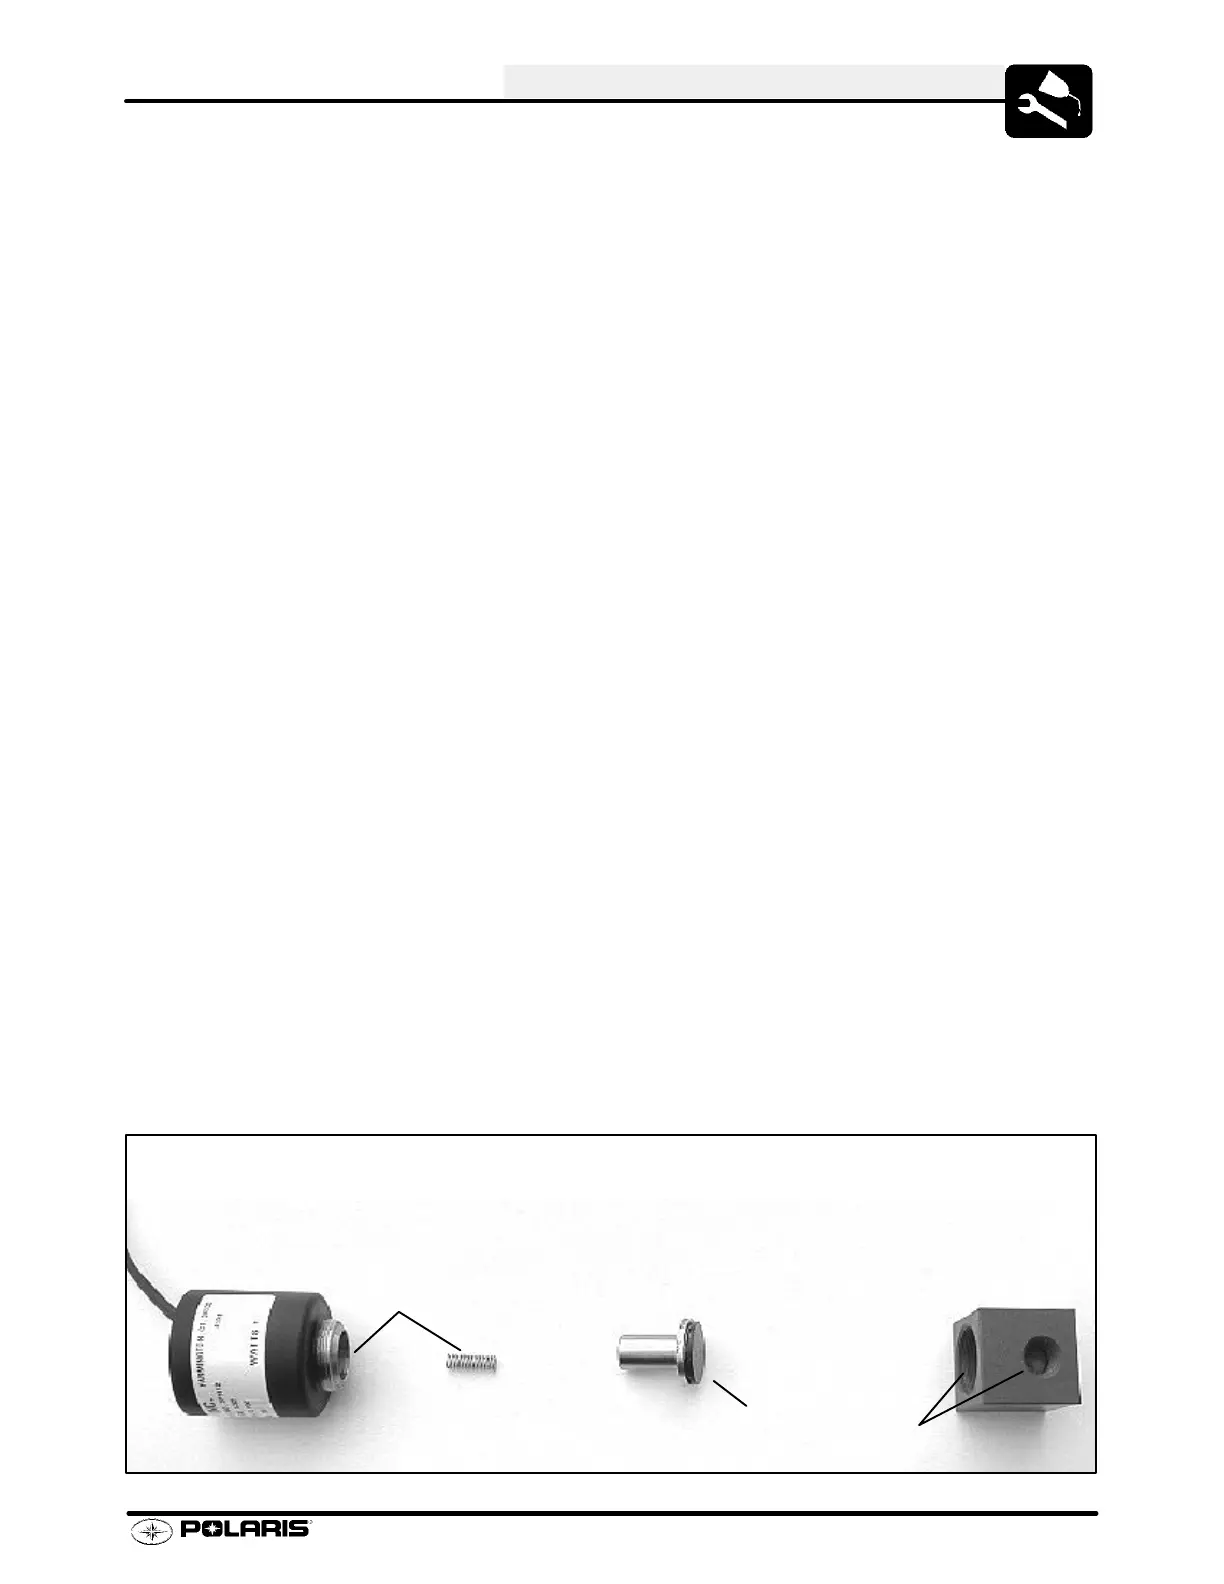
Solenoid
Plunger Spring
Plunger Assembly
Square Valve
(One side marked
“IN”; Opposite side
marked “OUT”)
Clean
Clean
Clean
Order of Assembly
Maintenance
2.15
Engine -- Continued
Cylinder Head Re -Torque*
With engine at room temperature (68° For20° C), re-
torque cylinder heads in a criss-cross pattern de-
scribed in the Engine Section.
Cylinder Base Gasket Re-Torque*
With engine at room temperature (68° For20° C), re-
torque cylinder base nuts following the pattern de-
scribed in the Engine Section.
Exhaust Manifold*
With engine at room temperature (68° For20° C), re-
torque exhaust manifold bolts following torque pattern
shown in Engine section.
NOTE: *Refer to Preventative Maintenance Schedule on Pages 2.2 and 2.3.
Water Injectio n Solenoid Maintenance -- (Virage i Only)
Inspect and clean the water injection solenoid at 25 hour intervals and during pre and post season inspections
or when watercraft is operated close to shore for extended periods of time. The solenoid must be cleaned after
any operation in water that is saturated with sand, salt, algae weeds, etc. Failure to do so may cause poor engine
performance.
1. Begin by disconnecting the solenoid--to--harness wiring connector.
2. Loosen and remove the gear clamp from the exhaust pipe fitting. Remove the hose from the fitting.
NOTE: Take care not to loose any parts when disassembling the solenoid valve.
3. Remove the solenoid by grasping square valve assembly and turning solenoid counter--clockwise. Use
extreme care if tools are required to loosen solenoid.
4. Inspect the IN and OUT ports on the square valve, the plunger assembly, spring, and solenoid barrel for sand,
debris, algae, etc. Remove any debris and clean components thoroughly.
W ARNING: Do not remove the rubber gasket from the plunger .
5. Reassemble components in reverse of disassembly. V erify threads are clean. Firmly tighten the solenoid to
square valve. Re--attach hose to pipe fitting and reconnect wiring harness. Tighten gear clamp to 22 in. lbs.
 Loading...